How to Use Donorbox’s Mail Center Feature
Looking for a comprehensive solution to donor communication? Read on to learn how Mail Center works and how your organization can use it to start communicating smarter.
Looking for a comprehensive solution to donor communication? Read on to learn how Mail Center works and how your organization can use it to start communicating smarter.

With so much of your team’s communications happening online these days, it’s easy to miss crucial updates and urgent requests from donors. What if all of your donor communications could happen in one place?
Donorbox CRM’s Mail Center offers efficient, streamlined tools to help you communicate more effectively. In this article, we’ll walk you through everything you need to know about Donorbox’s Mail Center, including how it works and how to use it.
Donorbox Mail Center is part of the Donorbox CRM platform. It allows you to read, write, and send emails directly from Donorbox – so you don’t have to navigate to your email provider! Plus, all emails are automatically saved on each supporter’s profile, allowing you to track your donor communications easily.
Mail Center also allows you to connect multiple Gmail and Outlook accounts into one combined inbox, streamlining your team’s efforts.
Learn more about how to use Donorbox CRM and its features in this tutorial:
Donorbox CRM is entering an exciting phase of enhancement. We’re working hard to develop and launch powerful features to elevate fundraising income and enhance user experience. Stay tuned for more updates as we move closer to the full, enhanced release!
Mail Center was designed to make the important task of connecting with donors even easier.
We’ve all been there. A donor reaches out to your teammate who is on vacation and won’t be able to respond until next week – but the donor needs something urgently. Having one combined inbox helps your team stay on top of building those all-important donor relationships. This allows you to share the load and work together without anything slipping through the cracks.
Mail Center makes it easy to assign email chains to your team members. When a new email comes in, simply select which team member needs to respond to it. For example, let’s say one of your team members gets an email from a supporter with a question about your annual gala. You can easily assign it to the team member responsible for planning the gala so the right person responds with the right information.
No more manually inputting donor communications! When you use Mail Center, all your emails are automatically added to your supporter’s profile so you can easily see where you left off. This provides important context for your next outreach attempt.
Streamline your communications by having all of the information you need just a click away as you write your emails. In a Mail Center message thread, you can access your supporter information via a special side panel that includes crucial information like address, full name, transaction history, and more.
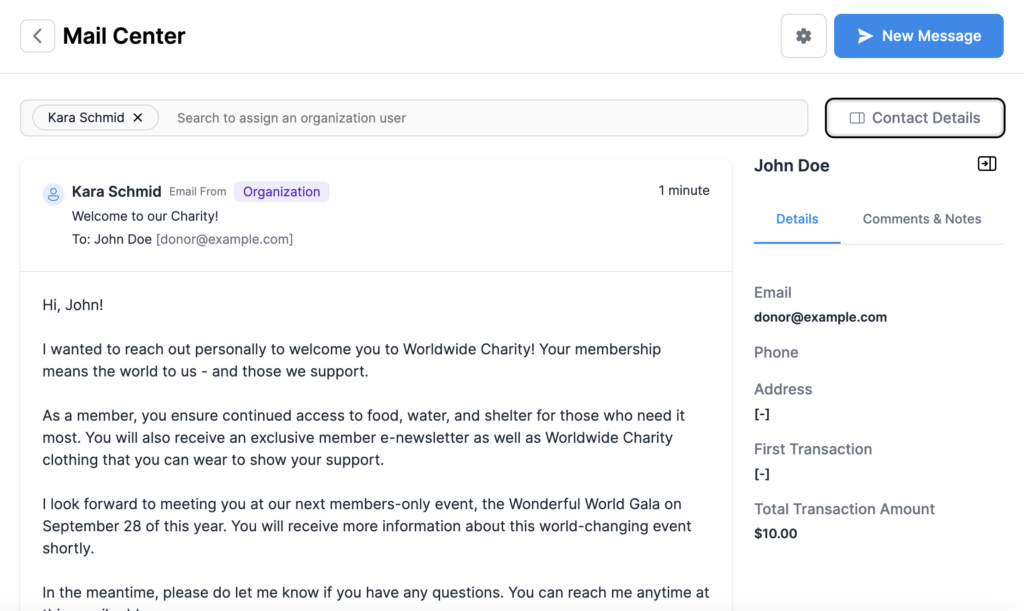
Now that you know the many benefits of Mail Center, let’s look at how it functions.
First and foremost, trust that your data is secure. When you connect Mail Center to your Gmail account, no data is being imported or used by Donorbox. Donorbox scans your Gmail inbox for labels to identify which emails have been previously sent by Mail Center (if any). This allows Mail Center to function without accessing unnecessary emails or data.
Learn more about Donorbox’s industry-leading security features here.
As mentioned above, when you send an email using Mail Center, it will receive a special Gmail or Outlook label. This allows Mail Center to import emails sent using Donorbox so you can keep all of your communications in one place.
To send an email using Mail Center, you must first make the email recipient an existing supporter. Doing so allows you to keep accurate and complete communication records for each supporter. You can also link email addresses to existing supporters who are listed with different email addresses through an easy record-merging feature.
If you send an email using your Gmail or Outlook account from outside of Mail Center, it will not be saved on Donorbox.
To access Mail Center, you’ll first need to access Donorbox CRM. You can do that by finding the “Engage” section of the main menu from your Donorbox account. Under that section, click “CRM.”
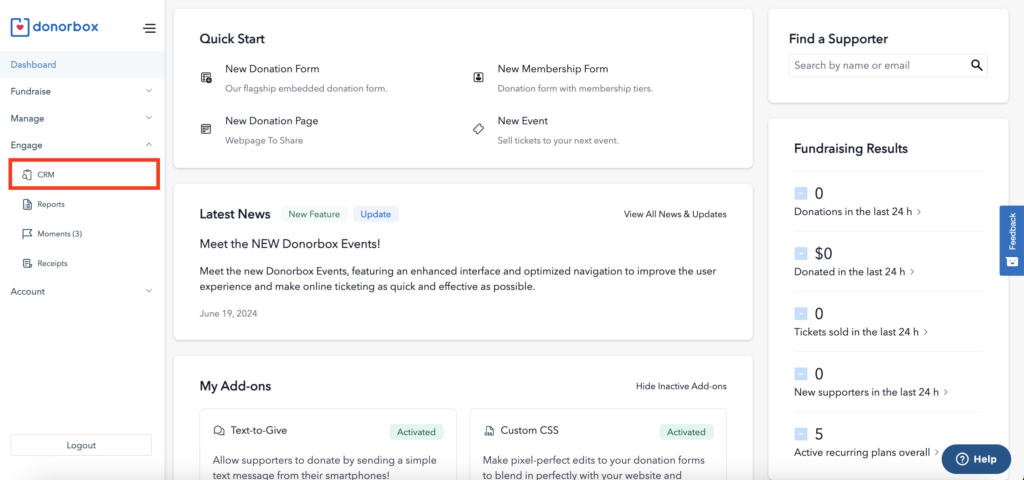
From there, you’ll be able to select the “Mail Center” tab and proceed to connecting your account.
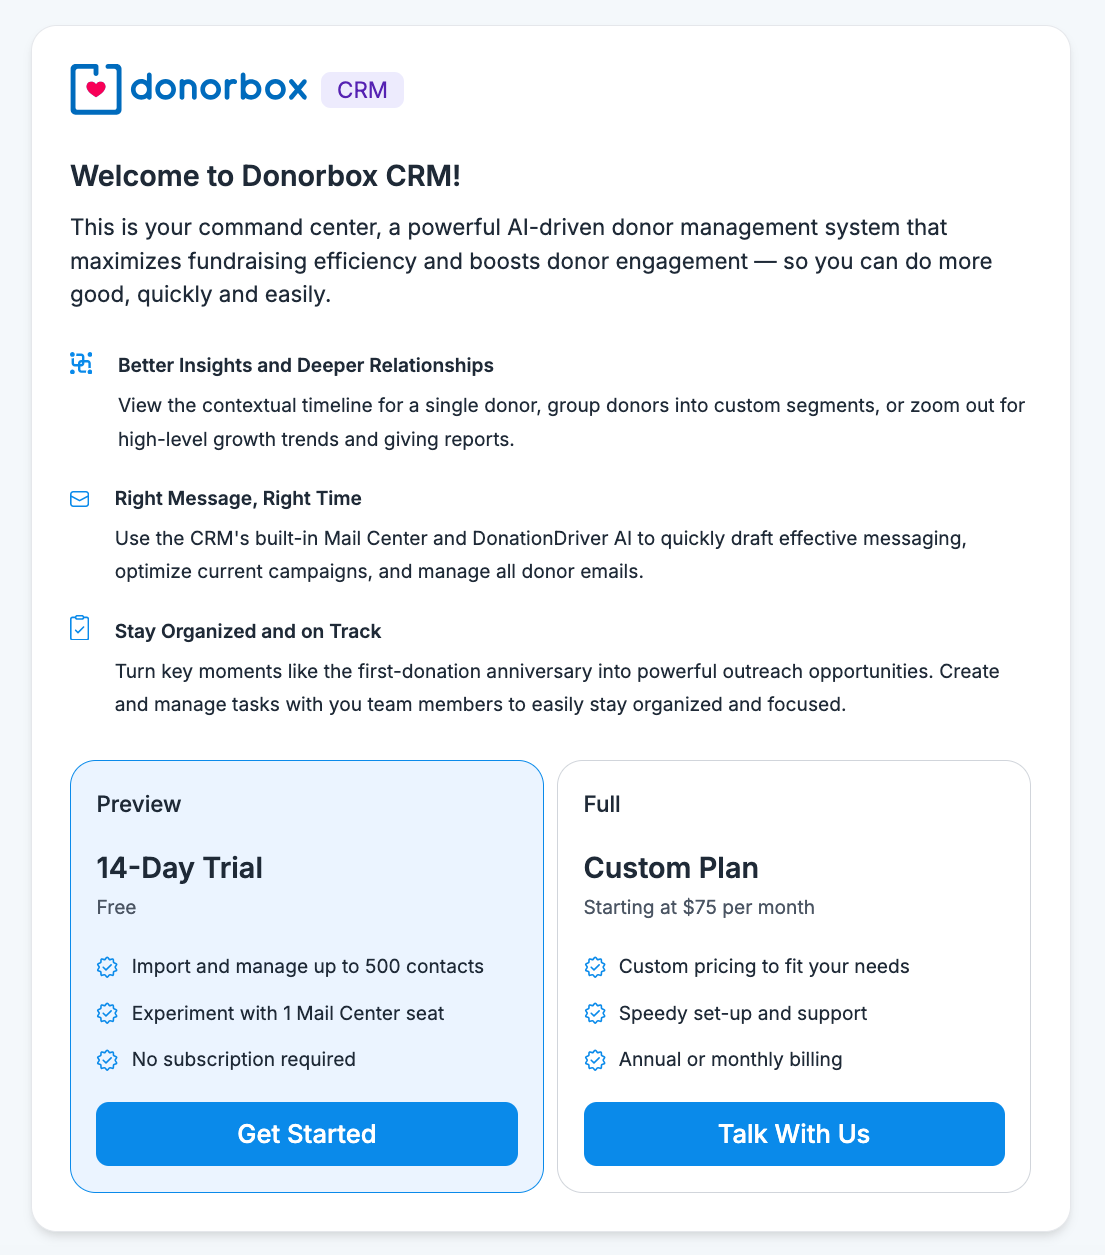
From the Mail Center page, you’ll be able to connect your Gmail or Outlook account if you haven’t done so already. Simply click which account you’d like to link. You’ll then be prompted to log in to your account and grant the required permissions.
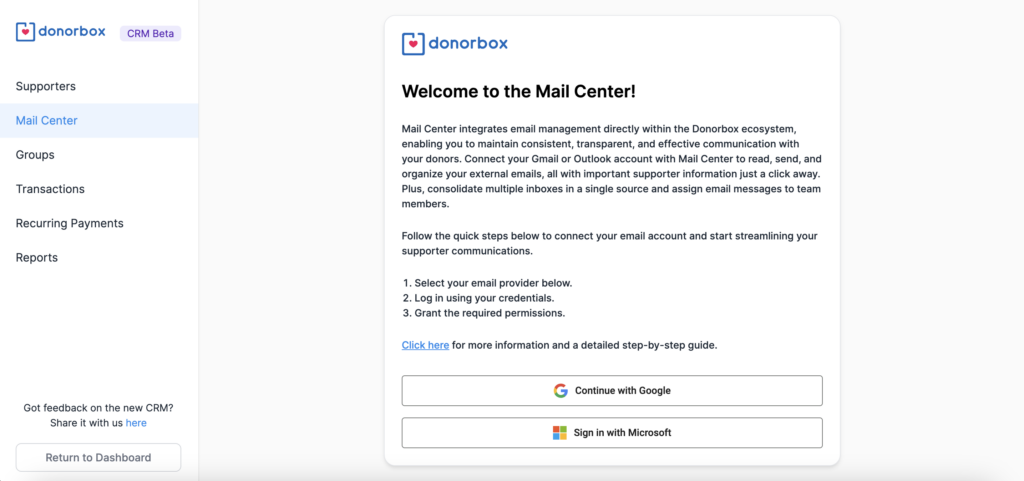
Your team members can add their accounts, too! This allows anyone in the organization to see a combined inbox with all messages sent from Mail Center.
If you need to change your account connections at any time, you can do so by clicking the gear-shaped icon to access your Mail Center settings.
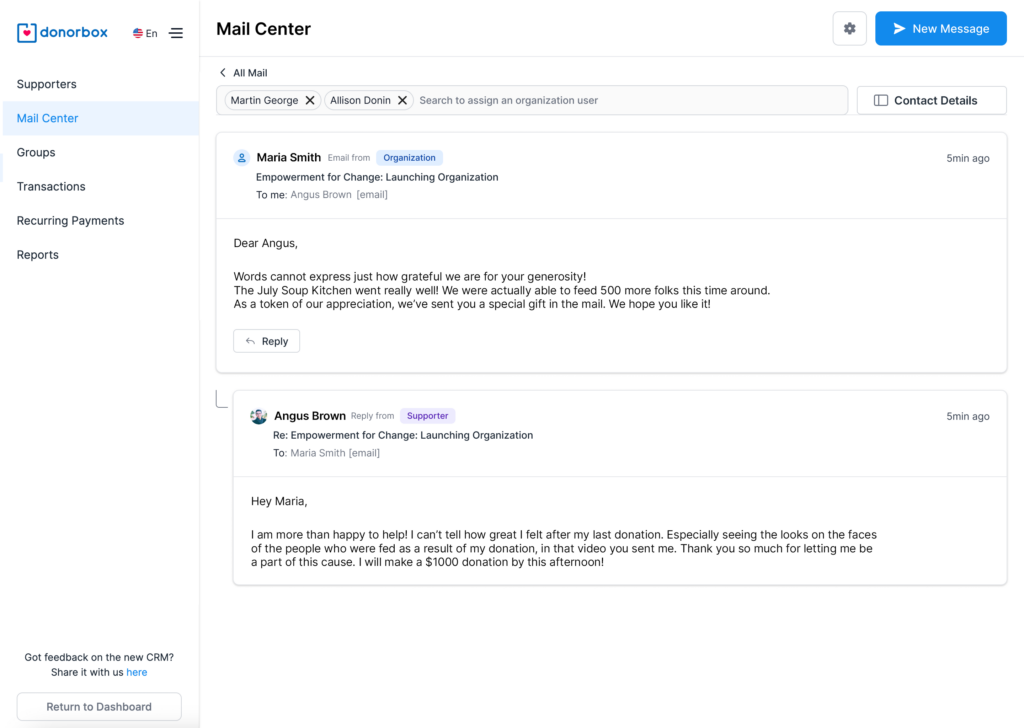
When you’re ready to send an email, click the blue “New Message” button in the top right corner of your screen.
From there, you can search for a supporter, input your subject, and select which team member the email is coming from (if you have multiple team members using Mail Center).
Use the rich text editor to customize the body of your email to your liking.
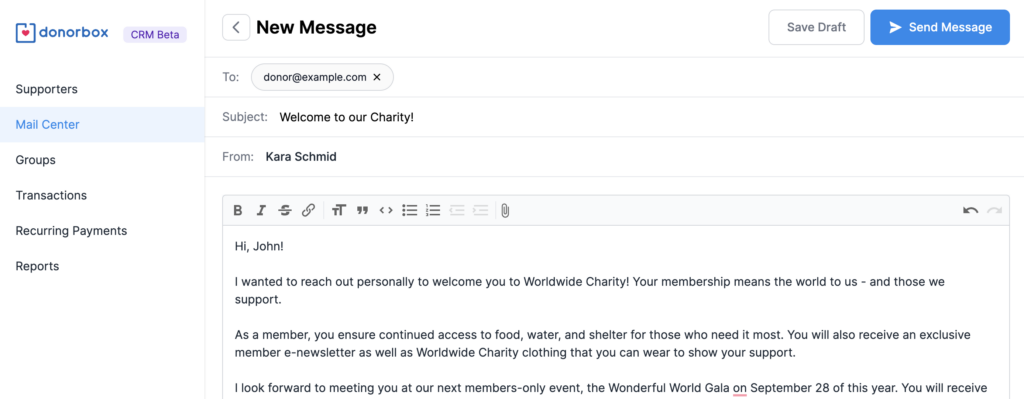
You have the option to add a custom signature to your email to increase the professionalism of your outreach. To add a signature, you can click “Manage Signatures” from the New Message page, as pictured above.
You can also click the gear icon in the top navigation of Mail Center to access your signature settings.
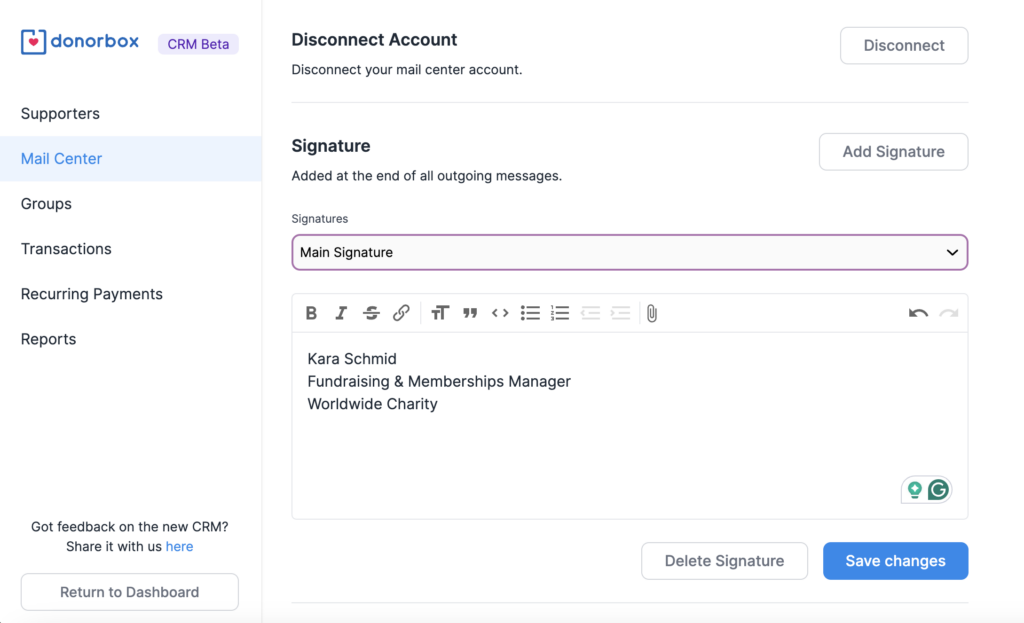
You can add text and images to fully customize your signature. Choose a name for your signature to differentiate it from any others your team members might add. If there are no other saved signatures, Mail Center will choose this signature by default.
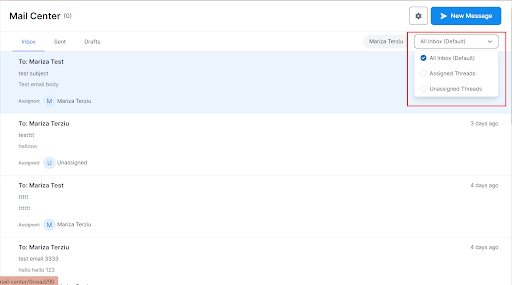
To assign email threads to team members, click on the email thread you wish to assign. From there, you can search and select the team member from a dropdown.
You’ll then see the assigned team member marked on the email thread.

You can also filter your inbox, sent, and drafts by whether they have been assigned.
To send a communication directly from a supporter’s profile, first access the profile. Then navigate to the “Communications” tab and click “Send Email.”
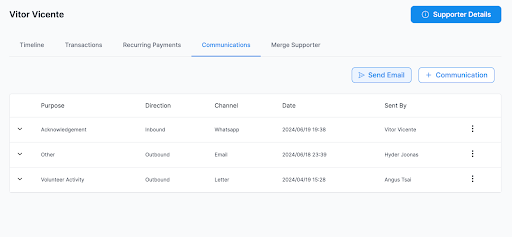
Like all other emails sent by Mail Center, this email will be saved in the same tab for future reference.
Mail Center makes it easy to create templates for common donor scenarios. First, navigate to the settings tab.

Then click “Add Email Template.” Here, you’ll be able to name your template and add your content. Click “Save” when you’re finished.

Now you have a ready-to-go template for your next email. You can also use this template with Donorbox Moments to automate donor outreach for important milestones like first donations, birthdays, recurring donation changes, and more. Discover how Donorbox Moments works in this blog.
Get caught up to speed quickly with the help of your fundraising assistant, Jay·AI. Ask Jay to summarize your unread emails and see a prioritized list so you can plan your outreach and respond quickly.
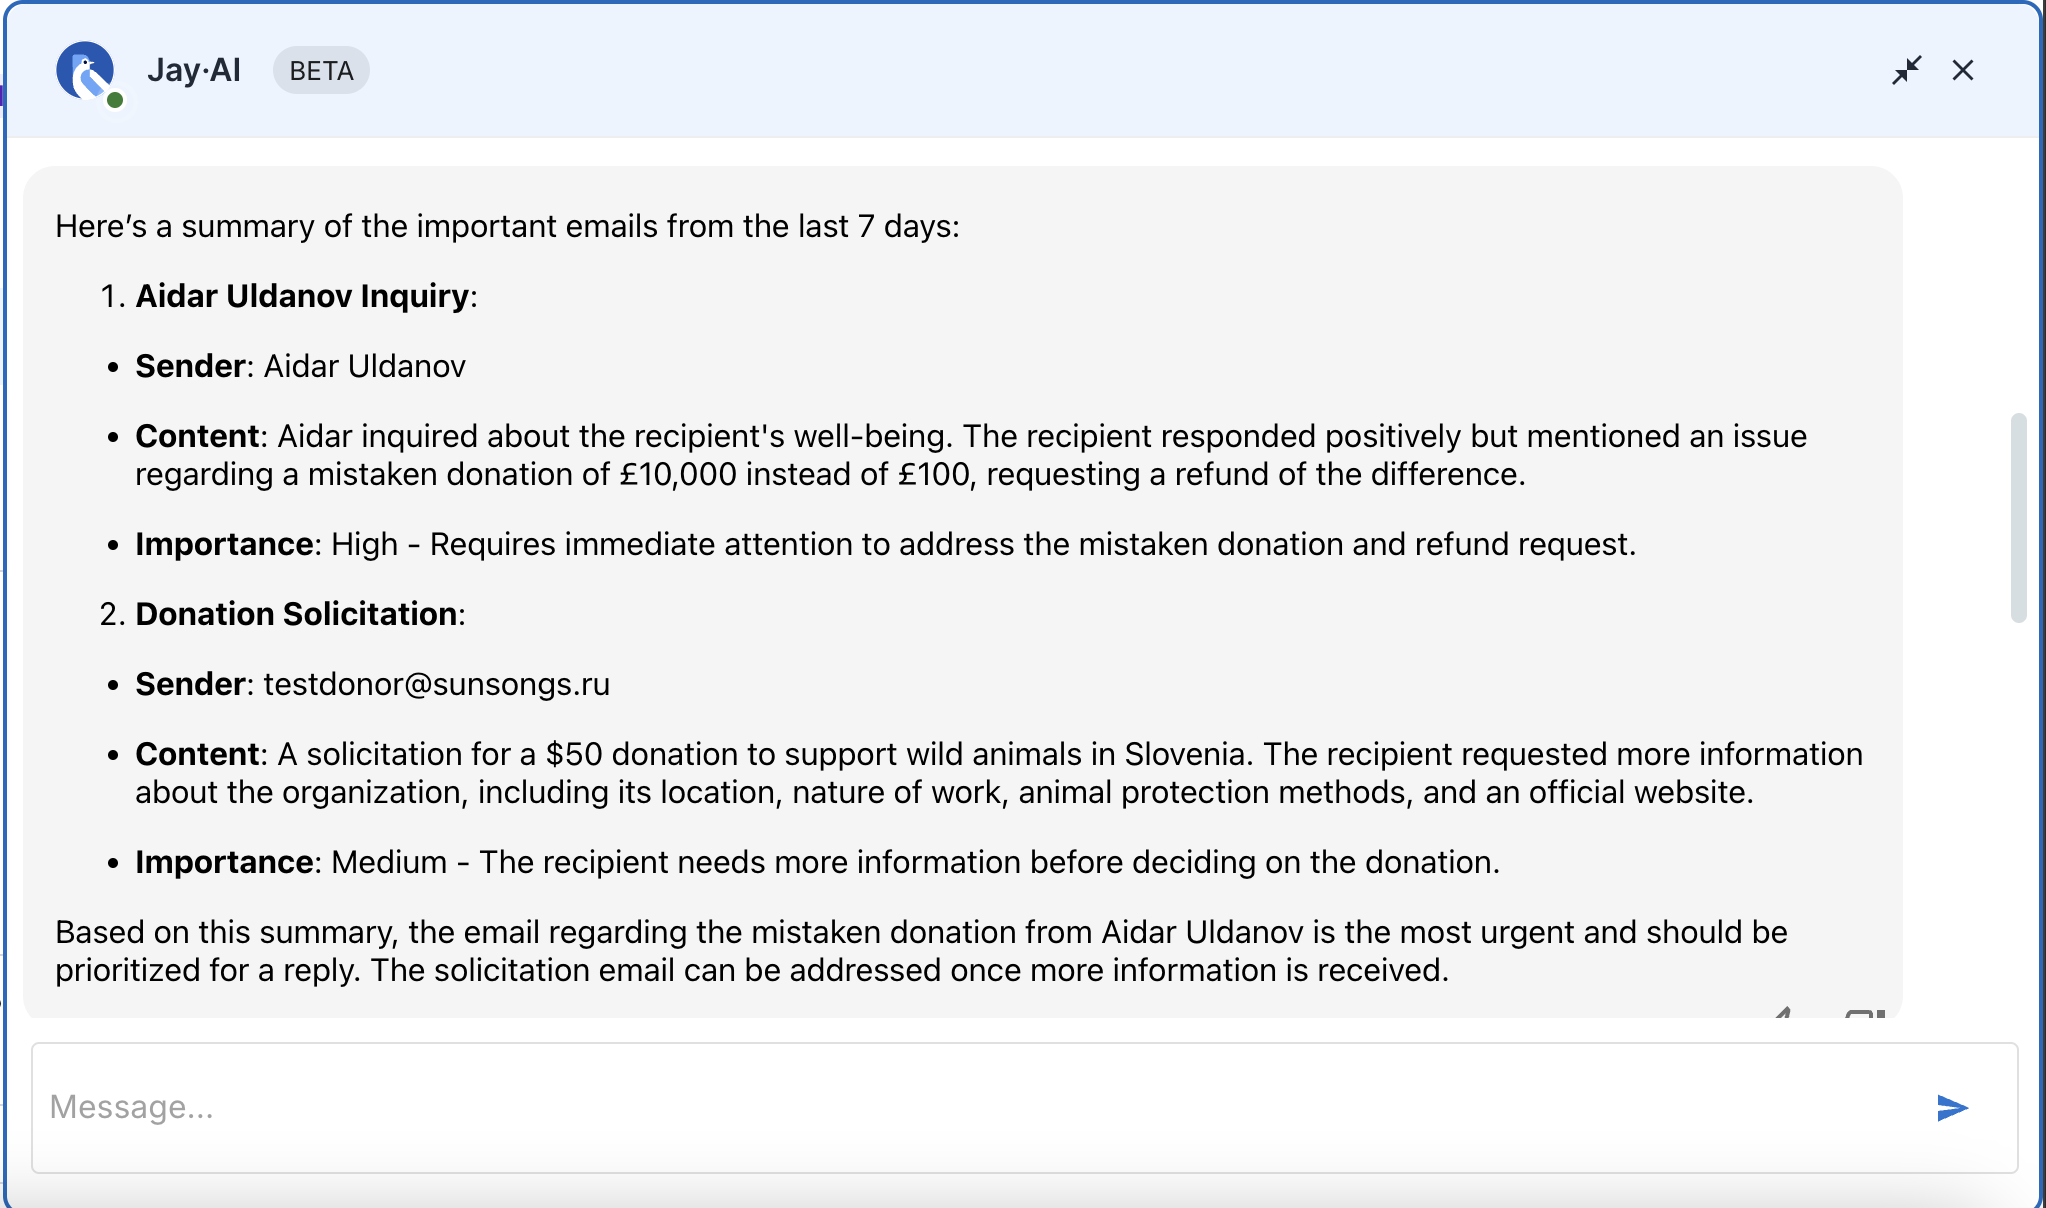
Learn more about all Jay·AI has to offer in this blog.
Whether you’re an established fundraiser or are just getting started, Donorbox CRM’s Mail Center offers efficient functionality to make your everyday tasks smoother.
Keep all your fundraising emails in one place, access crucial information about your supporters, and automatically log all communication in a robust supporter profile so you never lose track of your donors. This helps you make every donor feel like the most important donor in the world – because they all are.
Sound like a dream come true? Join the Donorbox CRM waitlist today!
For more nonprofit tips, check out the rest of our Nonprofit Blog. Subscribe to our newsletter to receive the best of the blog in your inbox every month.
Subscribe to our e-newsletter to receive the latest blogs, news, and more in your inbox.

