Donorbox Live™ Kiosk – Elevating Live & In-Person Fundraising with Swift Cashless Donations
The Donorbox Live™ Kiosk app turns your iPad or Android tablet into a giving kiosk so you can accept swift, cashless donations, anywhere and anytime. Learn how to set up your own donation kiosk at your nonprofit location or fundraising event in this article.
In an increasingly cashless world, churches, museums, masjids, art galleries, and other nonprofit organizations that often get visitors at their locations are seeing fewer in-person cash donations.
What if you could easily set up a giving kiosk at your location or fundraising events that collects cashless donations seamlessly, anywhere and anytime? That’s where Donorbox Live™ Kiosk comes in!
Keep reading to learn more about Donorbox Live™ Kiosk and how it can help you elevate in-person giving.
What is Donorbox Live™ Kiosk?
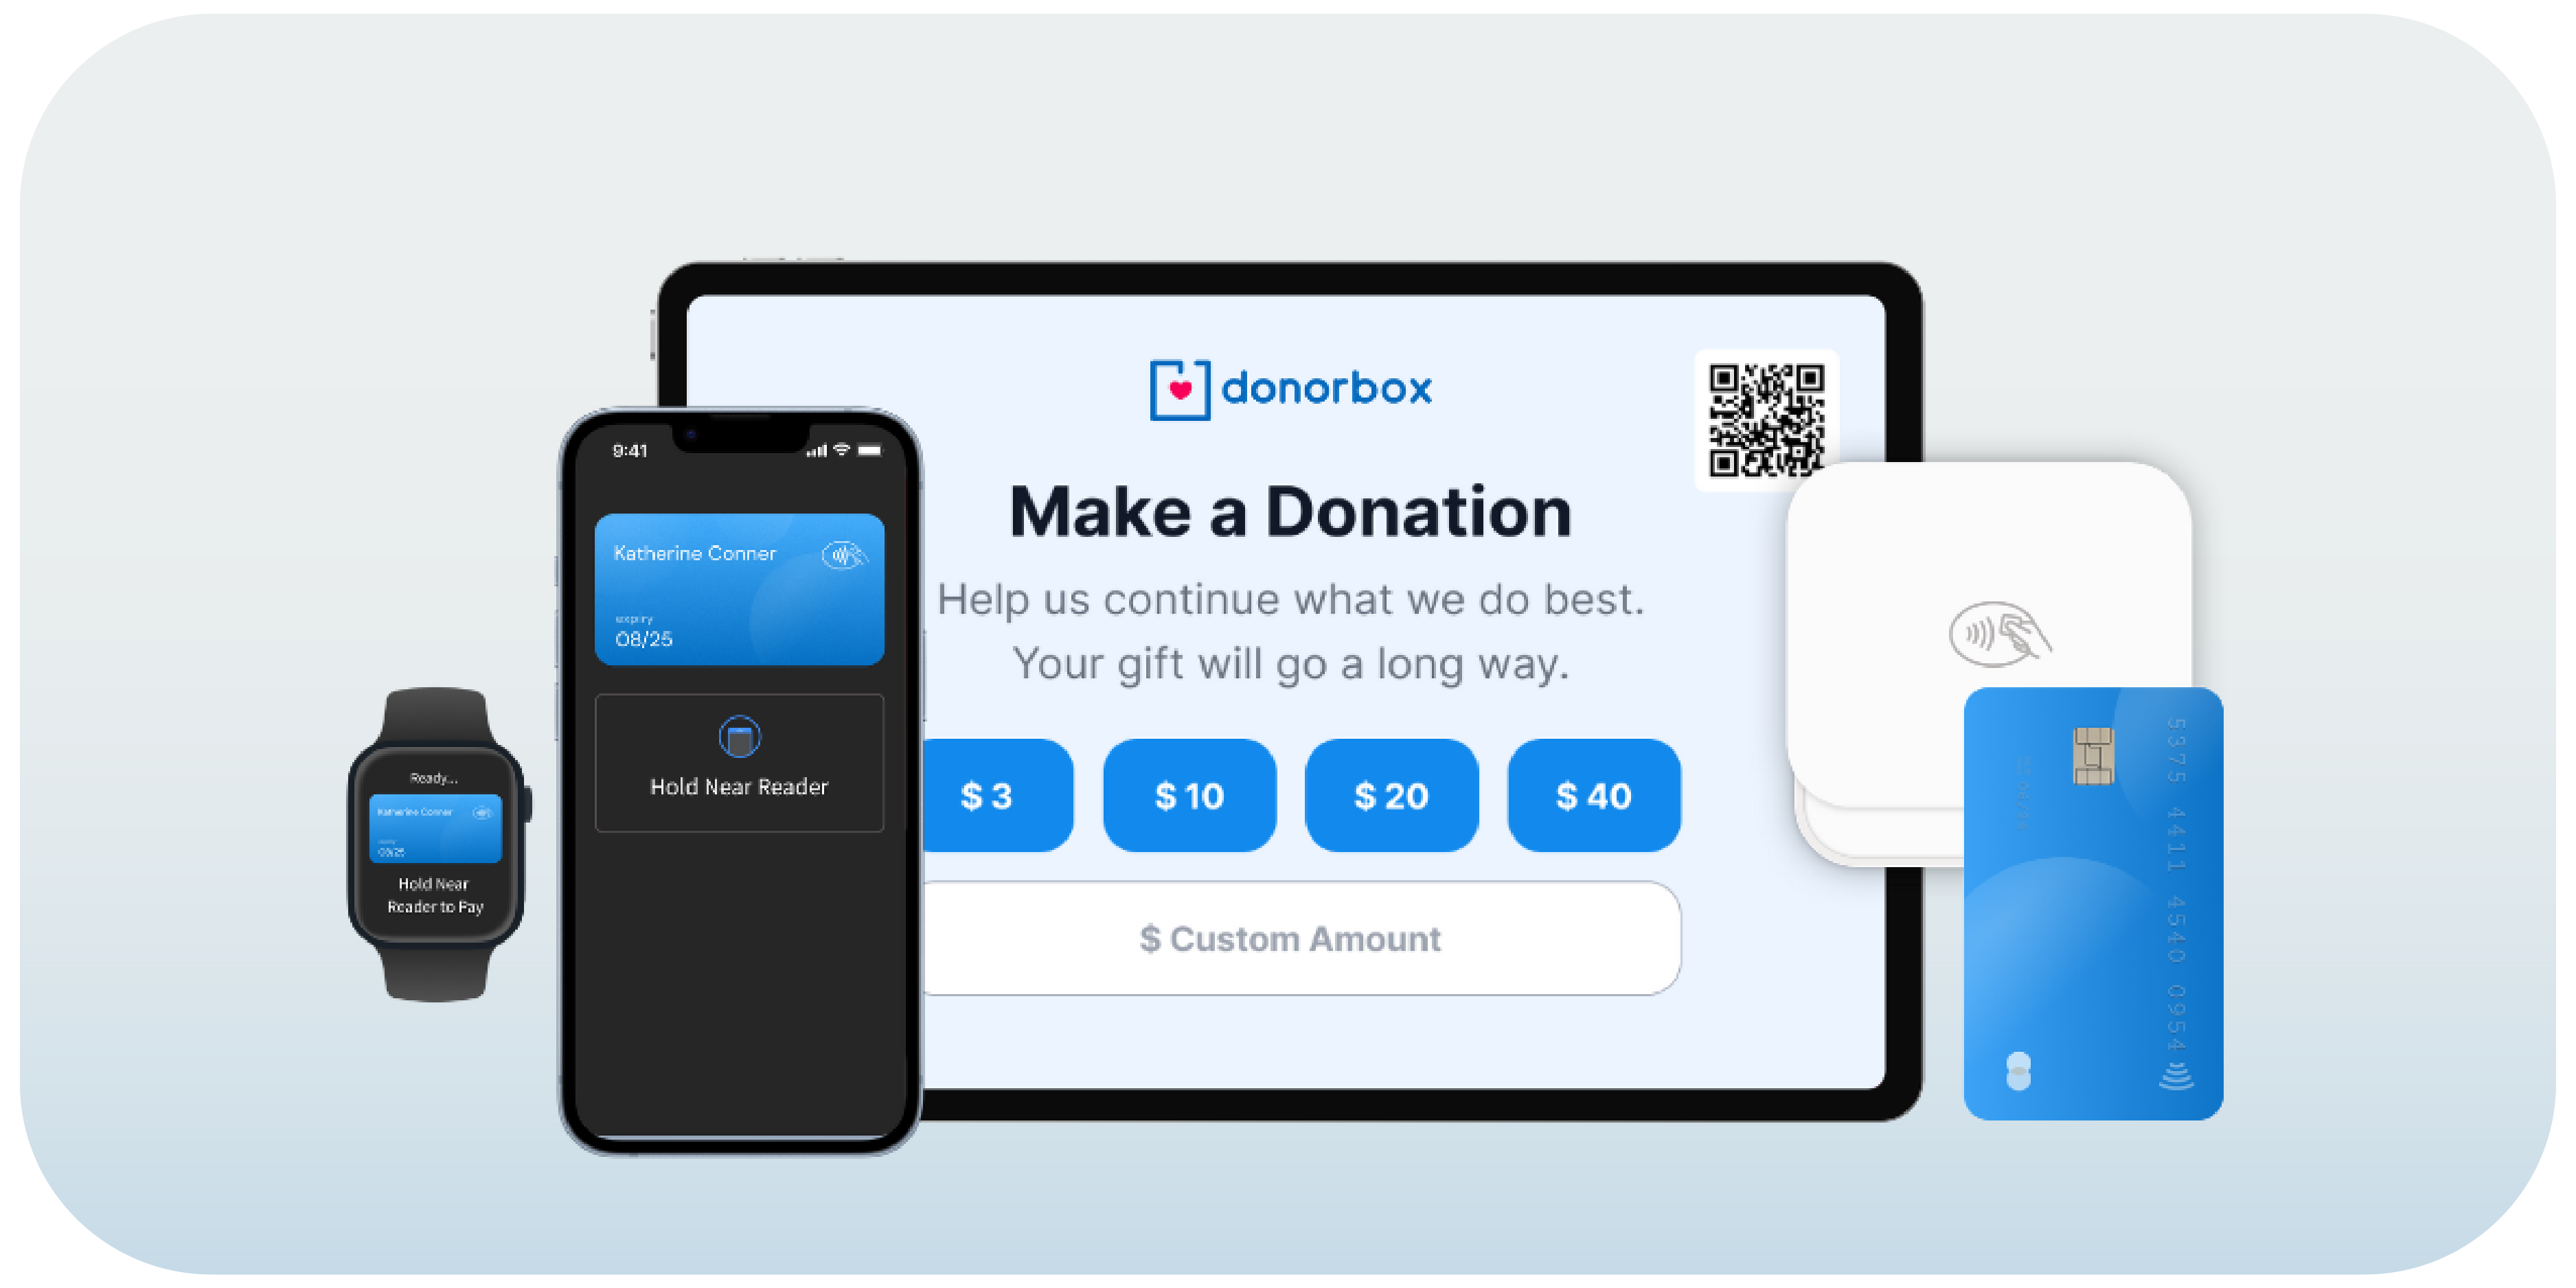
The Donorbox Live™ Kiosk app turns your iPad or Android tablet into a giving kiosk that helps donors tap, dip, or swipe their credit or debit cards or use digital wallets to make swift cashless donations, anytime and anywhere. The app can also be downloaded on Android smartphones if you plan on utilizing our Tap-to-Pay feature!
Donorbox Live™ Kiosk is available in 17 languages. Having a variety of languages available allows you to welcome a wider range of supporters!
You can easily activate the Donorbox Live™ add-on on your Donorbox account and create an in-person campaign. Then, download the Donorbox Live™ Kiosk app from Google Play Store or Apple App Store to your tablet, and log in to the app to pair it with your card reader.
Alternatively, download the Donorbox Live™ app on an Android smartphone and leverage your phone’s built-in payment feature to collect donations using Tap-to-Pay.
Donors visiting your location or attending your in-person events can choose a suggested ask amount and tap, dip, or swipe their credit/debit cards or use digital wallets via smartphones and smartwatches to make swift and secure donations on the go. Plus, you can even provide the option for them to cover the transaction fees, ensuring that 100% of their donation goes towards your mission.
The Donorbox Live™ add-on is priced at $50/month for the first device and an additional $15/month for each additional device you use. You can choose to only activate the add-on in the months you will be using your giving kiosk.
We’ll explain the steps to get started later in this blog post. First, let us take a look at everything you’ll need to turn Donorbox Live™ into a giving kiosk.
What You Need to Turn Donorbox Live™ into a Giving Kiosk
Everything you’ll need to turn our powerful app into a giving kiosk is easily accessible – and you may already have some of these tools on hand!
An Android (Android 8 or later) tablet
OR an iPad (running iOS 13 or later)
OR an Android smartphone (to use Tap-to-Pay)
A Stripe M2 card reader device (inside the U.S.) – order it here*
A WisePad 3 card reader device (outside the U.S.) – order it here*
An active Donorbox account and Stripe account
A stable internet connection
Get more information about these card reader devices on Stripe’s website:
Once you receive the appropriate card reader device from Stripe, it will be easy to set it up using their instructions. Then, follow the simple steps below to finish setting up your giving kiosk.
*You must have an active Stripe account and log in to view and order a card reader device.
How to Set Up a Giving Kiosk with the Donorbox Live ™ Kiosk App
Setting up your giving kiosk with the Donorbox Live ™ Kiosk app requires these 15 simple steps!
If you’re new to Donorbox, you can sign up for an account here. It’s easy and free to get started with our Standard plan. We do, however, recommend the Pro or Premium plans for a lower platform fee, next-level integrations, expert coaching services, and more!
2. Connect your Stripe account
After you’ve logged in, make sure that your Donorbox account is connected to your Stripe account. You can connect to Stripe from your Donorbox account here.
You can also watch our video on how to connect to Stripe here.
3. Activate the Donorbox Live™ add-on
Connected to Stripe? Great! Now, you’re all set to activate the Donorbox Live™ add-on.
Note: You must add your Tax ID/EIN/ABN and your organization’s address to Donorbox under “Nonprofit Info” to be able to activate the add-on.
First, go to “Integrations & Add-ons” on your Donorbox account and click the drop-down arrow.
Click “+ Create New Campaign” to create a new In-Person Campaign for your giving kiosk.
5. Set your In-Person Campaign details
Next, head to the “General Settings” tab to name your campaign, select the currency (choose from 13 options), and set your default language.
This “Default Language” is the language the donor view will be in when donors walk up to your kiosk. No matter which default language you choose, donors will still have the option to change to their preferred language – there are 17 languages to choose from!
Also, be sure to set your suggested ask amounts for your campaign. We recommend adding four suggested amounts, but you can choose how many are right for your organization. Don’t worry – donors will still be able to type in a custom gift amount.
You can also include a minimum or maximum donation amount, or omit custom donations entirely.
Ask Donors to Cover Fees
Here, you also have the option to ask donors to cover processing fees for their donations.
When this is selected, donors will be given the choice to cover your fees for their gift, empowering them to ensure that 100% of their donation goes directly to impacting your mission.
U.K. Gift Aid
If your organization is based in the U.K., you can allow your donors to claim from the U.K. Gift Aid – which allocates an extra 25% on top of every qualifying donation received towards your organization!
6. Customize your In-Person Campaign
Next, you have the option to make your Donorbox Live ™ Kiosk experience match your organization’s messaging and branding.
Content customization
In the “Content” tab, you can customize the headline and description text that appears on your welcome screen. This is the first screen donors will see when walking up to your kiosk.
We recommend using this text as your call to action to give. Use language that will tell your audience exactly what you want them to do – donate and share the impact their gift will have to encourage more donations to your cause!
You can also set your default – or “static” – language in this tab. This is the language the donor view will be in.
Note: Donors will have the option to change between 17 languages with a single tap on the welcome screen, no matter which default language you choose – unless you customize your messaging. Translations are disabled with custom messaging, but you may still choose a default language.
Design customization
Next, head to the “Design” tab, where you can customize the look and feel of your giving kiosk’s screen! First, select a main color (we recommend using your primary brand color). This will change the color of your suggested ask amount buttons as well as add a tint to the screen. Then, upload your logo in standard image formats such as PNG, JPEG, or GIF – a PNG with a transparent background is ideal.
Personalizing these options to suit your brand identity optimizes the giving experience for your donors, building their trust and making them feel comfortable to give even more towards your cause!
Customization preview
Want to preview how donors will view your giving kiosk with these customizations? Simply click “Preview Kiosk” in either tab when you’re ready.
Here’s an example – your logo will replace the Donorbox Live ™ logo on your giving kiosk:
7. Customize your donor receipts
On the next tab, labeled “User Receipts,” you’ll be able to customize the receipt template used to send receipts to your donors. Use this feature to showcase your gratitude and ensure your receipts match your brand’s tone and messaging.
You can add variables and images, and personalize the look of your receipts within the rich text editor.
8. Mailing List
On the “Mailing List” tab, you can enable the option to ask donors to subscribe to your mailing list via your donation kiosk. This is great for driving engagement and collecting valuable donor information for future outreach and campaigns! You can also choose to subscribe your donors by default.
9. Add a QR Code
On the “Campaign QR Code” tab, you can add a campaign QR code of your choice to display on the home screen of the donor view in the app (as seen below).
To add a QR code, check the box for “Enable QR Code,” then choose from the options shown.
You may select a Donorbox-hosted page by selecting “Hosted Page” and choosing one of your Donorbox fundraising campaigns in the drop-down. This option enables you to direct giving kiosk donors to an online campaign that features additional options such as recurring giving, tribute gifts, designated funds, and more.
Or, you have the choice to add a QR code to any page you wish, such as a newsletter sign-up form to encourage sign-ups for your email list or a YouTube video showing the impact a donor’s gift will have. Simply select “Custom Page” and add the correct URL.
Whichever option you choose, remember to add a short description in the box labeled “QR Code Description Text.” This tells users what they will find when they follow the QR code.
10. Add donation designations
Donation designations allow your donors to choose what they want their gifts to be allocated toward. This allows your donors to feel empowered and also helps your nonprofit keep track of where every precious donation goes.
On the “Donation Designations” tab, go ahead and enable the option if you’d like to add designation labels to your donation kiosk. If you want to make it mandatory for donors to choose where their donation should go, enable the option by checking the box.
Add personalized designation label text to let your donors know what this step entails, encouraging them to choose a designation. Note that this field is required.
11. Donor information
Donorbox Live ™ Kiosk gives you the option to collect valuable donor data when your supporters make a donation, including their addresses and phone numbers. This helps you grow your donor database and empower future communications with your supporters!
Collecting donor information is completely optional. However, many supporters don’t mind sharing their information for a good cause!
Once your campaign details, customizations, receipts, and other optional steps are up to your standards, click “Save Changes.”
12. Download the Donorbox Live ™ Kiosk app
Next, you need to download the Donorbox Live ™ Kiosk app on your iPad or Android tablet. Please make sure that your Android tablet is version 8 or later or that you are using an iPad that is running iOS 13 or later. You can also download the app to your Android phone if you plan to use Tap-to-Pay.
Download the Donorbox Live ™ Kiosk app for Android here.
13. Log in to the Donorbox Live ™ Kiosk app and check all settings
Now, log in to the Donorbox Live ™ Kiosk app on your tablet (or your Android phone if utilizing Tap-to-Pay) using your Donorbox account.
If you have enabled two-factor authentication on your account, input the code and sign in.
Please note that when you log in, we’ll sign you into the first organization your account is associated with. Support for switching organizations will follow at a later date.
Next, select the In-Person Campaign you created on Donorbox.
Then, check all other settings, including the currency and the suggested ask amounts you selected. If you want to make any changes, click the hyperlink “Click here to edit this campaign” right beneath the amounts.
Once you’ve made any changes, click “Refresh” on the bottom-left corner of the screen to have them reflect on the app.
14. Turn on your card reader device
Next, turn on your Stripe M2 or WisePad 3 card reader device. Your device must have Bluetooth or Nearby Devices enabled in order for the app to work. Make sure you’ve granted Donorbox Live access to your Bluetooth or Nearby Devices in your device’s settings. Remember to keep it near the tablet as it pairs.
If you’re new to using these devices and need help with setting them up, Stripe has all the information you need:
Click the “Launch Kiosk” button on your Donorbox Live™ Kiosk app. It will automatically pair with your card reader device and launch the donor view.
Please note that. while automatically connecting with your card reader, the Donorbox Live™ Kiosk app will ask for permission to use your device’s location. This helps connect with nearby devices. Also, connecting to your card reader device for the first time is likely to take a few minutes.
That’s it! You’re now all set for powerful live and in-person fundraising for your nonprofit!
Just place your Android tablet or iPad and your card reader at a location easily accessible to your donors and event attendees. Or, utilize your Android smartphone for Tap-to-Pay! They’ll love the convenience of giving via quick transactions!
Running into any setup challenges? Visit our troubleshooting guide here.
We’ve also got this video tutorial on how to set up Donorbox Live™ Kiosk:
How Donors Make Cashless Donations with Donorbox Live™ Kiosk
Your donors can make a swift and secure cashless donation in a few simple steps.
1. Select the donation amount
From this screen, donors can first choose to have their giving experience appear in any of the 17 languages available to them. The language that first appears will be in the default language you selected.
Donors will then tap their preferred donation amount on the tablet screen.
Alternatively, they can enter a custom amount of their choice, unless you have disabled this option on the backend – in which case, it won’t appear on this screen.
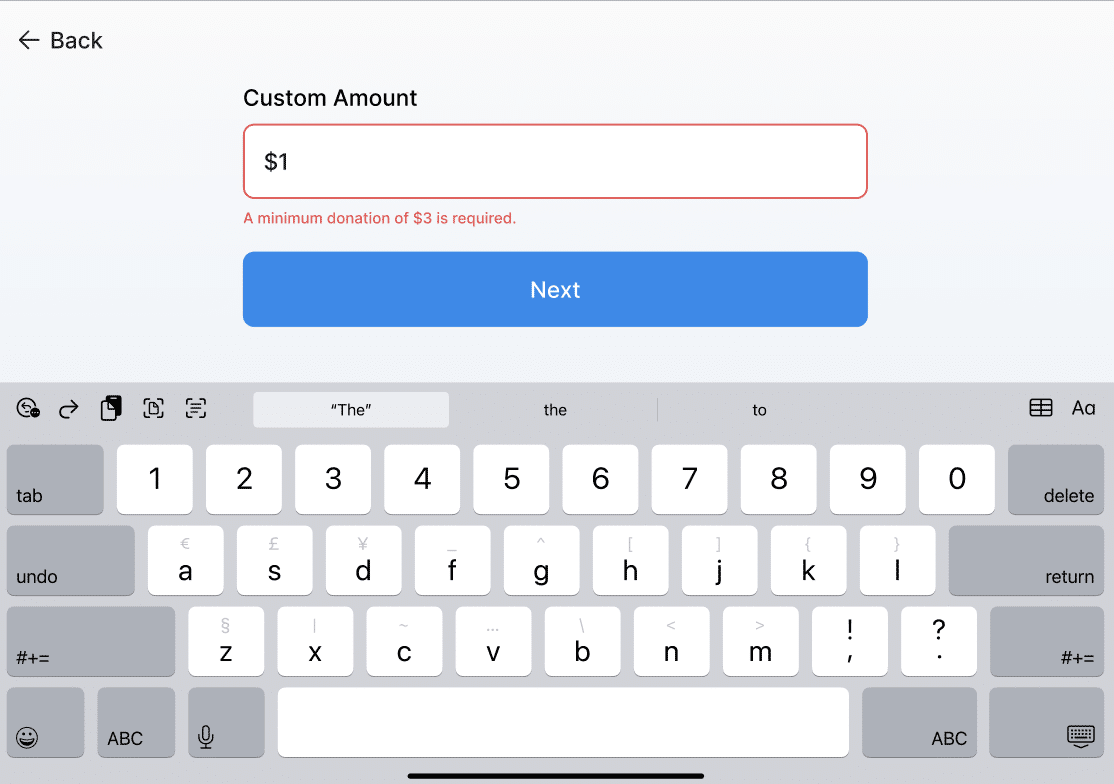
If you’ve included a minimum or maximum donation amount, supporters who enter a smaller or larger amount than you’ve specified will be presented with a message that lets them know about this. For example, if you’ve set a minimum donation amount of $3 and a donor tries to donate $1, they’ll be presented with a message to let them know about the minimum donation amount required.
2. Choose whether to cover donation fees
If you have opted to ask donors to cover transaction fees, the screen below will appear.
As soon as they select or enter an amount and (if you have given them the option) have either opted to cover fees or not cover them, the app will send a request to the card reader.
3. Select a donation designation
If you have enabled donation designations, your donor will then be able to select where they’d like their gift to go. If you haven’t made this a mandatory step, donors can simply skip this step.
If donors are choosing a designation, they can simply select the designation button and choose from the list of options available.
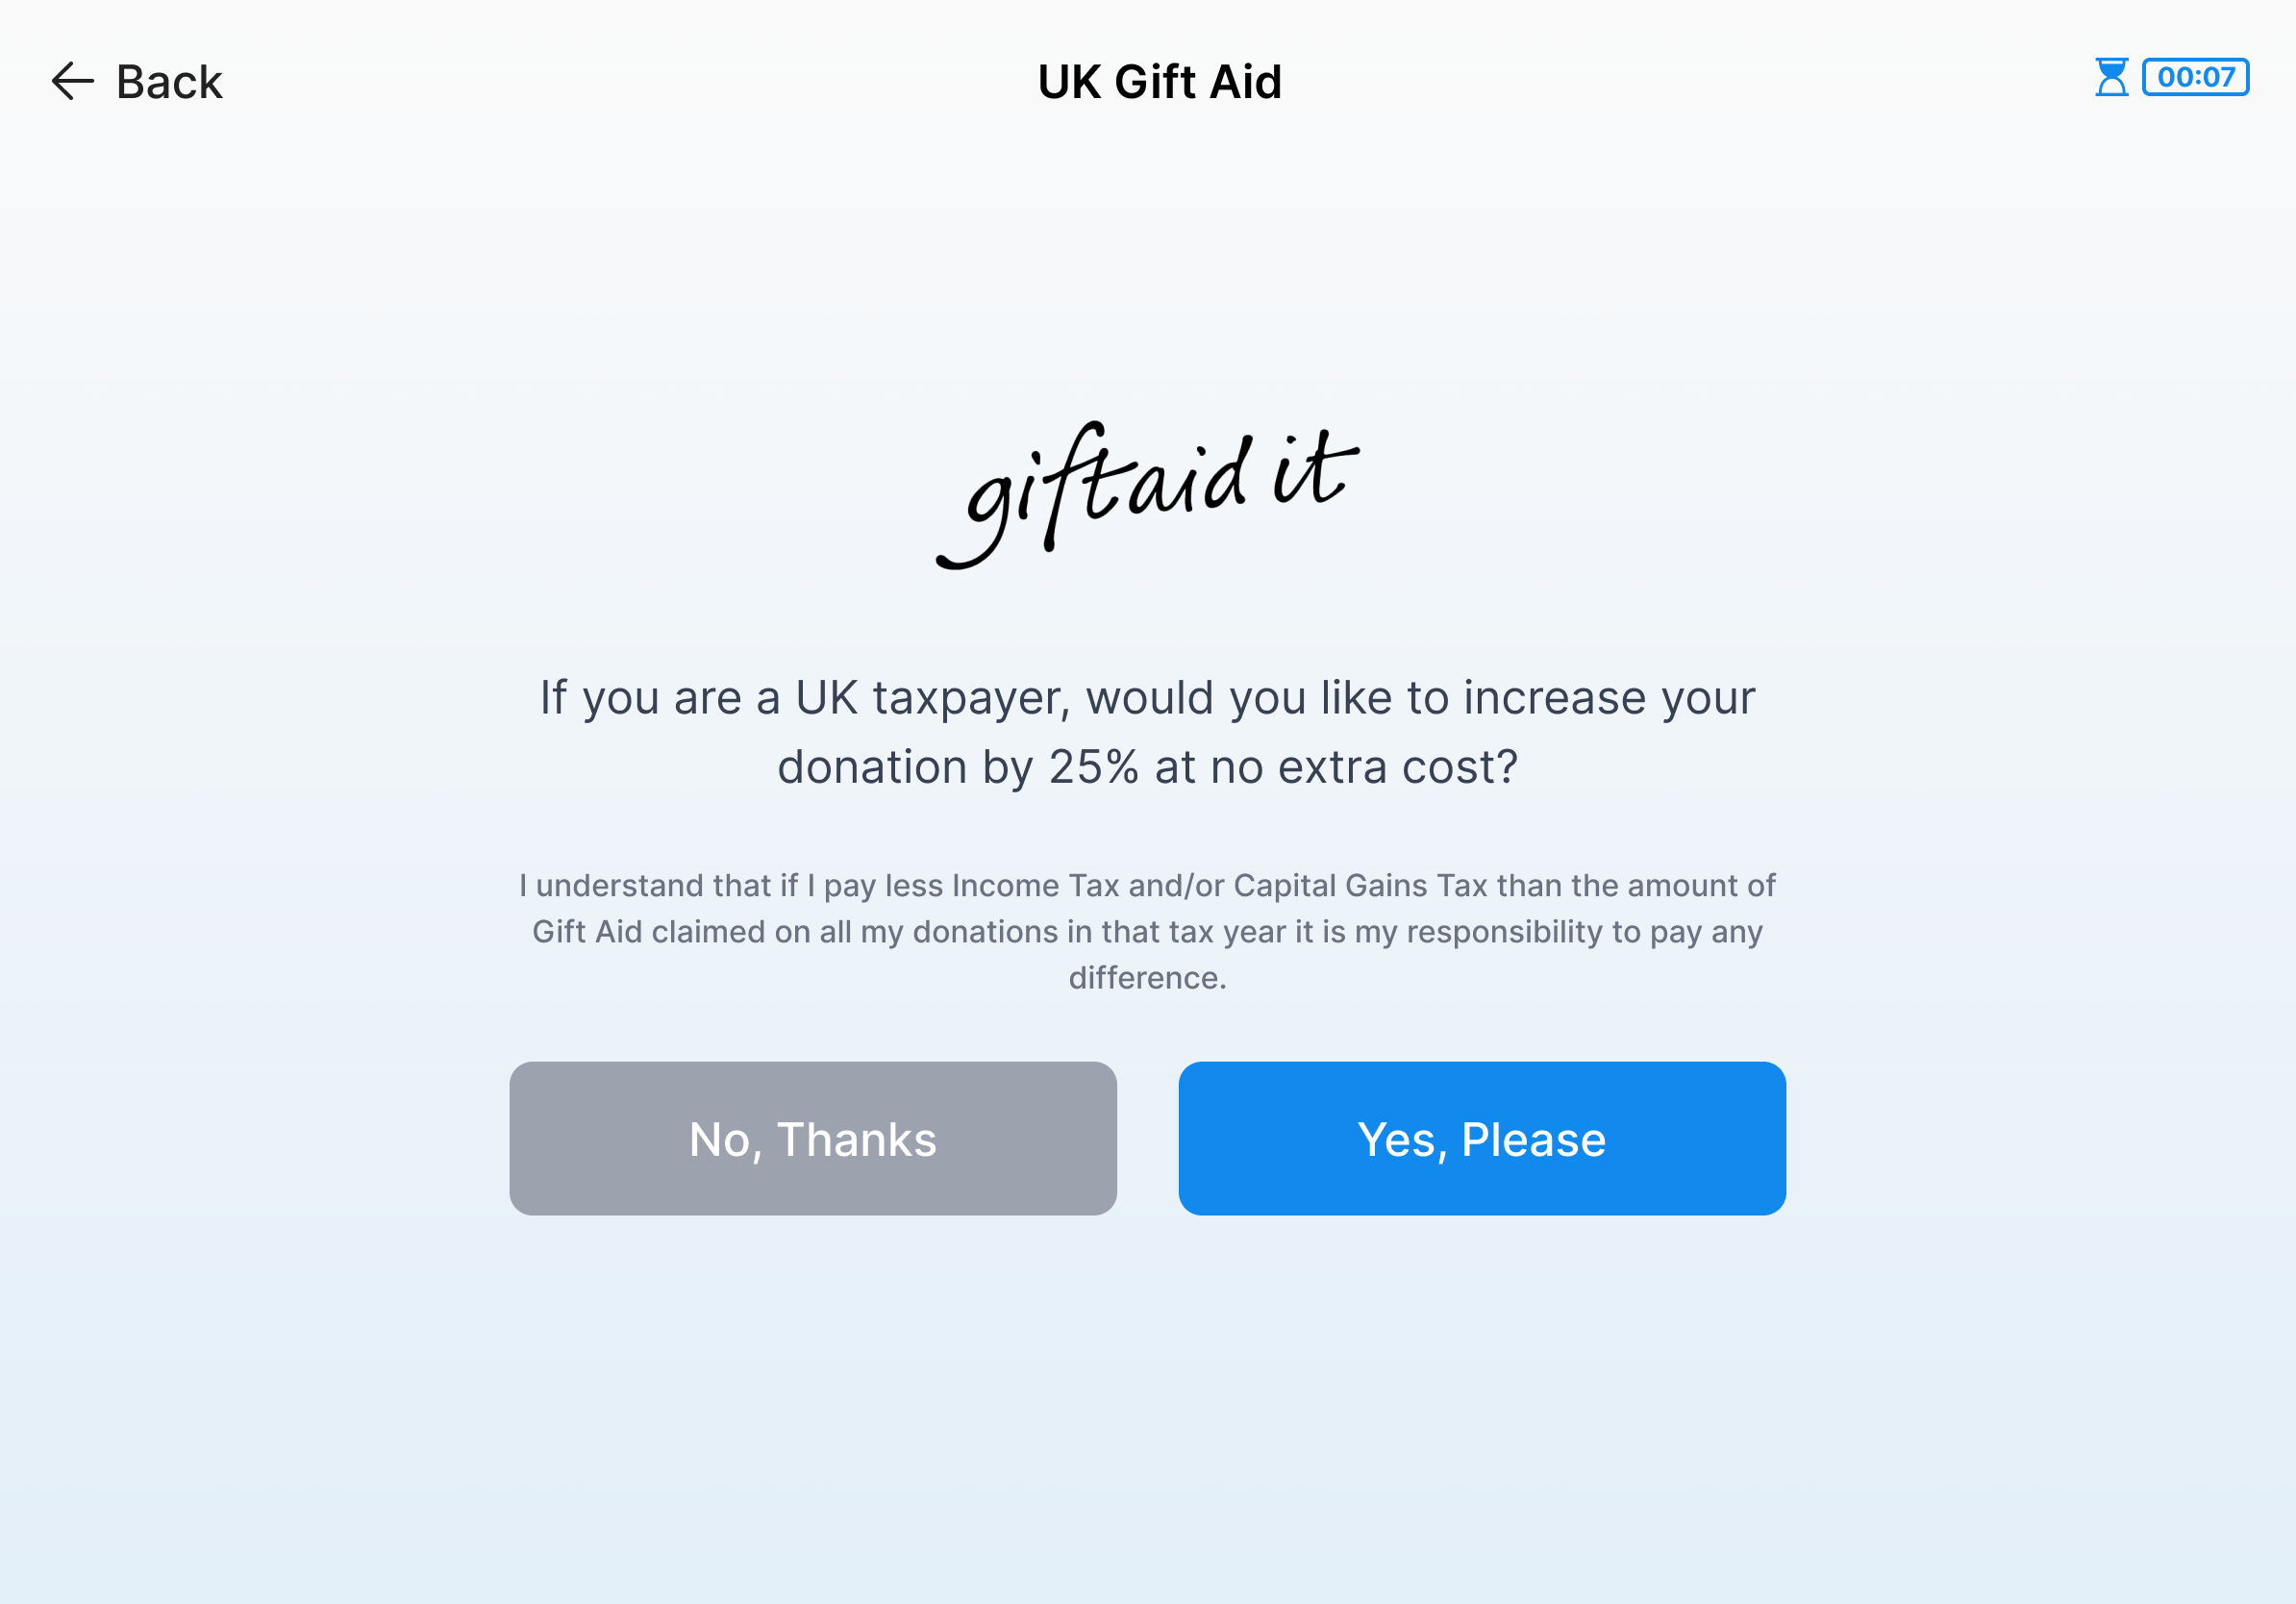
4. Claim U.K. Gift Aid
If your organization is based in the United Kingdom and you have enabled the U.K. Gift Aid option, donors will then be able to indicate whether they want to claim U.K. Gift Aid on their donations. If you are not a U.K. organization or have disabled this option, this step will not appear to your donors.
5. Add mailing address
If you have enabled mailing address collection, donors can then enter their mailing addresses. Donors can either search for an address or enter it manually, as shown below.
Note: This step can be skipped if it has been made optional. If you made this a mandatory step, then donors would need to complete it before proceeding with making a donation. If you haven’t enabled mailing address collection, then this step will not appear on the donor’s end.
6. Add phone number
If you have opted to collect donors’ phone numbers, this will be the next step that they interact with. Similar to mailing address collection, this step can be skipped if you have made it optional. If it’s mandatory, a donor will need to enter their phone number before proceeding to donate. Again, if you have not enabled this step, it will not appear to donors.
7. Finish the transaction
The app on your tablet will show the total donation (including transaction fees, if applicable) as well as instructions for the donor to tap, insert, or swipe their card. They may also tap their smartphone or smartwatch to use a digital wallet.
Similarly, when using an Android smartphone for Tap-to-Pay, donors can simply tap their card to complete the transaction.
The donation will then be processed. Depending on the donation amount, the app may need to request a PIN verification from the donor. Learn more about this on Stripe.
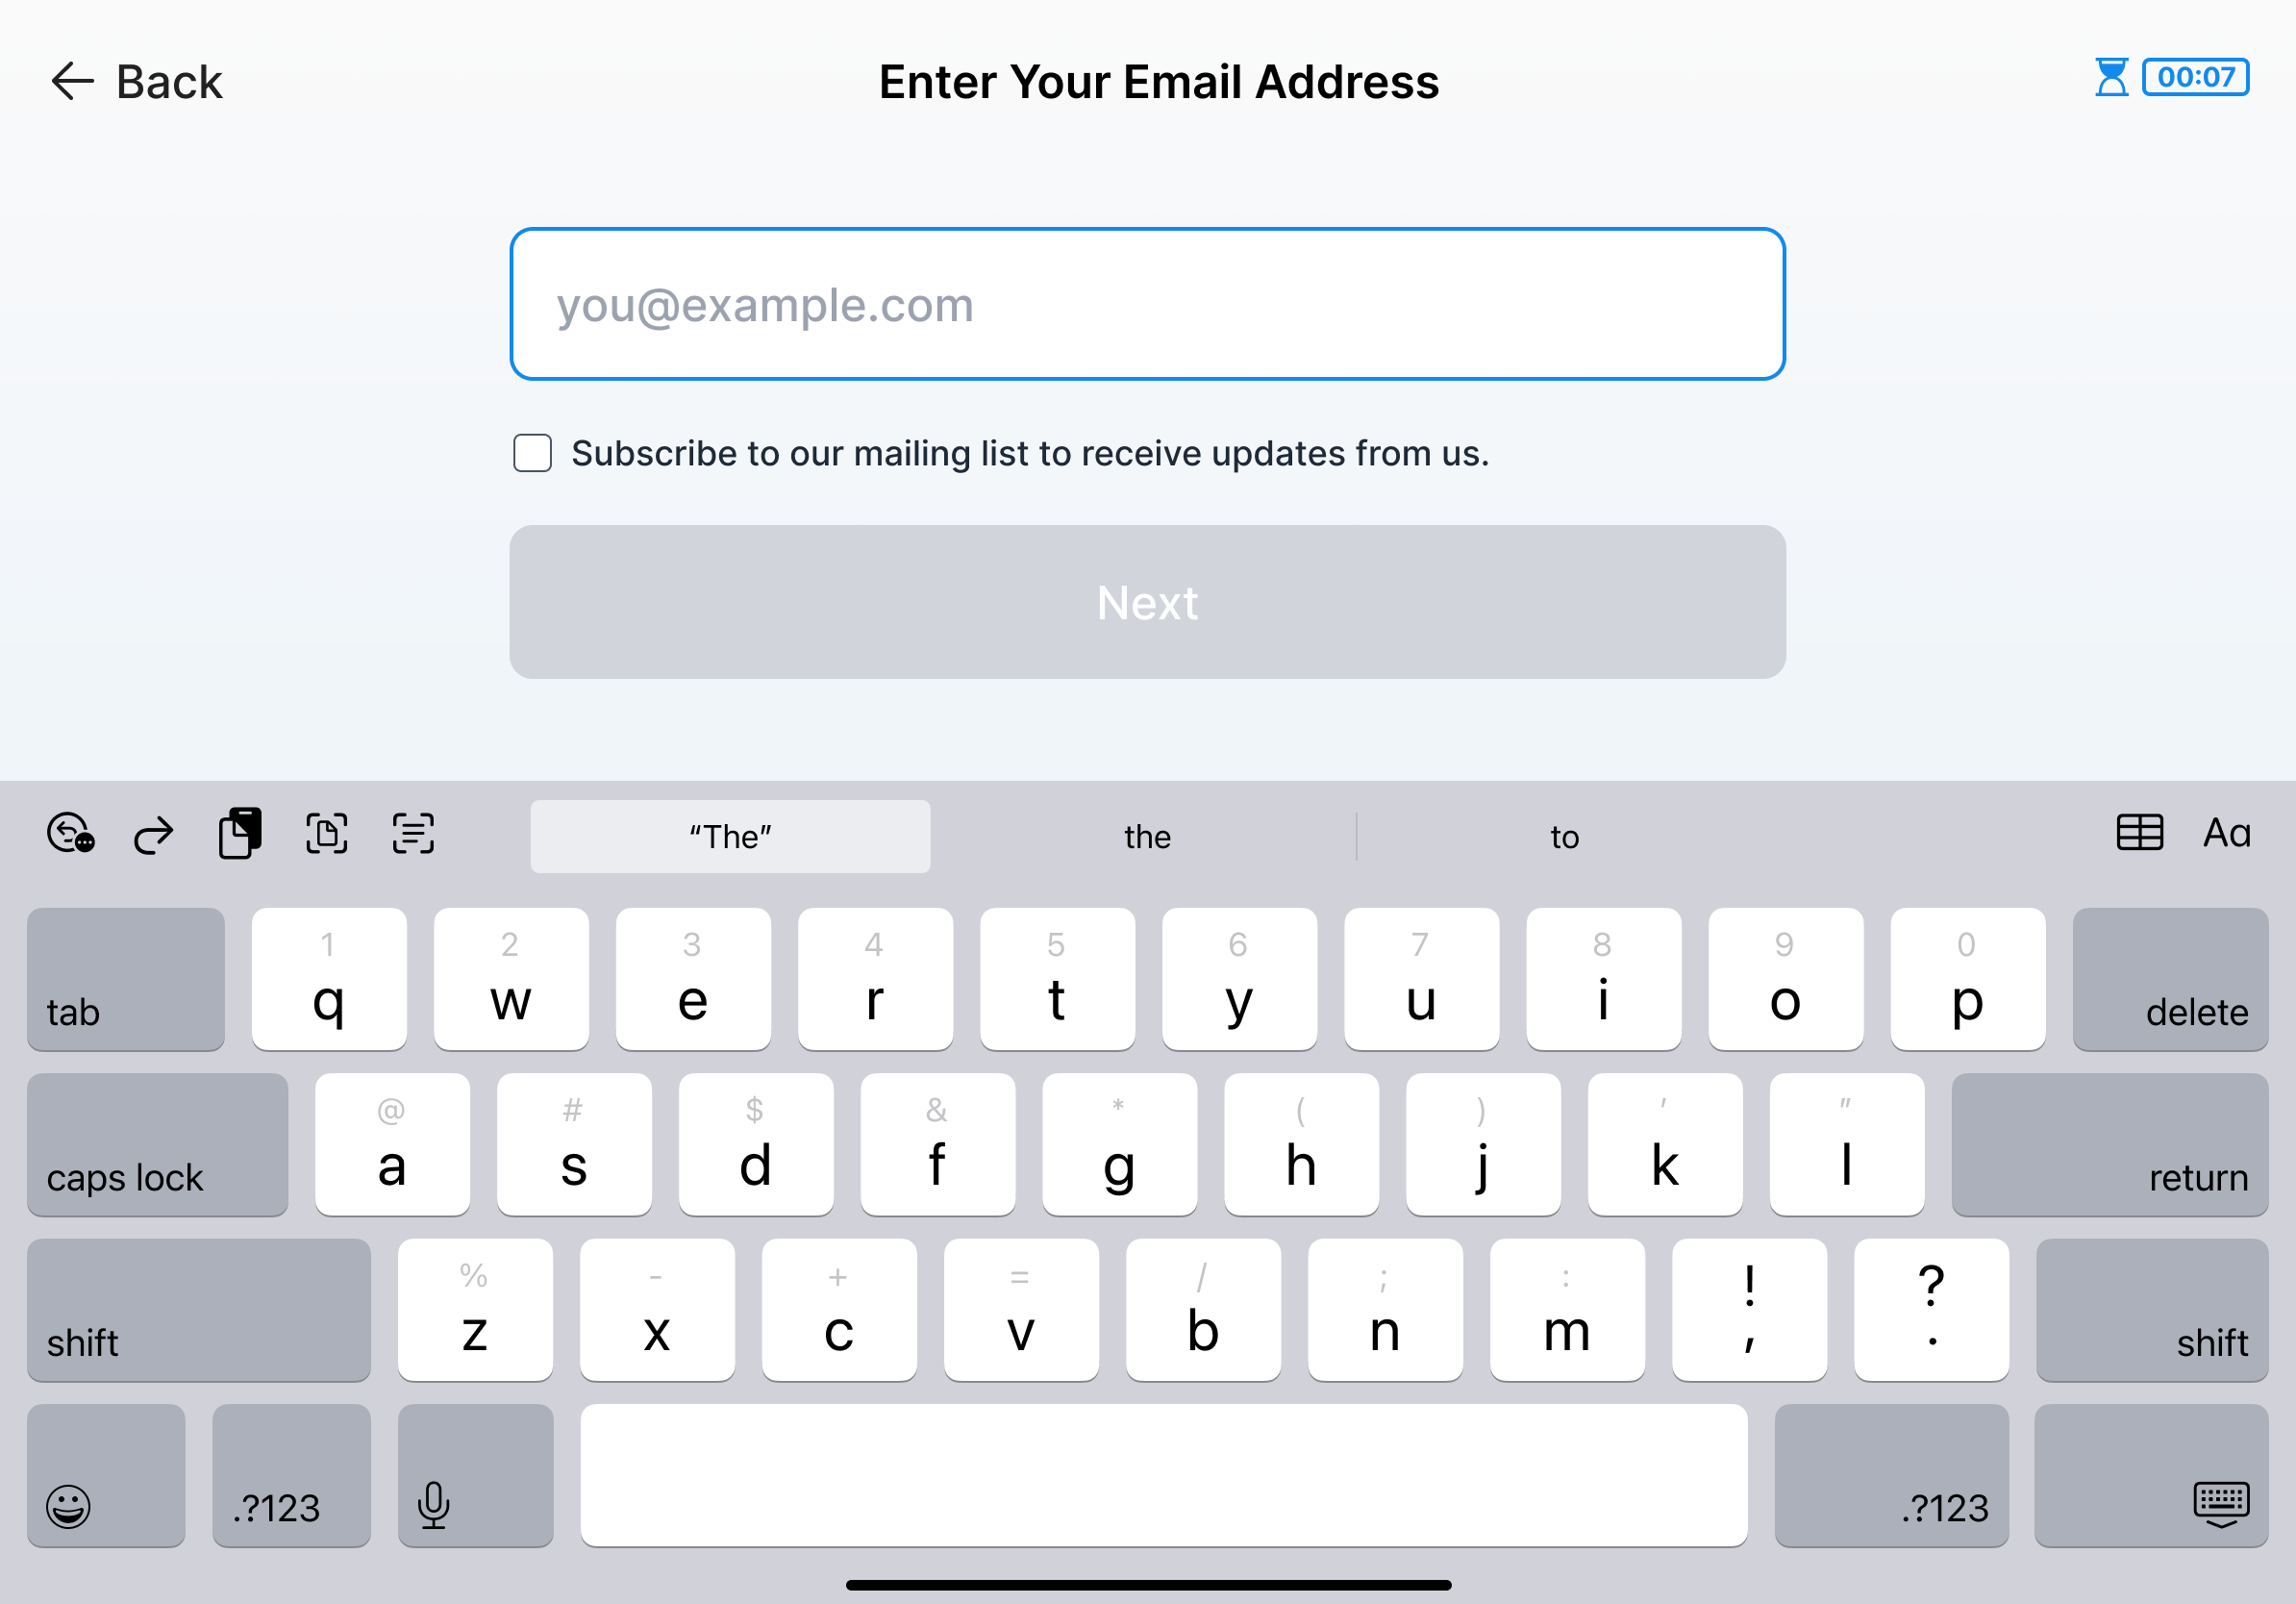
8. Enter an email address and name to receive a receipt
Once the donation is processed, the app will ask the donor to enter their email address and their first and last name to receive a donation receipt. This also helps save their information in the Donorbox database that you can access later to build on this relationship.
Please note that the donor can choose not to enter their personal information. In that case, we have a timer at the top of the screen set to wait for 30 idle seconds and return to the home screen.
Either way, you’ll still have this donation saved on the Donorbox database! If the donor does not enter their contact info, the gift will be saved with the email “cardreader@donorbox.org” and the name “Supporter.” This helps you keep track of all donations made via your donation kiosk at your events or locations.
Mailing list
If you have enabled the option to ask donors to subscribe to your mailing list, they’ll have the option to select the checkbox, as shown below:
If you have set the option to subscribe donors to your mailing list by default, the screen below will appear. However, donors can deselect the checkbox if they choose.
9. Donor receives the donation receipt
After the donor enters their email address and name, they will be sent a donation receipt. If you customize the donation receipt template (as shown in the steps above), they will receive your customized version.
After the receipt is sent, the donor will see a confirmation screen with their receipt number, donation amount, and email displayed.
Want free resources to amp up fundraising and donor management efforts? Visit our Nonprofit Blog or check out the Donorbox Library. Subscribe to our newsletter to receive a handpicked collection of our best resources in your inbox every month!
Chirasree Bose is the Content Editor at Donorbox. Apart from editing and writing, what holds her interest the most is reading books. Chirasree loves to explore the world of fiction and has authored some books herself. Connect with her on Facebook, Instagram, LinkedIn, and Twitter.