How to Embed a Donorbox Recurring Donation Form in Wix
Donorbox fundraising software easily embeds on your Wix website and the process is really simple! There is no special coding required and the process will take you only a few minutes. Donorbox’s simple, responsive, and smart donation form is designed to give your donors a fast online donation experience. In this post, we will take…
Donorbox fundraising software easily embeds on your Wix website and the process is really simple!
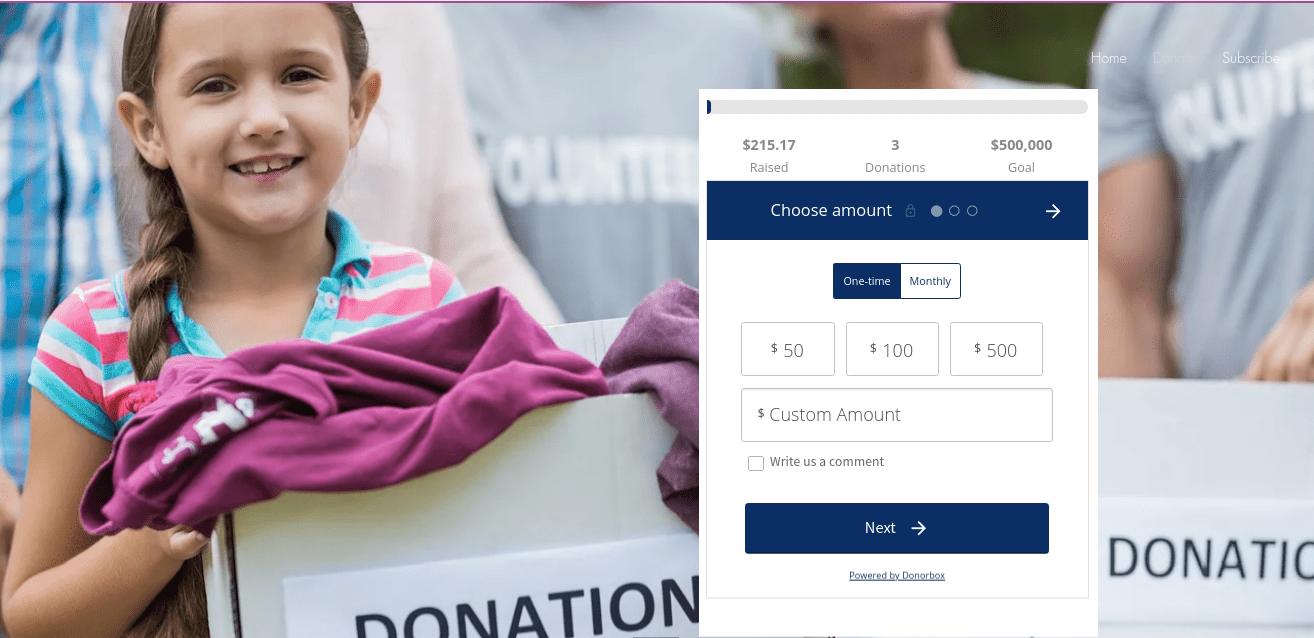
There is no special coding required and the process will take you only a few minutes. Donorbox’s simple, responsive, and smart donation form is designed to give your donors a fast online donation experience.
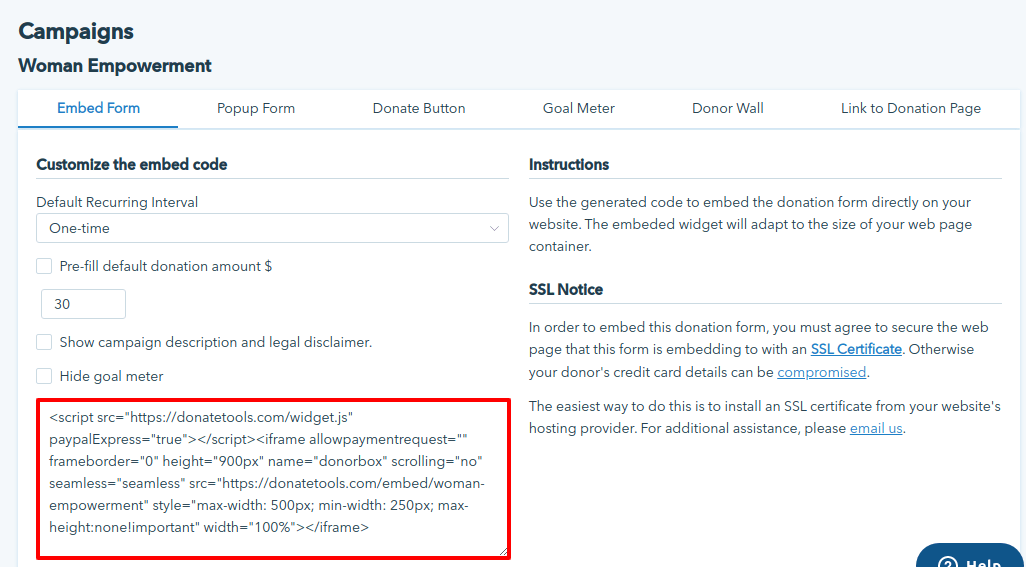
You can edit some of the default settings in your form here, like setting a default donation amount or recurring option. As you change the settings, you will see the code automatically adjust itself.
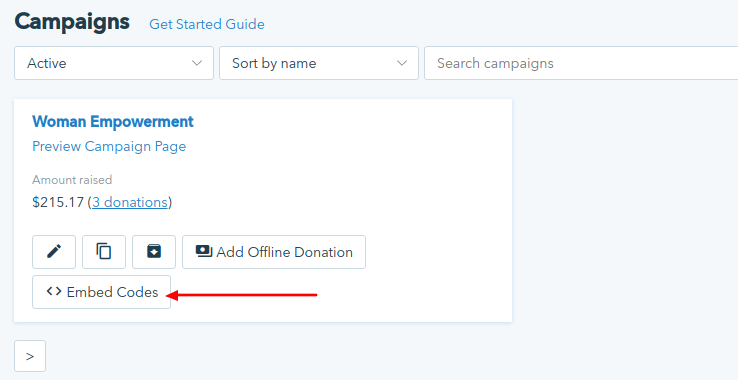
When you’re happy with the settings, highlight and copy the embed code for your form. This code will be pasted on your Wix site later on.
Step 3
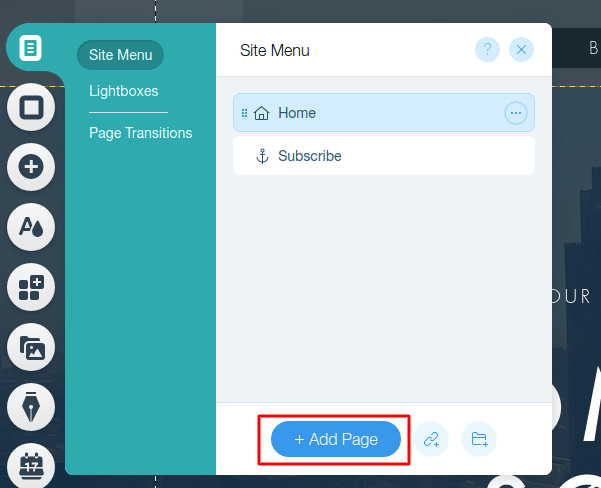
Go to your Wix site editor. Locate or create the page that you want to embed your donation form on.
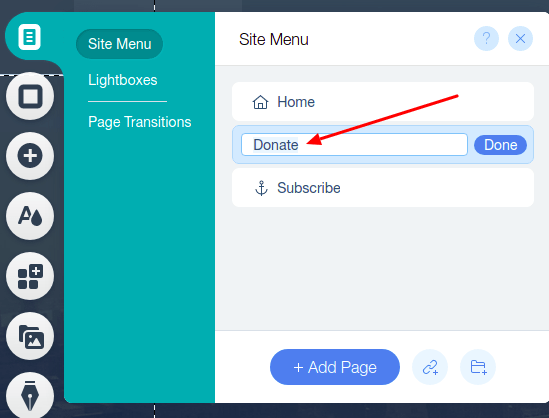
To create a page, under ‘Site Menu’, click the ‘Add Page’ button, as highlighted below.
Next, type a name for your new page in the box shown in the below image and click ‘Done’.
Step 4
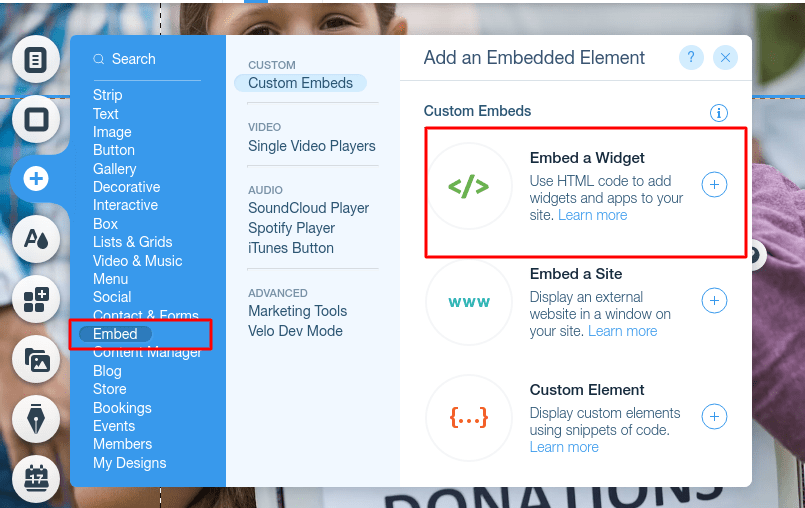
On the page editor, click the ‘+’ (Add) button on the left sidebar. Select the ‘Embed’ option and under ‘Custom Embeds’, select ‘Embed a Widget’.
The step is highlighted below.
Step 5
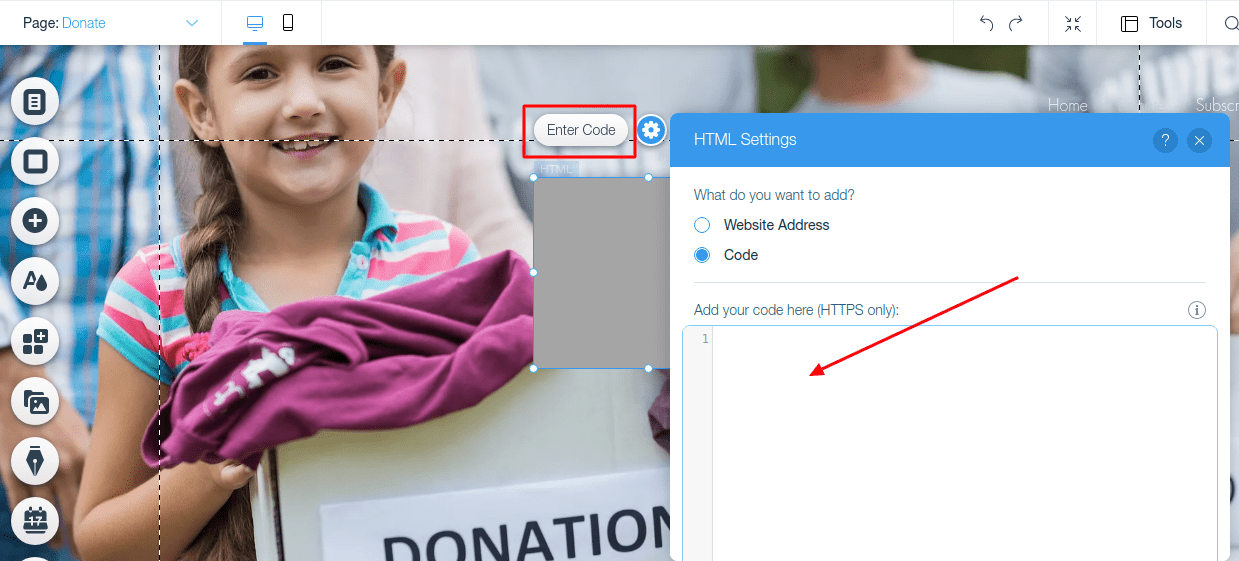
Click ‘Enter Code’. Then, paste the Donorbox form embed code under ‘Add your code here’. This is the code that you copied earlier from your Donorbox dashboard.
Next, click ‘Update‘.
Step 6
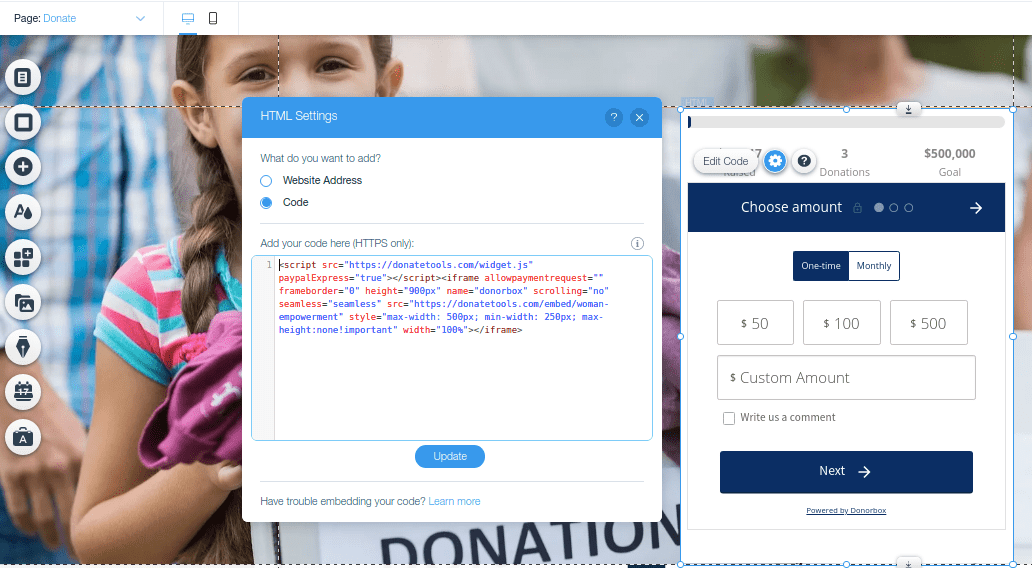
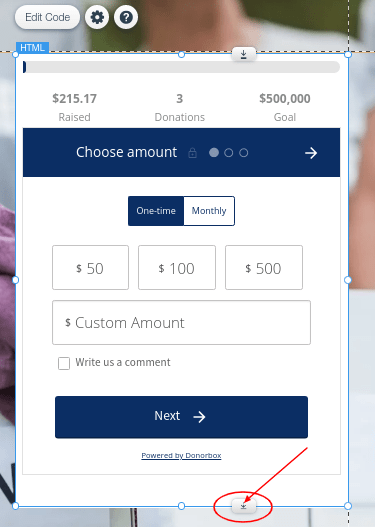
When the donation form appears, expand the code box to ensure that the entire form is visible.
Step 7
Publish your page and wait for the donations to come in!
You also have the option of installing a donation button, if you prefer. A donation button will only deploy your form when it is clicked. Check out this tutorial for step-by-step instructions.
Note: Wix also provides SSL security across all their websites.
The issue with resizing donation forms on Wix sites
Due to Wix’s iFrame embed policy, Donorbox cannot adjust the actual height or width of the donation widget container on Wix sites. So, if your widget container is smaller than the Donorbox donation form, a scrollbar will be displayed.
The scroll bar won’t block the donor from continuing with the donation. But, it can look somewhat unpolished and force the donor to scroll a bit to make their way through your form.
To get around this issue, we recommend that you increase the height or width of the widget container, using Wix’s site editor. This ensures that the donation form will have enough room to be displayed without the need for a scroll bar.
Wix Donation Form Examples
Here are 2 nonprofits that have embedded the Donorbox donation form on their Wix website.
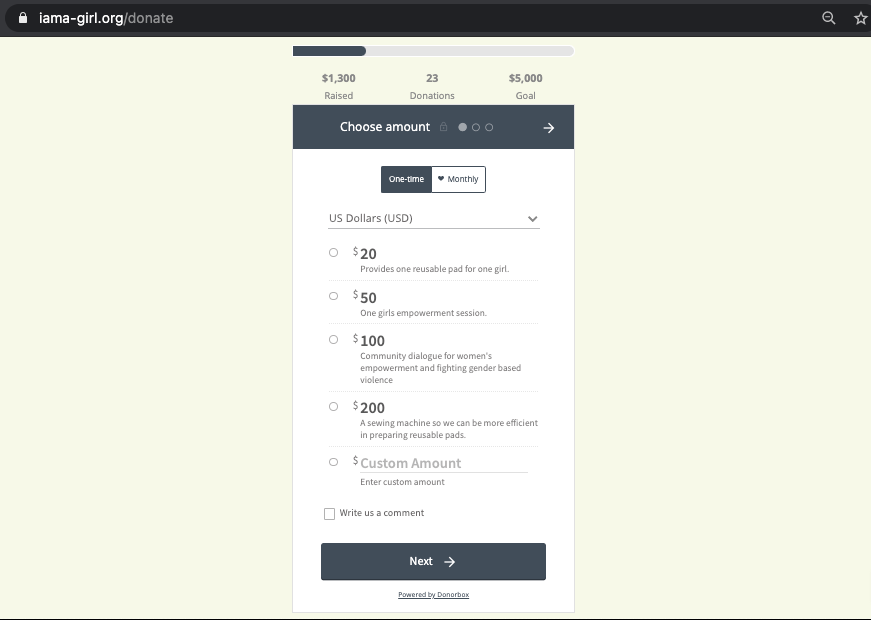
1. I AM A GIRL
I AM A GIRL helps marginalized young women with the tools they need in school. For their donation appeal, they have embedded the recurring donation form by Donorbox on their donation page.
The goal meter suggested donation amounts coupled with description for each, and the ability to choose the currency make this donation form an ideal example for you.
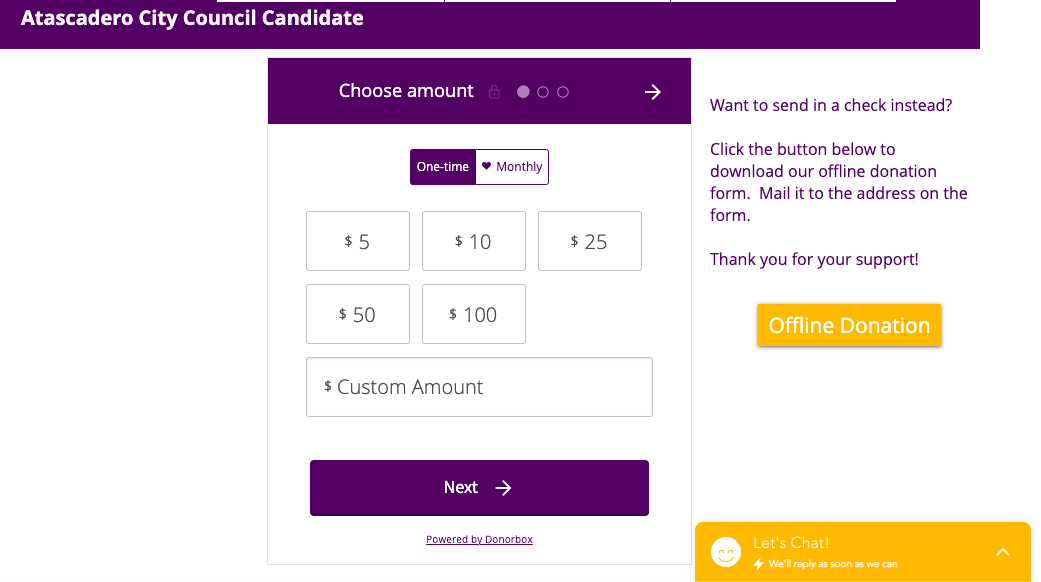
2. Tori Keen
Tori Keen was the city council candidate from Atascadero in 2020. She set up a donation page on her official website to strengthen her mission with donations from her supporters.
Here’s how the embedded Donorbox donation form looks on this Wix website.
This simple, recurring donation form gives people a convenient way to help and support the cause that they believe in.
Installing Donate Button
Based on your preference, you also have the option of installing a donate button on your website. A donate button will only deploy your donation form when it is clicked. Check out this tutorial for step-by-step instructions.
Raviraj heads the sales and marketing team at Donorbox. His growth-hacking abilities have helped Donorbox boost fundraising efforts for thousands of nonprofit organizations.