How To Install Recurring Donation Forms on Site123 with Donorbox
Looking for an attractive and effective way to accept donations on your Site123 website? Donorbox makes it easy to add a recurring donation form to your website in just a few steps. Read on to learn how to add a donation form on Site123.
Site123 is a user-friendly website builder that allows anyone, even with no website-building experience or coding skills, to build responsive websites. You don’t even need to drag and drop widgets, just use the ready-made designs and layouts, add your content, and you’re all set! You can choose to create a Site123 website for free, or to upgrade to their premium plan for $9.80 a month and benefit from a domain connection, higher bandwidth, and more storage. It also only takes a few minutes to embed your Donorbox donation form on Site123 website – keep reading to find out how it’s done.
Site123 has recently added an option to turn on SSL. To do this, go to your Site123 dashboard and click on domains. Next, hit SSL setup and choose to turn on SSL for a more secure site!
How to Install a Donorbox Form on Site123
Step 1
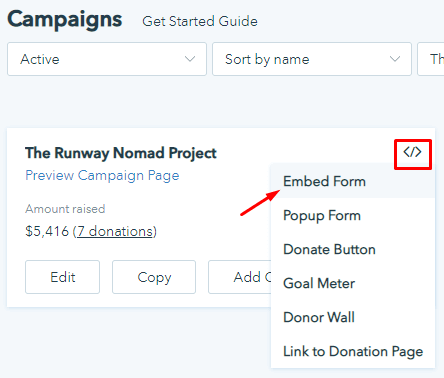
On your Donorbox campaigns page, click on the form integrations icon </> next to the campaign you want to embed. Then, select the “Embed Form” option.
Step 2
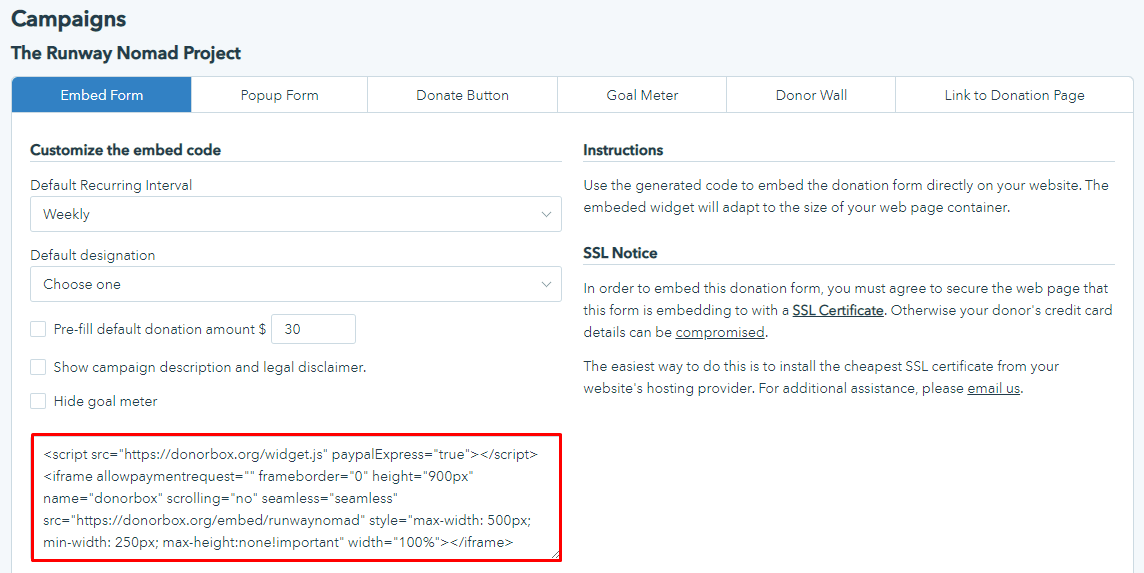
Customize your embed options and copy the auto-generated code, as shown
Step 3
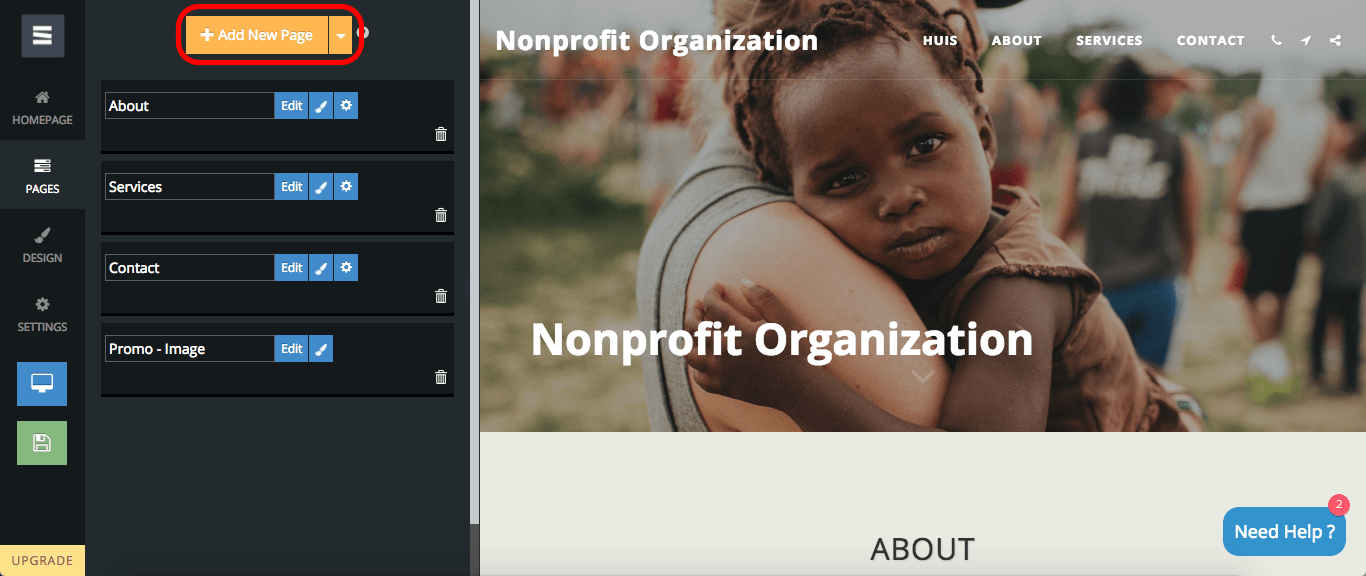
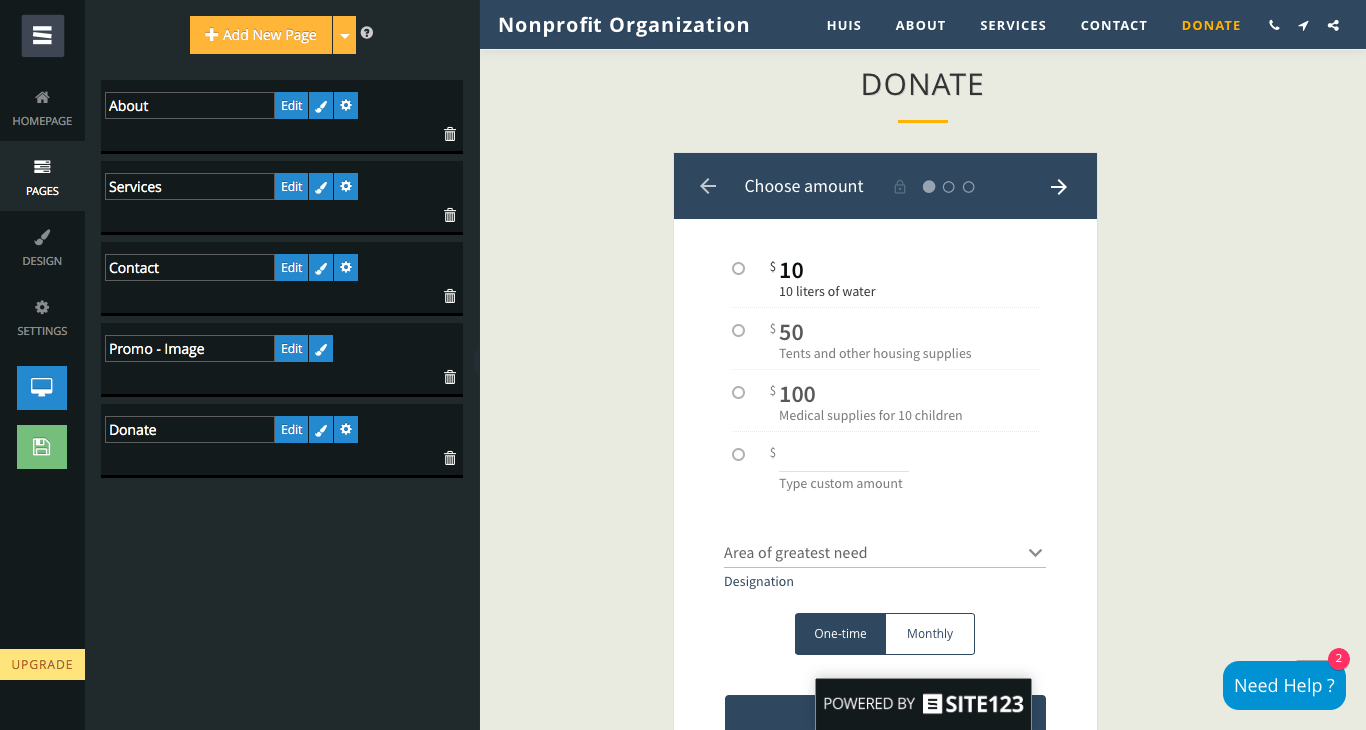
Now, head over to your Site123 editor. Click on the “Pages” tab on the lefthand sidebar, and click the “Add New Page” button to create your Donate page.
Step 4
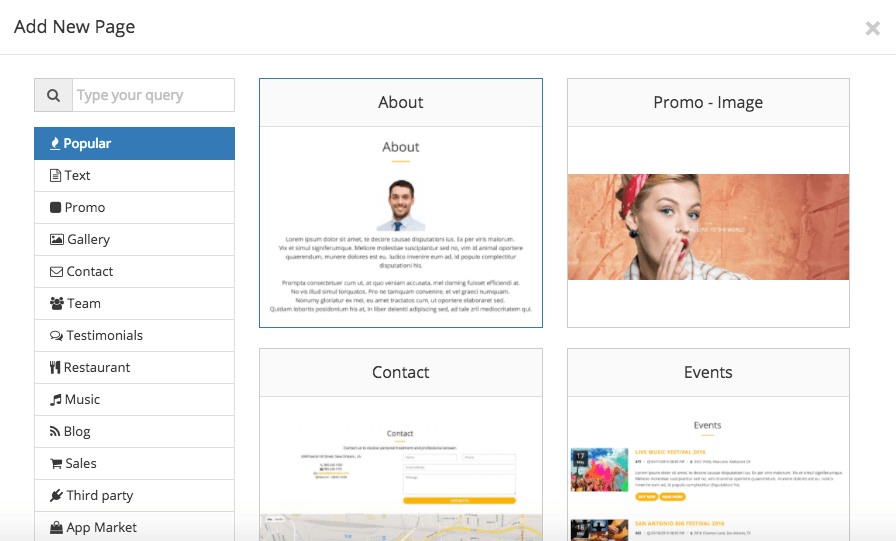
Select the first page format option, named “About”.
Step 5
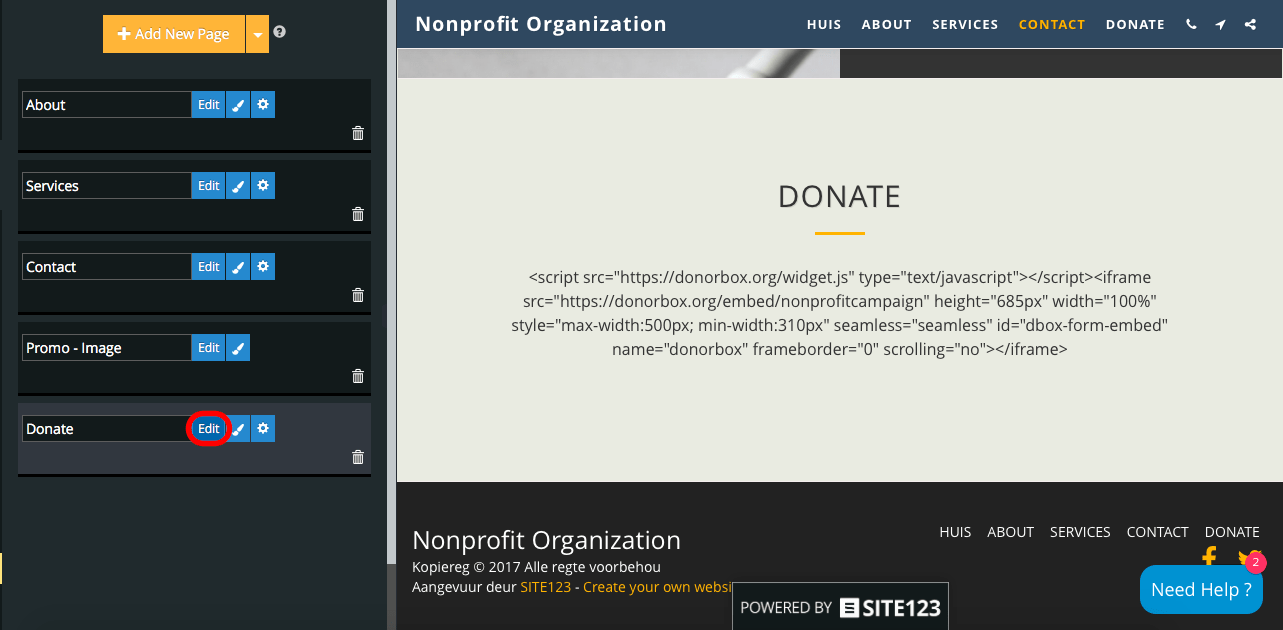
Now that your new page shows up on your page sidebar, we recommend that you change the name from “About” to “Donate”, or something else that is more relevant and appropriate. Then, click the “Edit” button.
Step 6
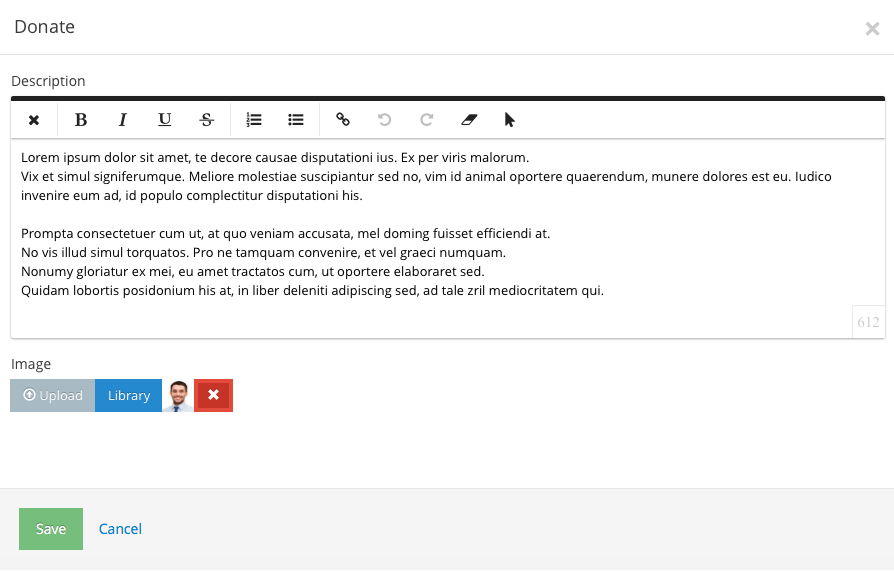
We recommend that you first remove the default picture present on the page by clicking the red “X” at the bottom of the page editor, or that you replace it with one of your own visuals.
Step 7
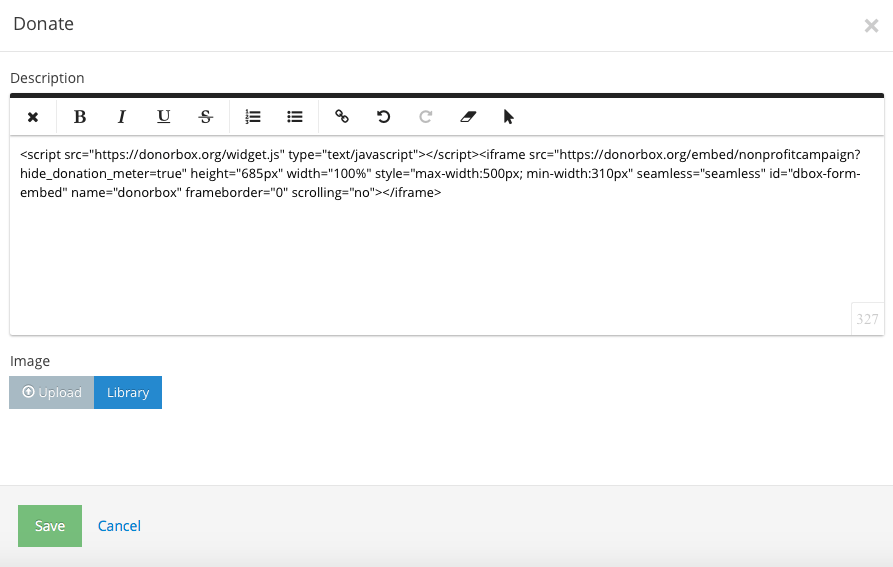
Then, paste your donation form embed code in the “Description” text box, and click the green “Save” button.
Step 8
When you return to your page editor, you will see your code written out, instead of an embedded form. But, don’t worry. Simply click the “Edit” button by the Donate page on the Pages sidebar once again.
Step 9
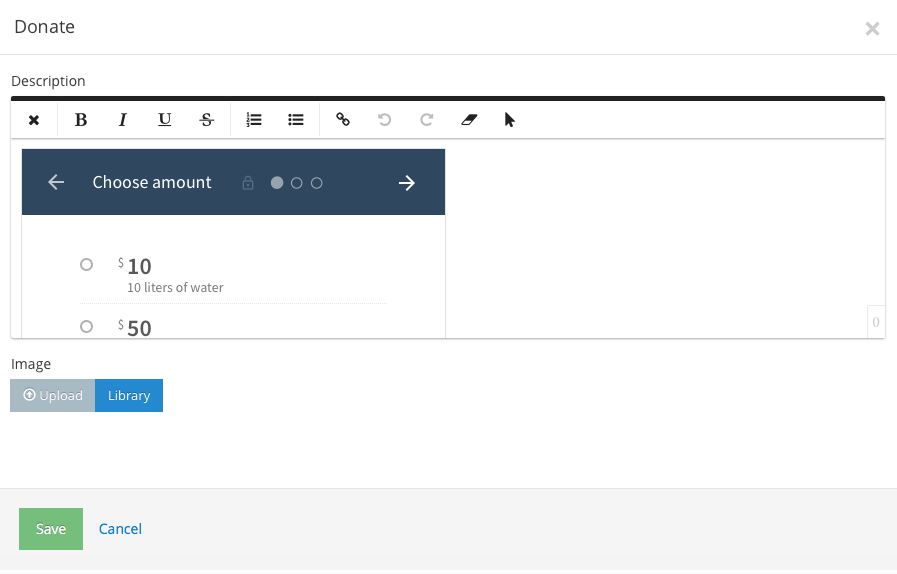
This time, the page editor will show up with your donation form embedded in the “Description” text box. Click the green “Save” button again.
Step 10
Your embedded donation form should now appear on your Site123 editor! Click the green publish button on the bottom of the lefthand sidebar to save your website.
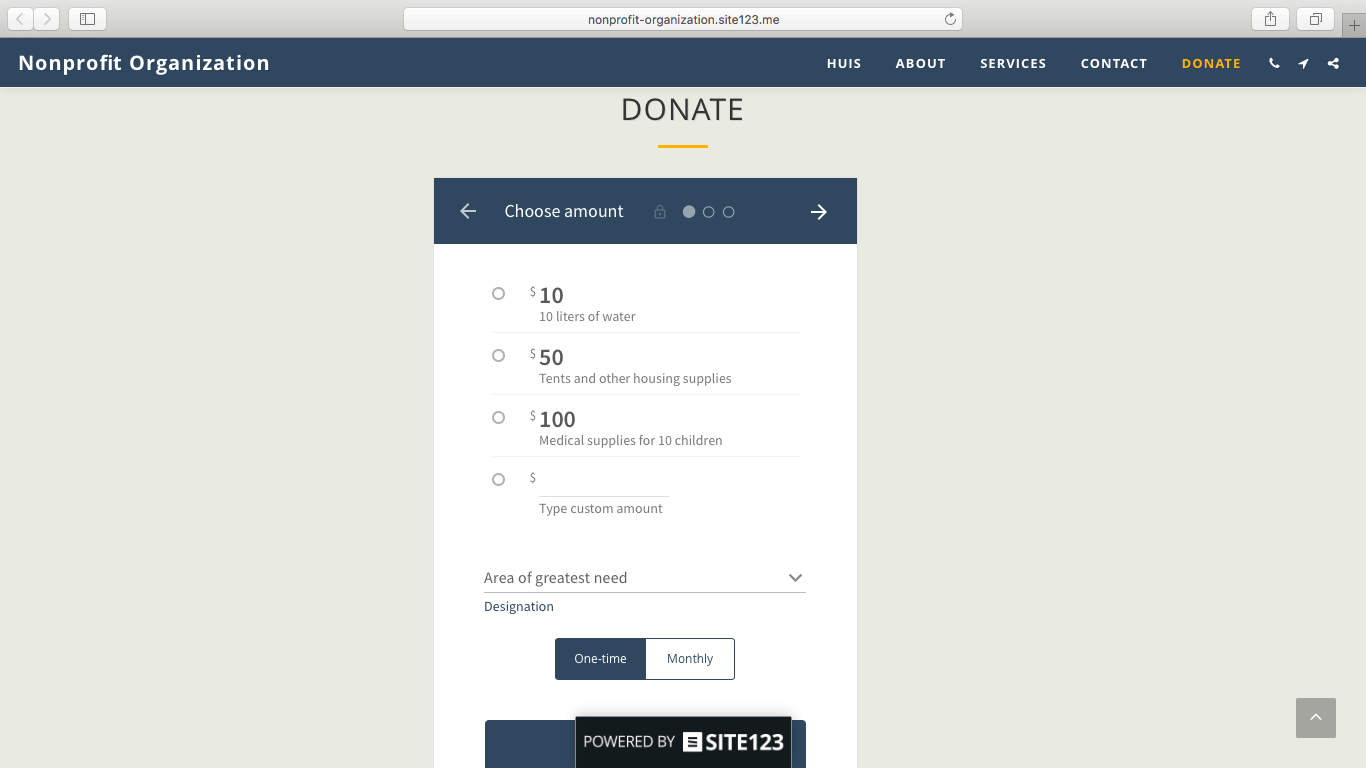
Your Donorbox donation form is now all set up on your Site123 website! Here’s a glimpse of what it should look like:
As always, you can change the color of your form to match your website design. You make this change in the “Color” tab of your Donorbox campaign editor.
Raviraj heads the sales and marketing team at Donorbox. His growth-hacking abilities have helped Donorbox boost fundraising efforts for thousands of nonprofit organizations.
 Raj
Raj