How to Add a Donate Button on Facebook in 5 Steps
Adding a donate button on Facebook can be easy. Just follow these 5 simple steps and learn how to easily redirect potential donors and followers to your Donorbox donation page from Facebook!

Adding a donate button on Facebook can be easy. Just follow these 5 simple steps and learn how to easily redirect potential donors and followers to your Donorbox donation page from Facebook!

UPDATE 04/16/2019 – Facebook has recently implemented a restriction on adding donate buttons to external donation pages. Now, nonprofits can only add a donate button to their Facebook page if they have signed up with Facebook Payments.
If you use Facebook Payments to receive donations, you can still log these donations into your Donorbox dashboard. You can add them as manual donations. All your financial records will remain balanced. Donorbox does not charge any fees for adding manual donations and your donations totals will remain accurate.
You can still add links to your donation page in your Facebook posts. If you don’t have a website, you can direct donors to your own Donorbox-hosted donation page which you can use at no extra cost.
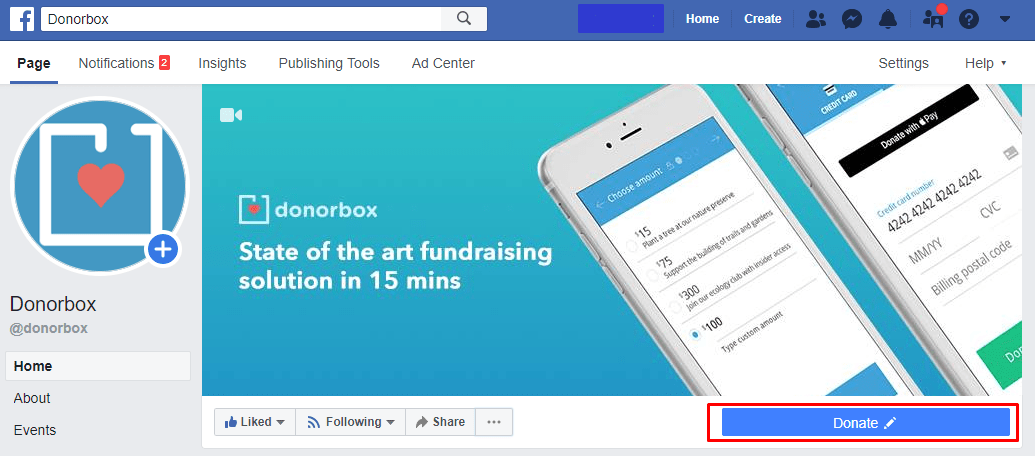
Facebook is a great way to promote your nonprofit and keep people informed. There’s even a way to add a Facebook donate button to your page. You’ll find it in the bottom right corner of your cover photo. This really helps to keep the idea of donating somewhere in your visitor’s minds as they browse your Facebook page. This call-to-action donate button for Facebook also works well on mobile.
Here’s How to Add a Donate Button on Facebook in 5 steps:
Make sure you are an admin of the page you want to edit. Click the “…” button located under your page’s cover photo. Then, click “Edit Page Info”.
Under the “General” tab, start typing “Nonprofit Organization” into the “Categories” section and select it from the dropdown list. Then, save your changes.
This is quite an important step. You must have the “Nonprofit Organization” tag in this section, or else the Donate button option will not appear later. Facebook uses this info to narrow down the selection of buttons you will be presented with later.
Now, go back to your Facebook page. Click the button labelled “+ Add a Button”. You’ll find it on the bottom right of your cover photo.
Then, choose the option marked “Shop with you or make a donation“. A small dropdown menu will open. Click the option marked “Donate“. Then, hit Next.
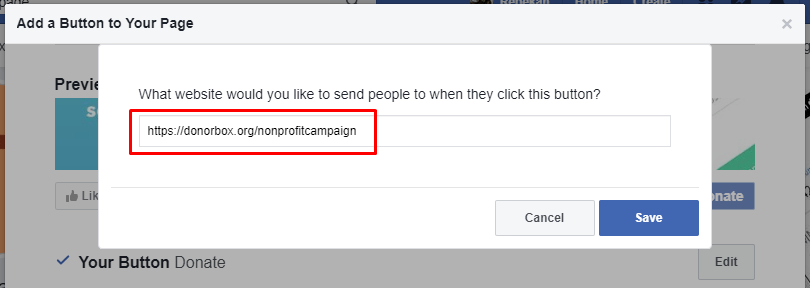
A menu will open up. This is where you can specify the link that you want the visitor to be directed to when they click your Facebook donate button. This can either be the donate page of your nonprofit’s website, that contains the embedded Donorbox donation software. Or, you can add the link to your Donorbox-hosted secure donation page.
Paste the donation link in the window, as shown above. Then hit Save.

Your Facebook donate button should be visible now when you view it. When a visitor clicks it, they will be directed to whichever link you specified in Step 5. And that’s all you need to do!


Subscribe to our e-newsletter to receive the latest blogs, news, and more in your inbox.

