Customize Your Donation Form to Match Your Nonprofit Branding
Creating a donation form that matches your nonprofit branding is a key step toward building donor trust and making your donation process more attractive for your donors. But it can be tricky to figure out how to align your donation form with your brand identity! In this article, we’ll walk you through the ins and outs of branding your donation form, including how to do it on Donorbox.
Nonprofit branding involves creating a recognizable aesthetic and feel for everything your nonprofit creates. Your logo, website, social media accounts, flyers, events, and more all add to your nonprofit’s branding. The tone of your written communications and videos all contribute to your brand, too.
But if you don’t have a brand-aligned donation form, you might miss out on a valuable tool to build stronger connections with your donors and bring in more donations.
We’ll walk you through how easy it is to create brand-centric form elements using Donorbox’s donation form builder. First, let’s look at why your donation form design is so critical.
Why Brand Your Donation Form?
While some nonprofits shy away from branding, no nonprofit can afford to avoid it completely. There are a few key reasons why it’s crucial to make your donation form design match your branding.
1. Build donor trust
Having a recognizable, trustworthy brand is the key to gaining donor’s trust – and their donations. In fact, brand-aligned donation forms receive up to 38% larger gifts on average than generic donation forms.
Why? Because branded donation forms feel more secure to donors than generic or off-site forms. When your donation form looks and feels the way your website does, a donor can be certain that their donation is going where they intend.
2. Maintain your brand
Creating a recognizable brand requires consistency. Everything your nonprofit shares with the public – and even some internal materials! – should reflect your branding.
Consistent branding builds that instant recognition that helps nonprofits grow. Think about a big brand like Coca-Cola. You can instantly picture the color of their logo and maybe one or two of their most recent ads. If they were to use a different logo on one of their new products, that lack of consistency would cause the ads to feel disjointed.
3. Ensure a smooth donor experience
The key to getting more donations is making the donor experience as smooth as possible.
Breaking your donation form down into multiple easy steps, adding quick checkout options like UltraSwift™ Pay, and providing clear instructions all improve the donor journey.
Believe it or not, donation form aesthetics matter almost as much as donation form functionality! Branding your donation form so it blends seamlessly with your website is another step to keep your donors from getting distracted.
Donorbox Donation Form Types
Donorbox donation forms offer a ton of customization options that affect the look and function of your form.
Donation forms are available in three formats:
Embeddable forms. Embed your form right on your website for a seamless donation experience.
Dynamic pop-up forms. Allow donors to give without leaving the webpage they’re on.
Donorbox-hosted forms. Donors can quickly access your form by clicking a donate button on your website.
Donorbox also offers crowdfunding and peer-to-peer pages, which are just as easy to customize to fit your campaign and your brand.
Plus, all donation forms now have an updated typeface so they’re better suited to match your website and nonprofit branding!
No matter which type of donation form you’re using, it’s easy to create a custom design using our form editor.
How to Brand Your Donorbox Donation Form
There are several ways you can create brand-aligned donation forms using the Donorbox form editor. Here are five features you can customize to create a branded donation form.
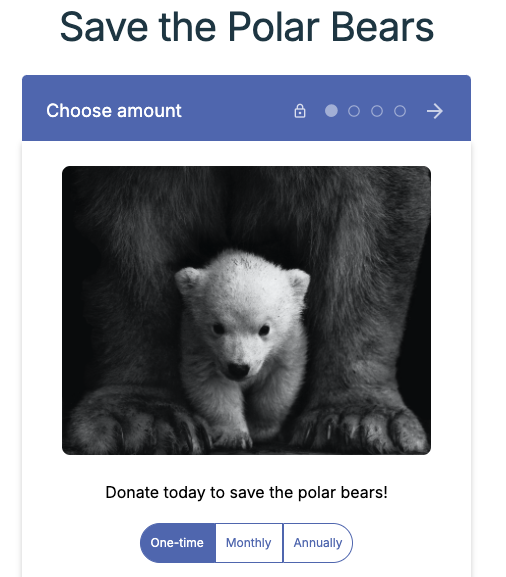
1. Share your call-to-action message
Your call-to-action message will appear right above your donation options on the first page of your donation form. This is your opportunity to repeat your slogan or carry over another part of your branding to your donation form.
We love how the National Wildlife Co-Op uses its call-to-action message to demonstrate the urgency of its donations.
Pro tip: If you’re running a fundraising campaign with unique branding, match your donation form call-to-action message to other calls to action you’ve included in your materials.
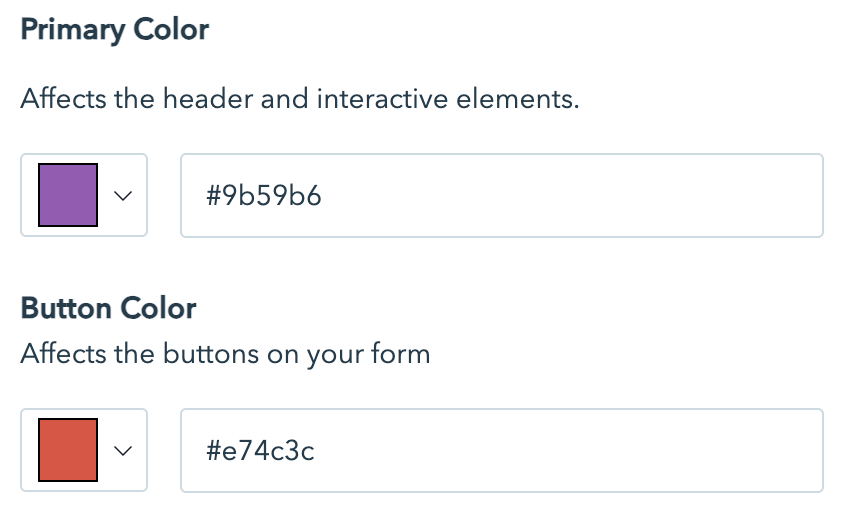
The primary color of your form affects the header and interactive elements like your donation intervals, but not your main button color. Having a different color for your buttons makes them pop, which is both aesthetically pleasing and eye-catching for your donors!
Here’s how it looks –
Typically, your primary color should be the color most associated with your branding, but you can play around to find the color pair that best suits your brand or website.
You can also choose to keep both colors the same for a uniform look.
Pro tip: To get your colors exactly right, expand the color field and find the shades that match your brand. Or simply use hex codes, a type of HTML color code, to find the exact colors your branding uses.
Since color is one of the most recognizable aspects of your nonprofit brand identity, it’s important to get it right!
Corner radius refers to the roundness or sharpness of the corners of your donation form’s buttons. Customizing corner radius can completely change the look and feel of your donation form, allowing you to create brand-aligned donation forms.
You have three options for corner radius:
Default Corners are the default for Donorbox forms, with a three-pixel border radius.
Sharp Corners remove any border radius, making the form fields more square.
Round Corners apply a more rounded shape to the form fields wherever possible.
Selecting your preferred corners is easy! From the donation form editor, simply use the corner radius drop-down to select your preference.
Here’s how a donation form with rounded corners looks –
Choosing the right corners for your custom-design donation form will help it match any style on your website. For example, if your website uses primarily rounded buttons, rounding your donation form button will better align with that aspect of your nonprofit branding.
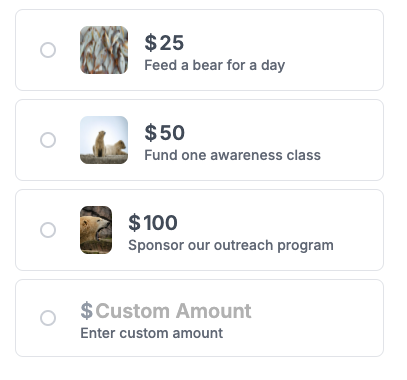
4. Add images
Donorbox Pro and Premium users have the option to add additional images to their donation forms. These images include:
A header image to make your form pop and to connect with the emotions of your donor.
A trust badge image to share certifications like your GuideStar seal and show off your credibility as an organization.
Donation amount images to demonstrate the impact of giving at each level.
These additional images make your donation form even more dynamic and enticing for your donors!
You can add a trust badge image and a header image on the Essential page of your donation form editor. To add donation amount images, continue to the Amounts page. If you don’t have a Pro or Premium plan, you can still add these images to your form to see how it looks – your changes won’t save, however. You can upgrade your Standard plan at any time on the My Plan page in your Donorbox account.
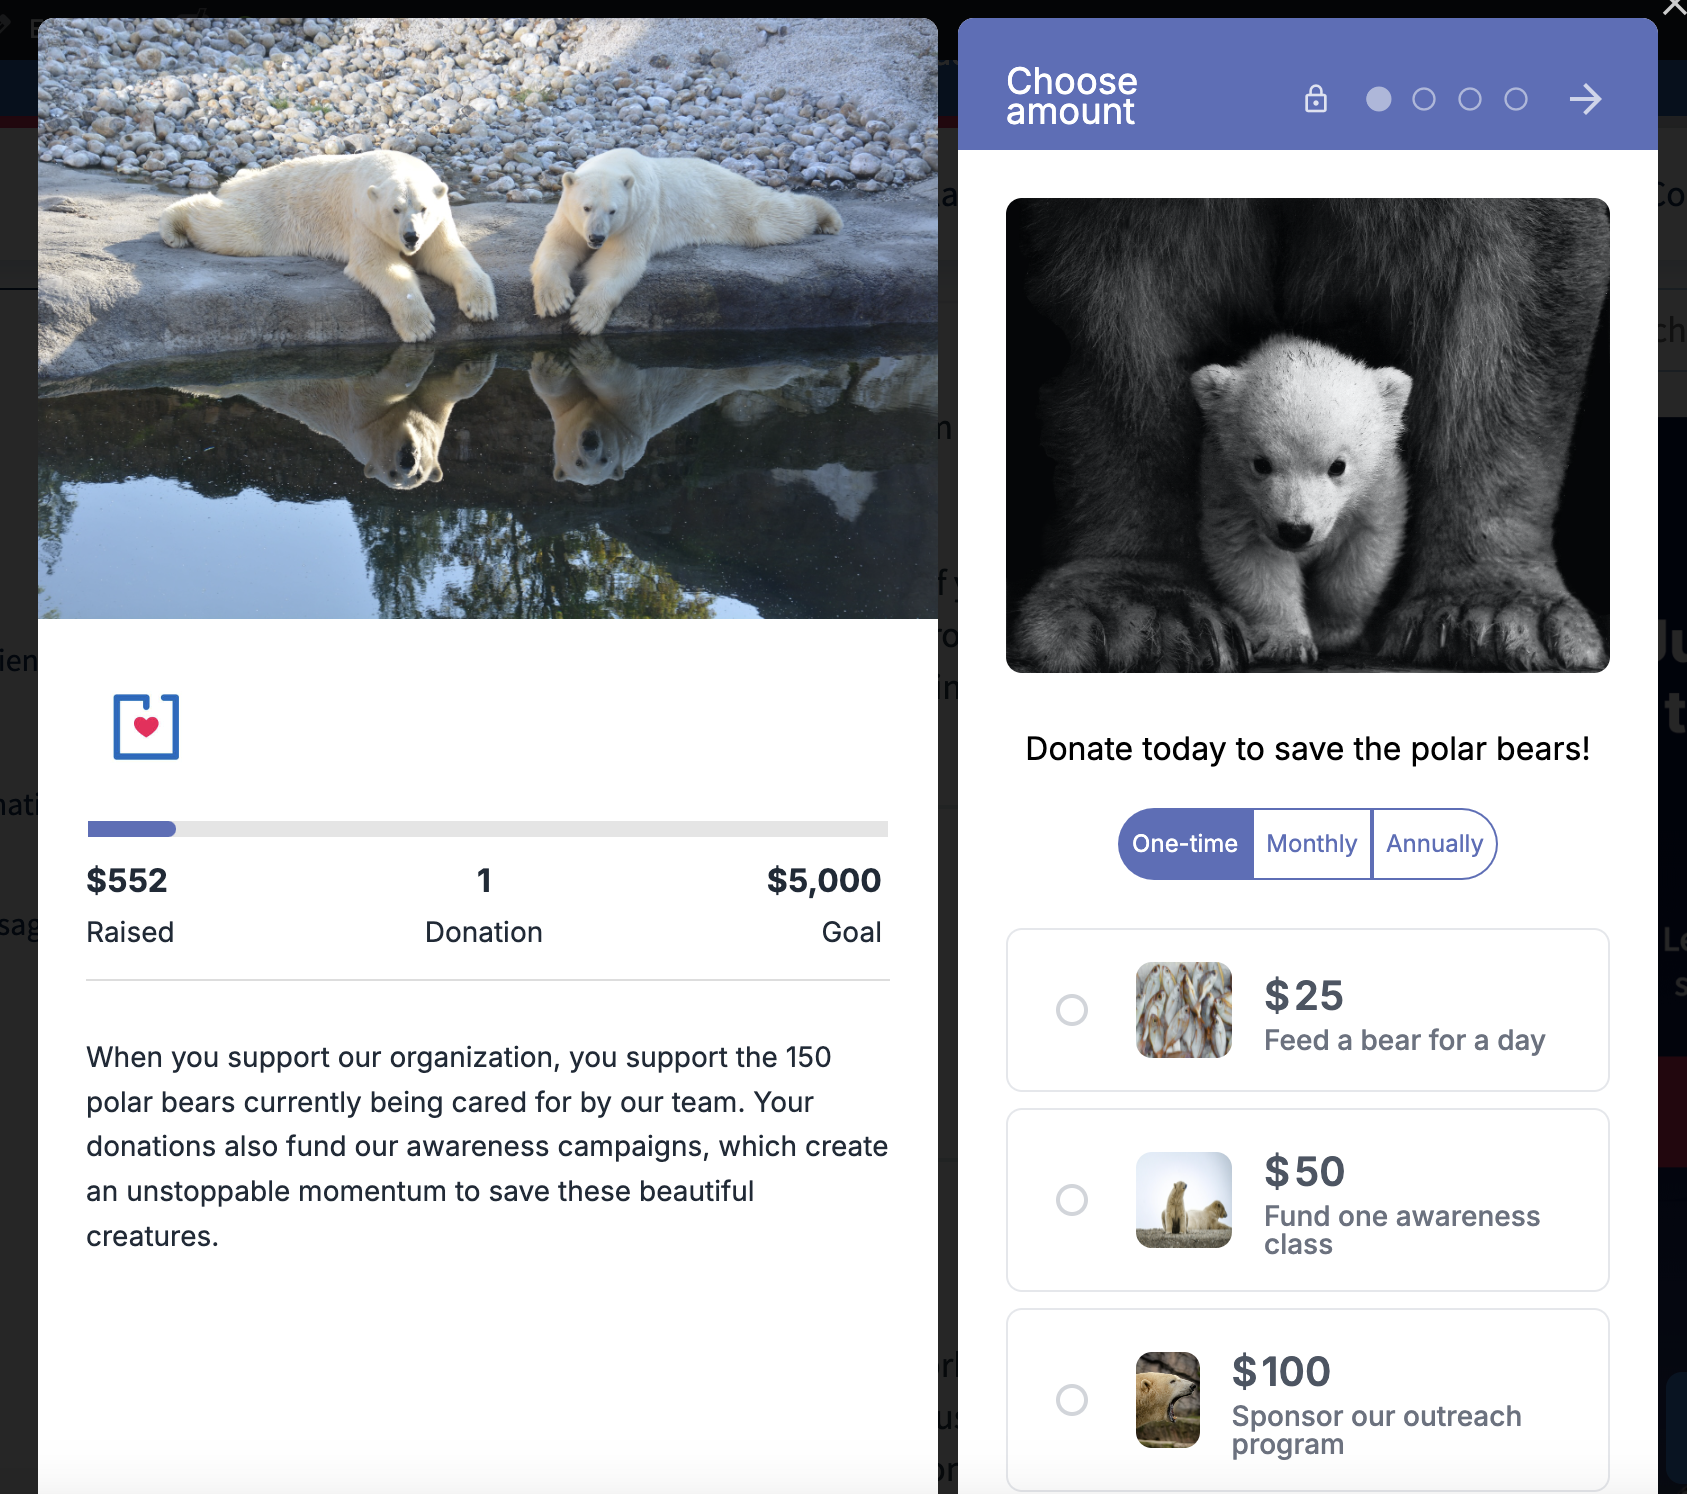
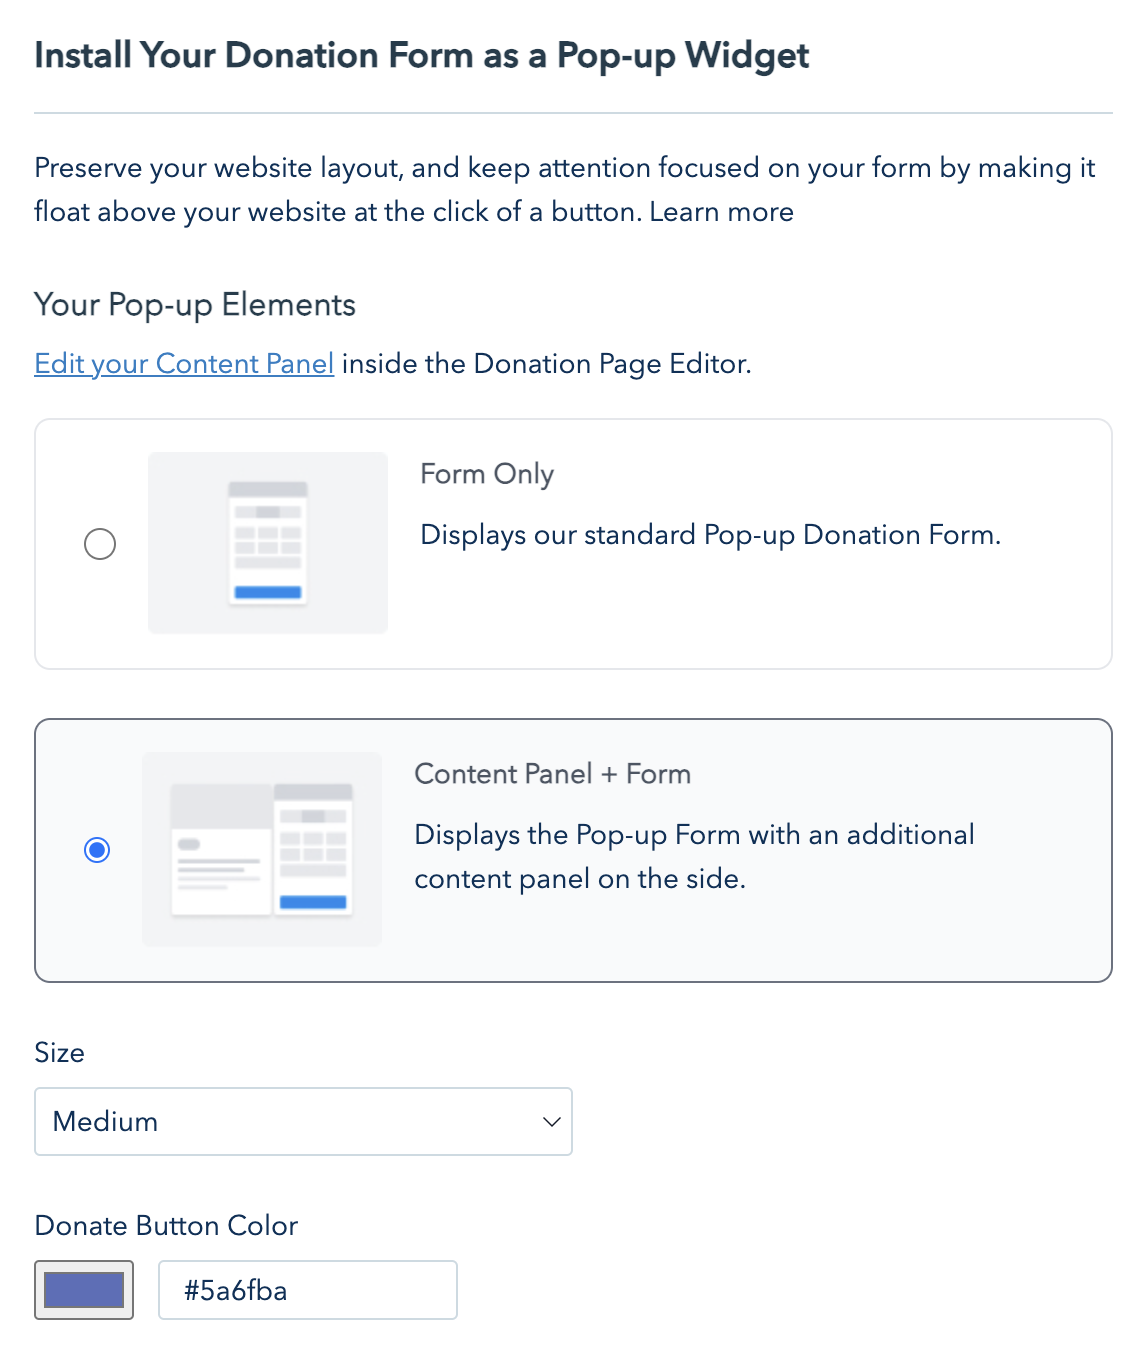
5. Include a content panel
Pro and Premium users can also add additional context to their pop-up donation forms by adding a content panel. Your donors can read your fundraising story and make their gift – all without navigating away from the webpage they’re visiting.
To add this content panel, simply toggle the option from your campaign Launchpad. The content is pulled from your donation page, so you can edit your copy and upload images in your donation page editor.
Upgrade to Pro or Premium today to access these features!
If you choose to host your donation form on Donorbox, you can add a custom domain to help build your brand recognition and donor trust. This means that donors don’t leave your website to make a donation on your Donorbox-hosted donation form or page.
To create a custom domain, you first need to have a Donorbox Premium account. A Premium account offers personalized support and advanced features to help you reach – and surpass! – your fundraising goals.
Once logged in, you can simply go into the Integrations and Add-ons section of your account to activate your custom subdomain and domain.
Learn more about how to set up custom domains in this blog.
7. Change “Donate” labels
Depending on your preference, you may want your call-to-action buttons to say something other than “Donate.” With your custom donation form design, you can choose to change those buttons to say “Give” or “Pay.”
While “Donate” is the default choice, you always have the option to change your call-to-action labels based on your nonprofit’s branding or the branding of a specific campaign. For example, if one of your campaigns is selling t-shirts, it might make more sense to ask users to “Pay” instead of “Donate.”
Over to You
Donor-friendly form branding is all about making your donation form match the look and feel of your nonprofit without sacrificing utility. Form layout and design are still crucial for securing more donations – and adding your nonprofit branding is the key to building donor trust.
When donors recognize your donation form, they are more likely to give and give more. Plus, an aesthetically pleasing, branded donation page streamlines the donor experience and keeps them from getting distracted. This builds your nonprofit’s brand as a reliable and trustworthy organization!
With Donorbox, it’s easy to make tailored giving forms for any campaign. Adjust the colors, button roundness, call-to-action messaging, button labels, and domain to make your donor’s experience as smooth and attractive as possible. Plus, enable features like UltraSwift™ Pay to make the checkout process four times faster and QuickDonate™ to allow donors to give again with one click via their donor portal.
Ready to get started? Sign up today and create your brand-aligned donation form in less than fifteen minutes.
For more tips, check out the rest of our Nonprofit Blog. Subscribe to our newsletter for curated content delivered to your inbox every month!
Lindsey spent years wearing many hats in the nonprofit world. Whether she was helping arts nonprofits with their messaging and content, planning a fundraising gala, writing an NEA grant proposal, or running a membership program with over 400 members, she learned how to navigate – and appreciate! – the fast-paced world of fundraising. Now, she loves sharing those hard-earned lessons with the Donorbox community.