Your donors want to receive engaging content from you that demonstrates the impact and importance of your mission. But sometimes they won’t go out of their way to sign up for your regular newsletter and other emails.
That’s where Donorbox makes things easy! Donors can subscribe to your mailing list right on your donation form to stay in touch and follow your important work.
Here’s how to enable this handy feature.
Ask Donors to Join Your Mailing List
Collecting donor emails for your mailing list is easy on Donorbox. Just follow these steps and you’ll be on your way to more meaningful connections with your donors!
1. Sign in to Donorbox and choose your campaign
Log in to your Donorbox account. From the menu on the left-hand side of your screen, click “Campaigns.”
Select the campaign you want and click “Edit Campaign.”

2. Locate the mailing list option
From your campaign dashboard, scroll down to the “Receipt Emails & Mailing List” option. Click “Mailing List.”

3. Enable mailing list subscription and customize text
Scroll down in the left-hand section of the page to find the mailing list block. Here, you can toggle the switch to ask donors to subscribe to your mailing list and customize the prompt text.

You can also choose to subscribe donors to your mailing list by default. Note that this cannot be checked by default if your form needs to be GDPR compliant.
4. Locate these responses
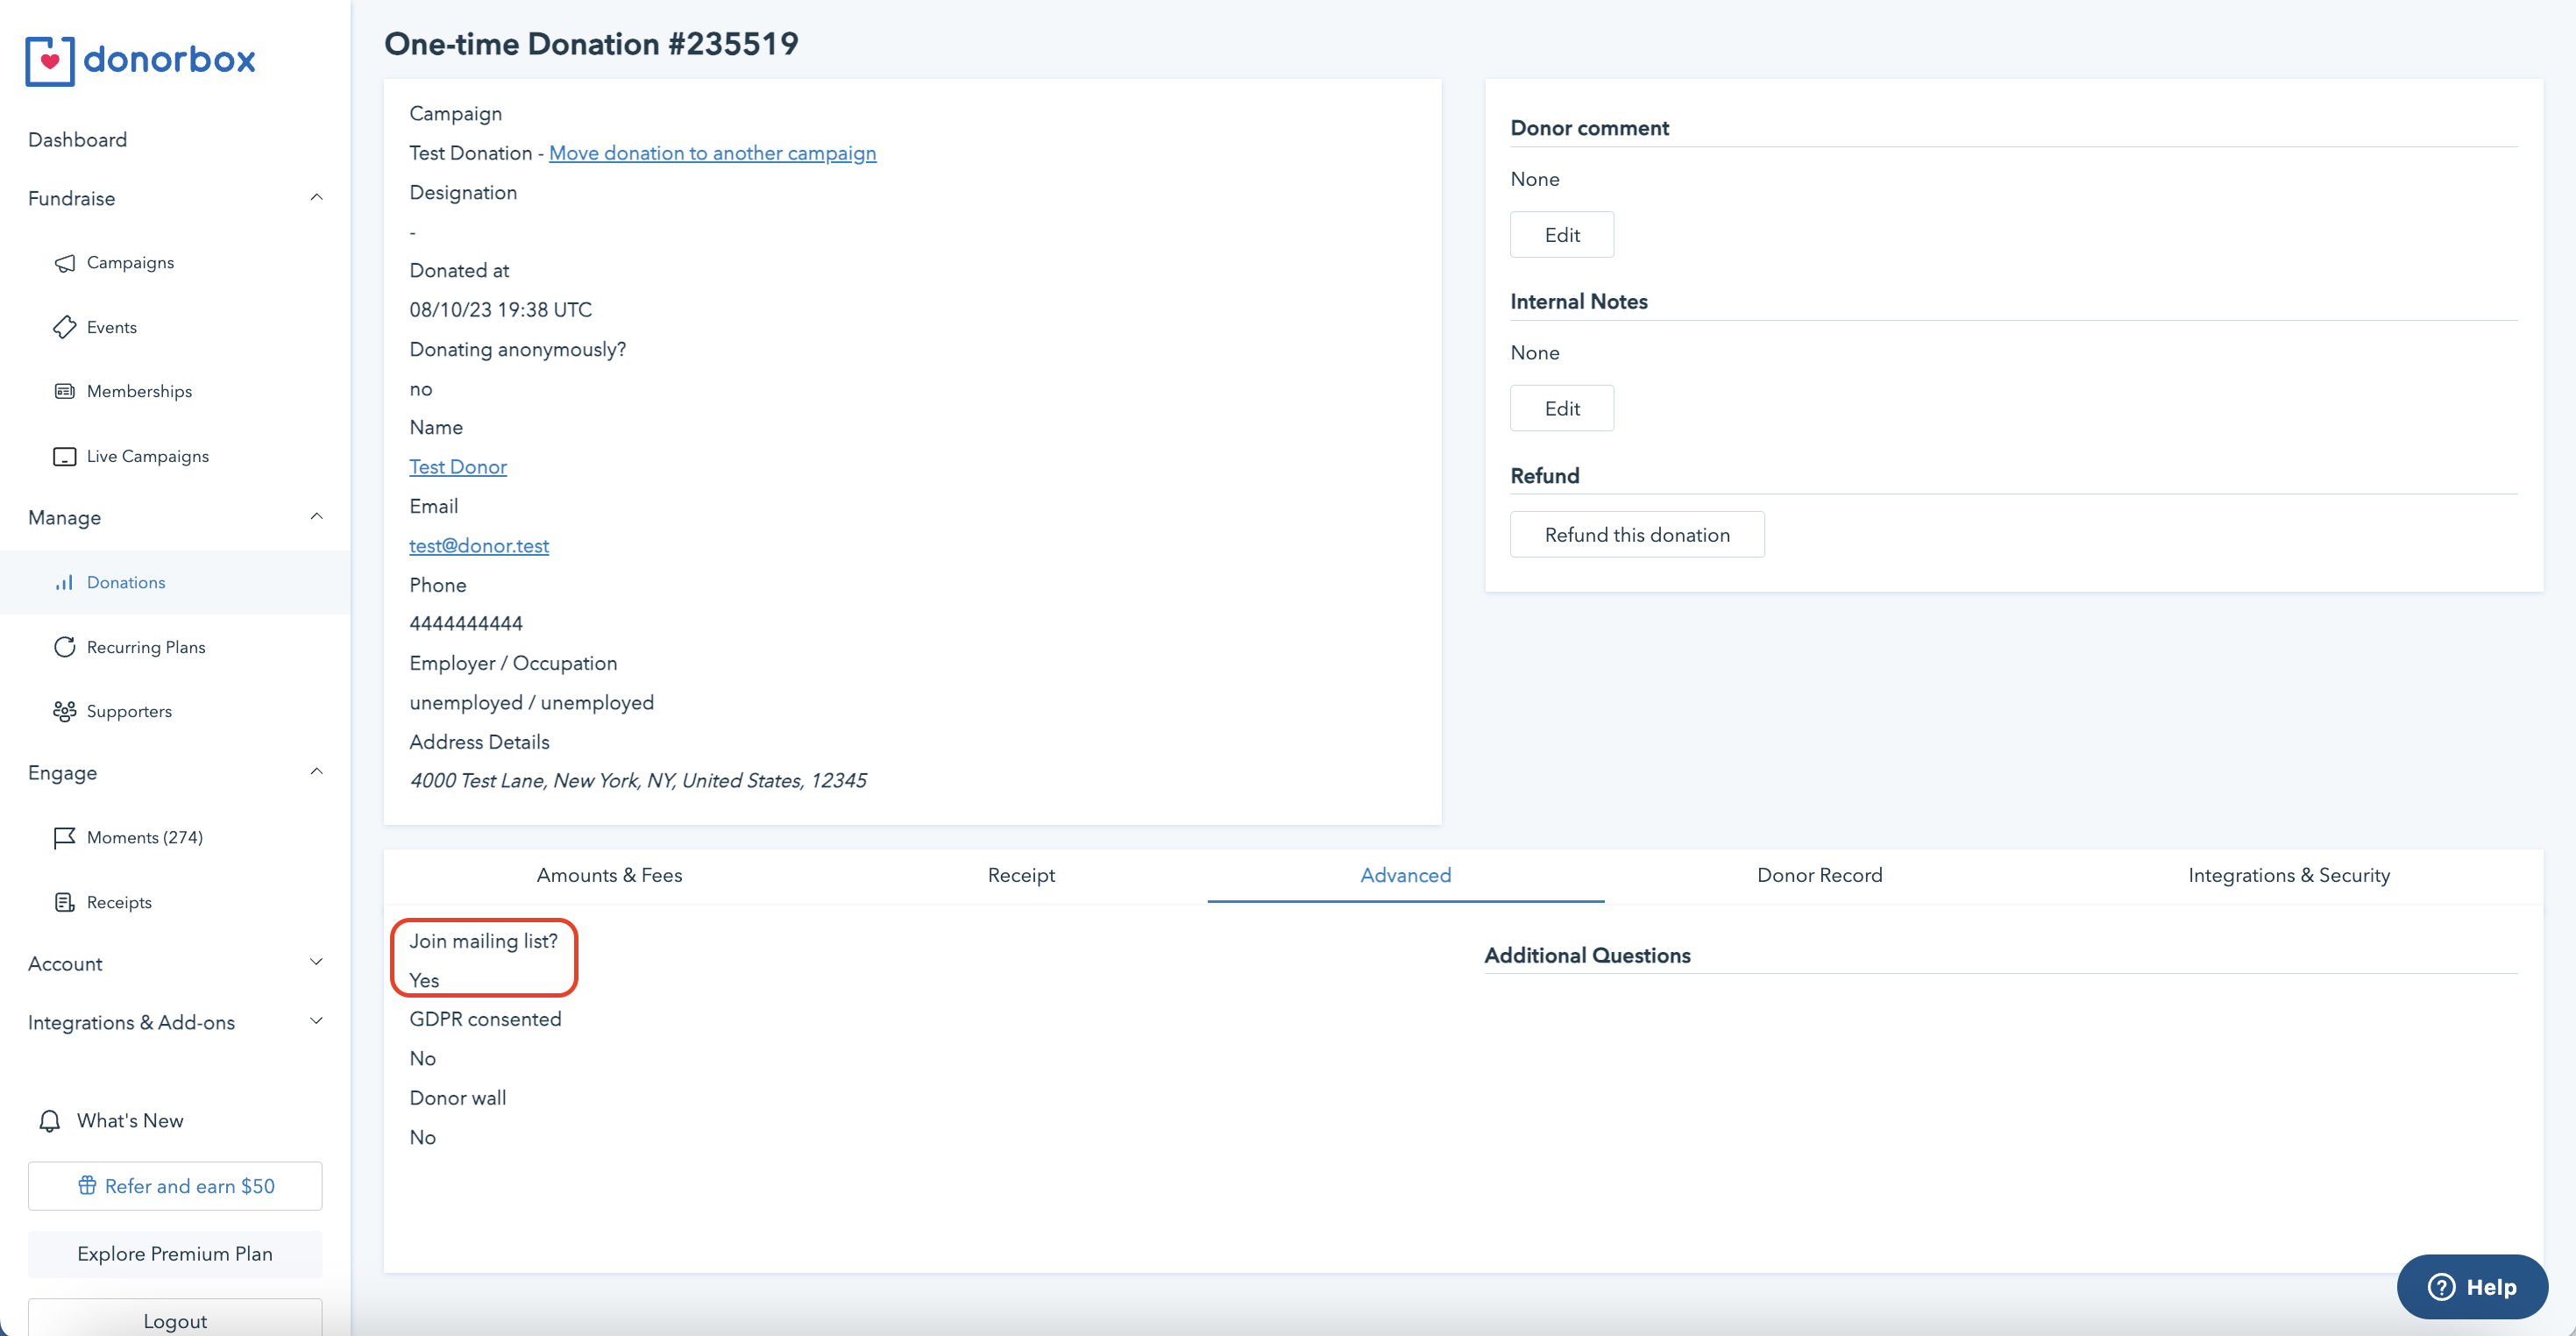
Once you enable the option to subscribe to your mailing list on your donation form, you can locate these responses in your Donorbox account.
On the menu on the left-hand side of your screen, go under “Manage” and click “Donations.”
From there, you’ll see all your donations. Click the expansion button on a donation to see more details as shown below.

This screen includes all information submitted by the donor through your donation form. Click “Advanced” on the menu at the bottom of the screen. Here you’ll be able to see how your donor responded.

This response will also show up when you export your donation data to a CSV file so you can easily pull this data in a batch.
If you are using our powerful integrations with MailChimp, ActiveCampaign, the “Subscribe to mailing list” field is quite useful. If this field is on but your donor does not subscribe to your mailing list, Donorbox will not export their email. This means less list management for you!
Over to You
Getting more mailing list subscribers is just a few clicks away. Adding this option to your Donorbox donation form is a smart choice because it allows interested donors to stay even more connected with you through meaningful content.
Now – what to send them? Check out these seven best practices for nonprofit newsletters or read our ultimate guide on church newsletters. For more fundraising tips, check out our Nonprofit Blog.

Raj
Raviraj heads the sales and marketing team at Donorbox. His growth-hacking abilities have helped Donorbox boost fundraising efforts for thousands of nonprofit organizations.


