Webflow is a website builder that has been growing in popularity in recent years. It bills itself as “production-ready experiences without coding” and uses a drag-and-drop system.
Webflow is a great option for building an attractive nonprofit website that converts more donors.
Adding a donation form on Webflow is quick and simple — we’ll walk you through how to do it.

The Benefits of Using Webflow
Webflow helps you quickly build a responsive website for your organization. It bridges the gap between design and development.
You can easily add active installations to create a visually appealing website — even with no coding experience.
This is great news for smaller organizations with modest budgets.
You can host your site through Webflow or export the code to another host.
How to Install a Donation Form on Webflow
You’ll need to have a paid Webflow account or a project with an active site plan to embed content. This includes donation forms.
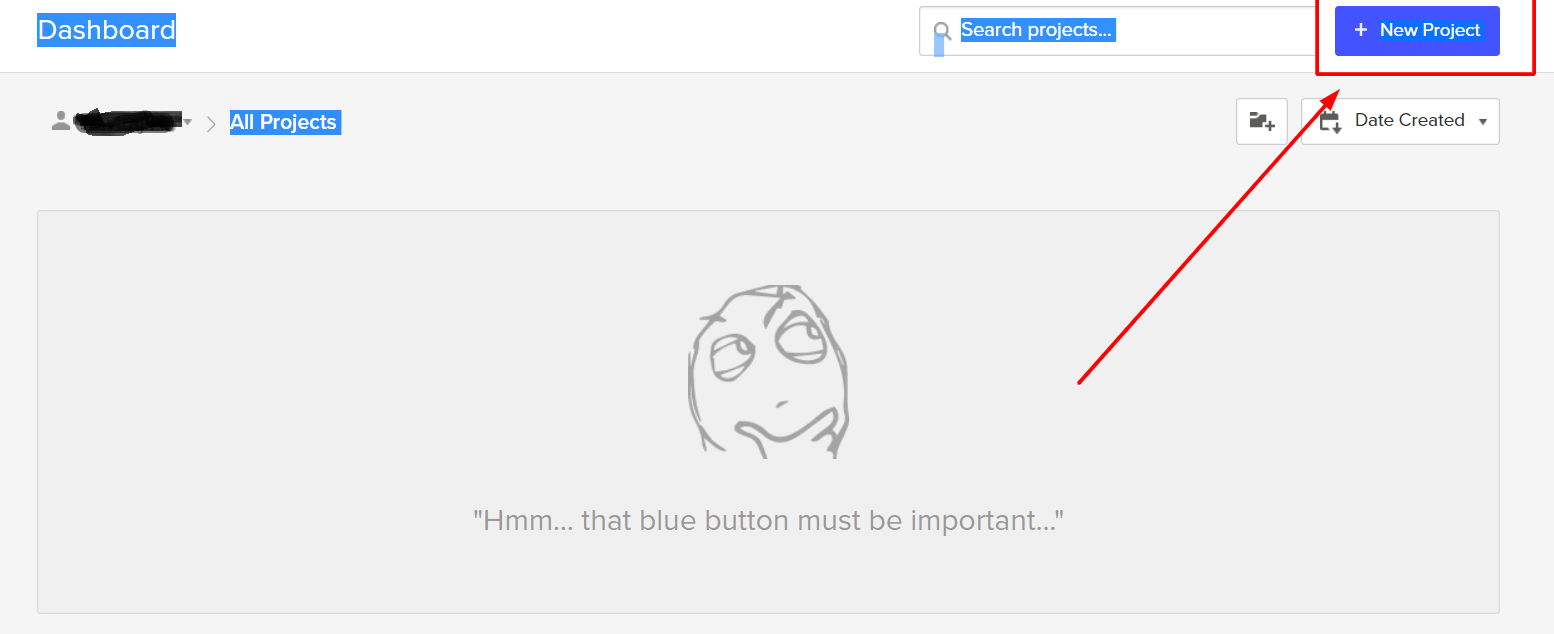
Step 1
Log and Create a New Project
Once you’ve created a Webflow account and accessed your Dashboard, you’re ready to create a new project.
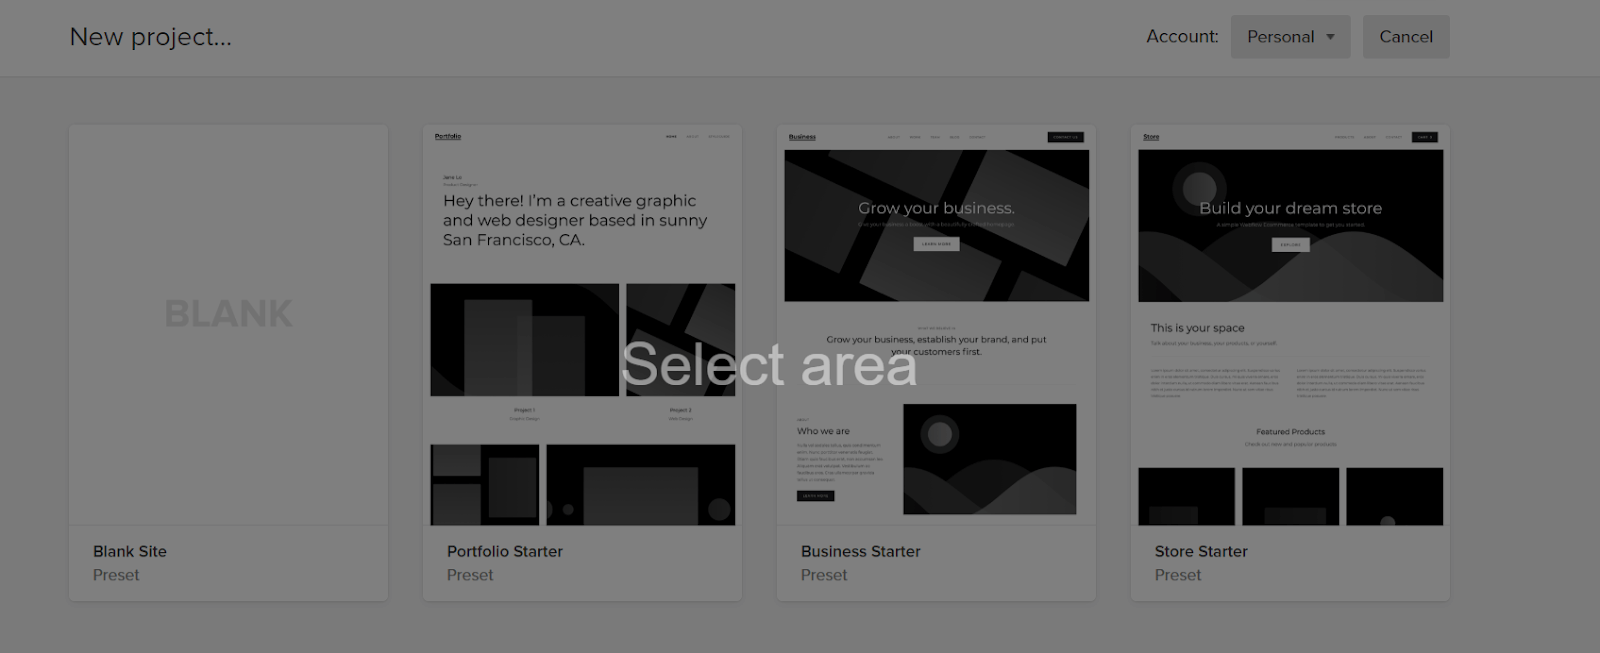
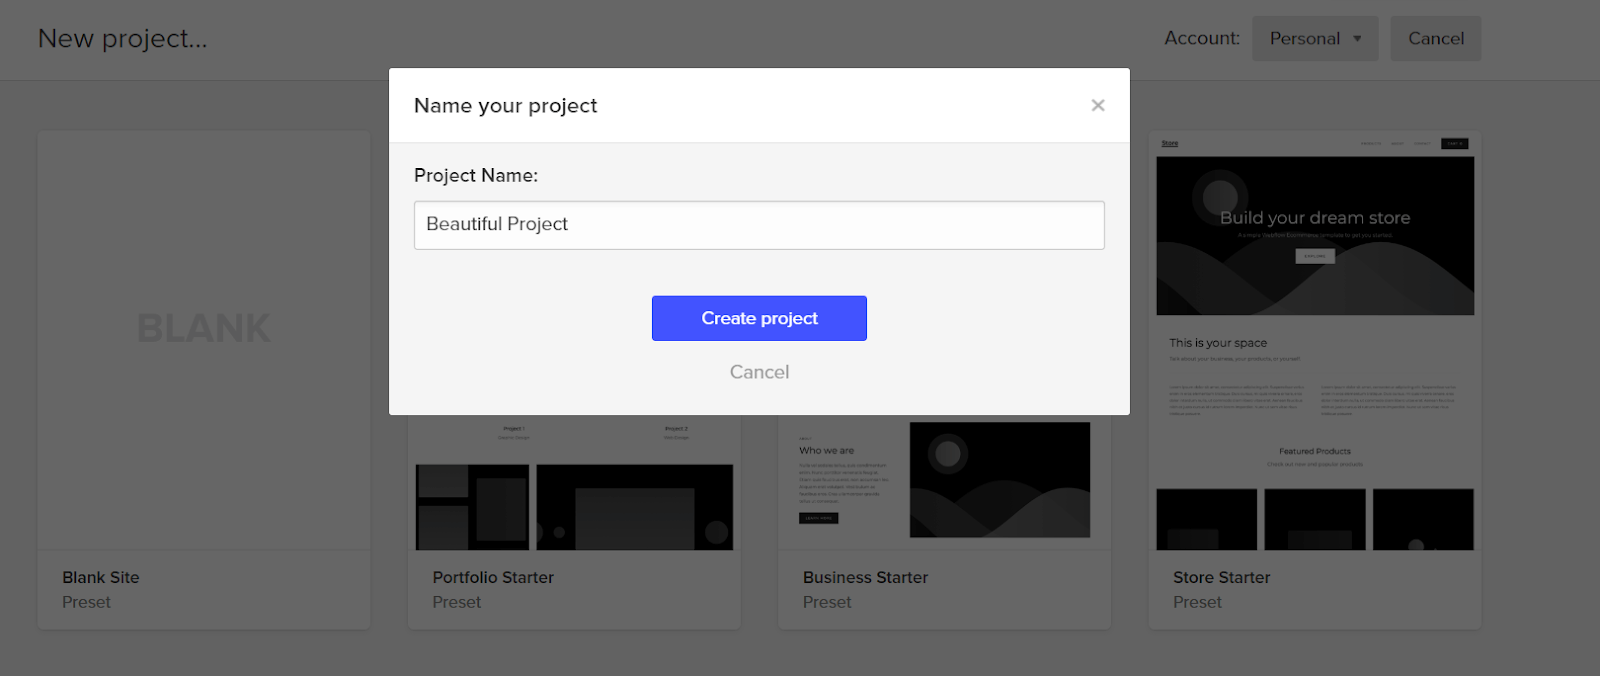
Step 2
Choose a Project Theme
You can choose from free or paid themes. You’ll need to be on certain plans to embed a donation form.
Select a project and give it a name.
Step 3
Add a Donate Page
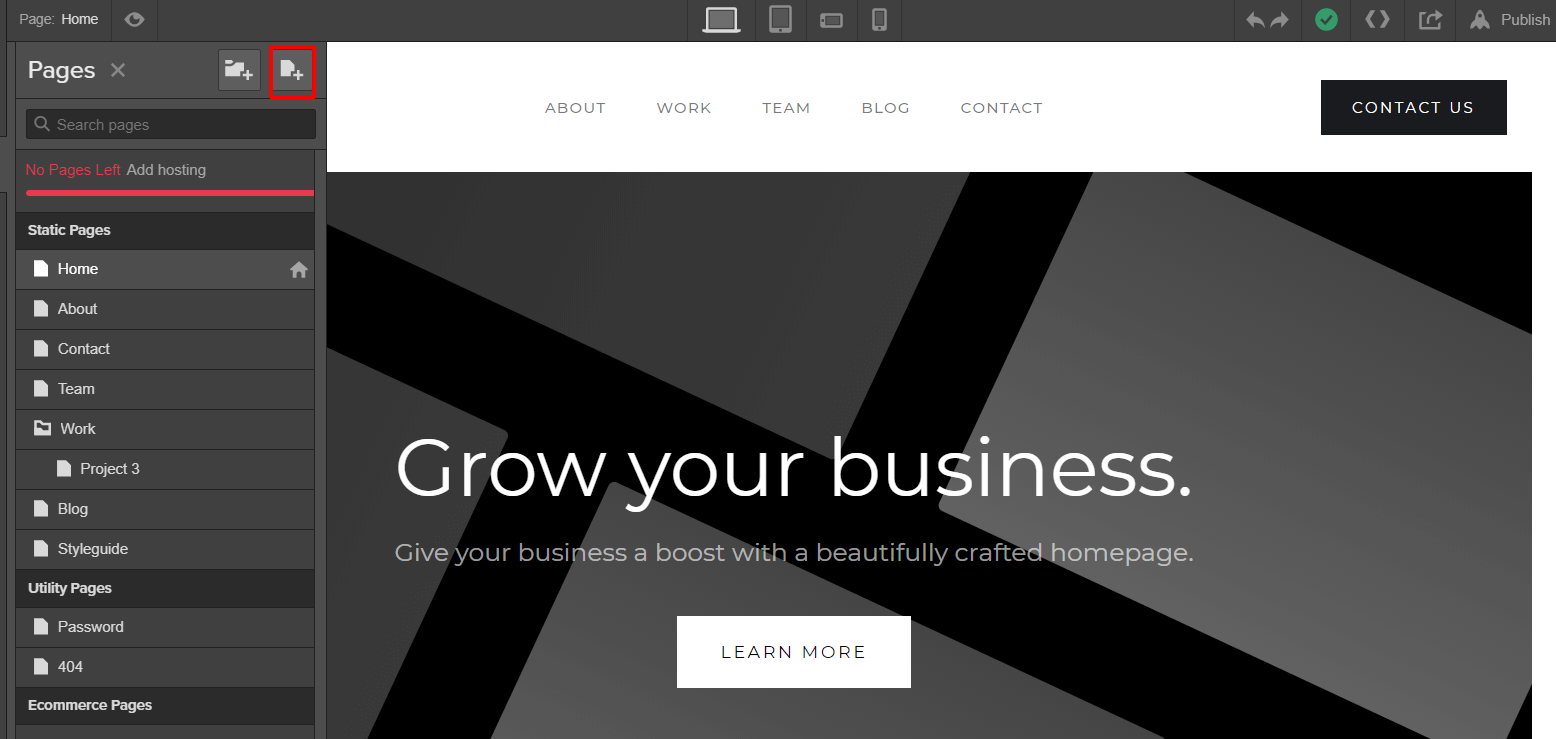
The next step is to add a new page to your site. You can add a donation form to this page once it’s set up.
Clicking on the white-paper icon on the left-hand side of the Pages menu lets you add a new page.
Give your page a name and add any other important details.
Step 4
Embed Your Donation Script.
Once you’ve set up a page to add your donation form, you can embed it.
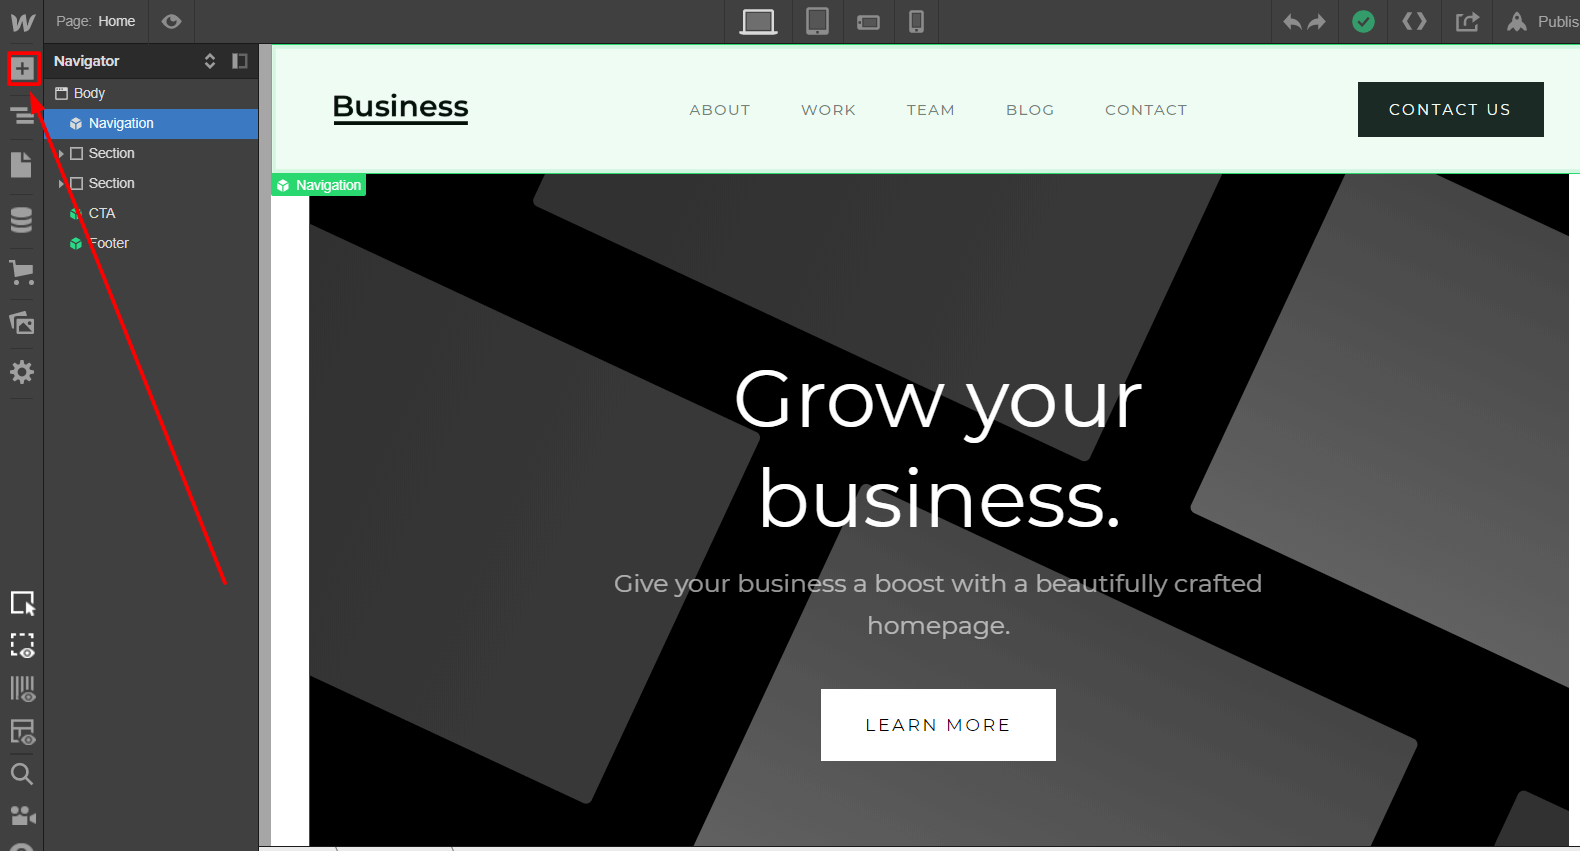
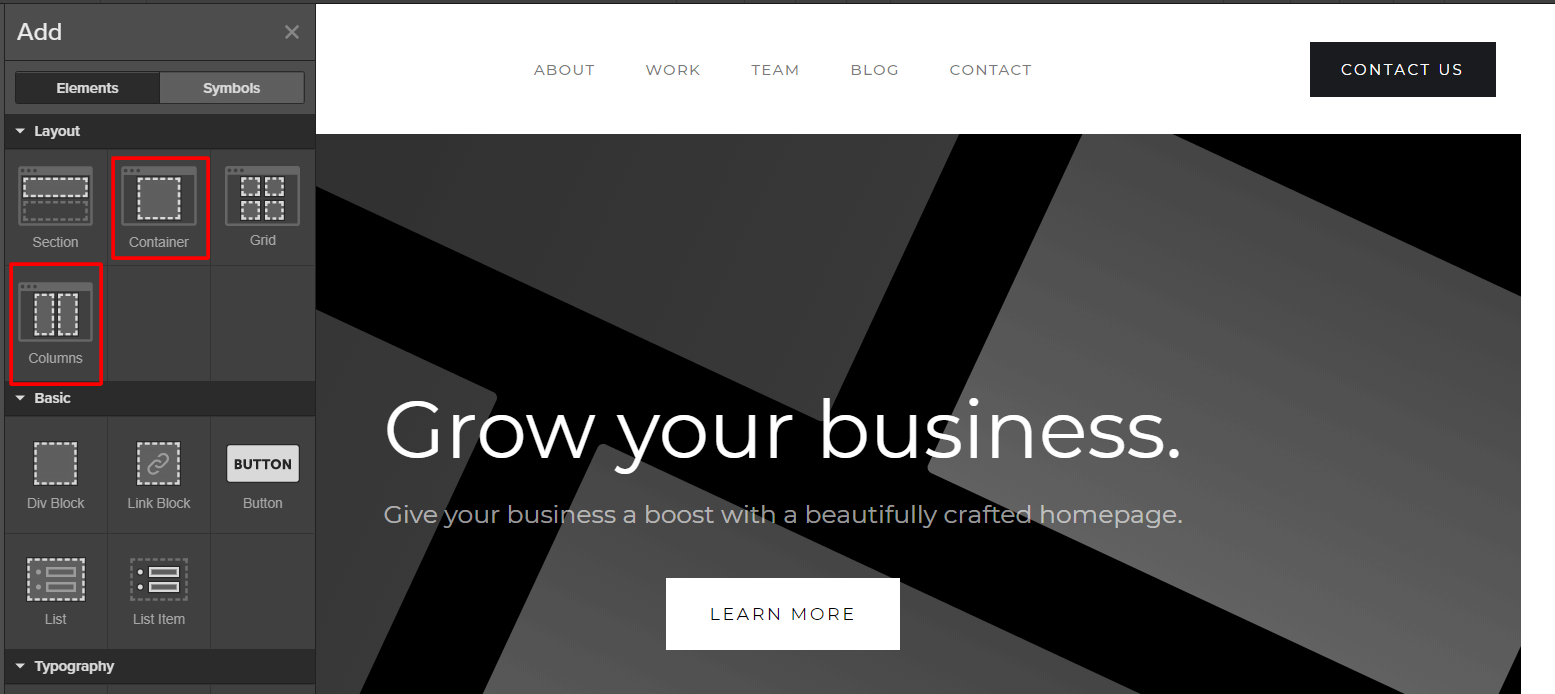
Click Add to set up a new Element and scroll down to select the Embed option.

Copy and paste your donation form script into the box. Not sure where to find your donation form script?
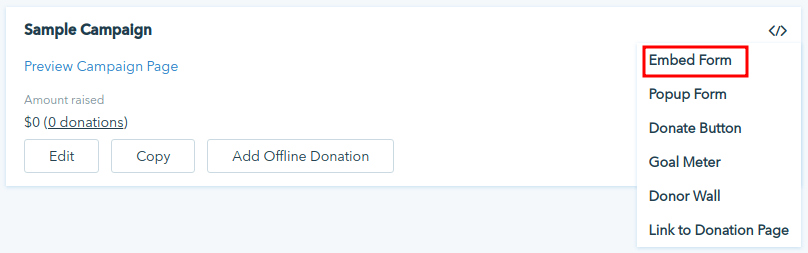
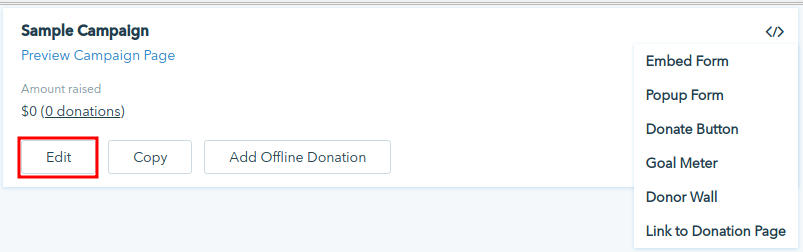
If you’re using Donorbox, go to Campaigns.
 .
.
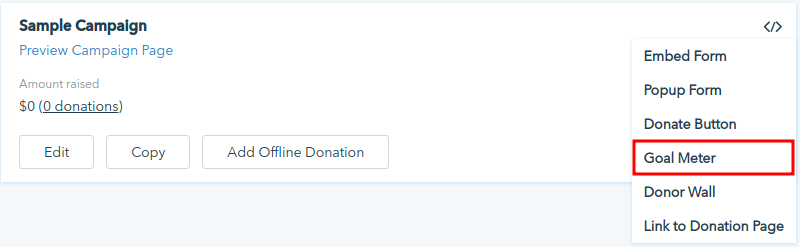
Choose a form of your preference and click on the angle braces button.

After that, click on “Embed Form”:
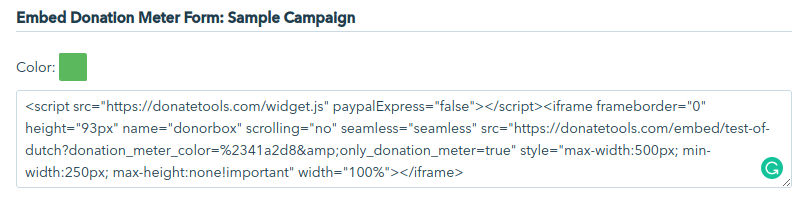
You will be redirected to a page with the embedding code. Now, all you have to do is to copy the lines on the “Customize the embed code” and paste it into the Embed form on your Webflow site.
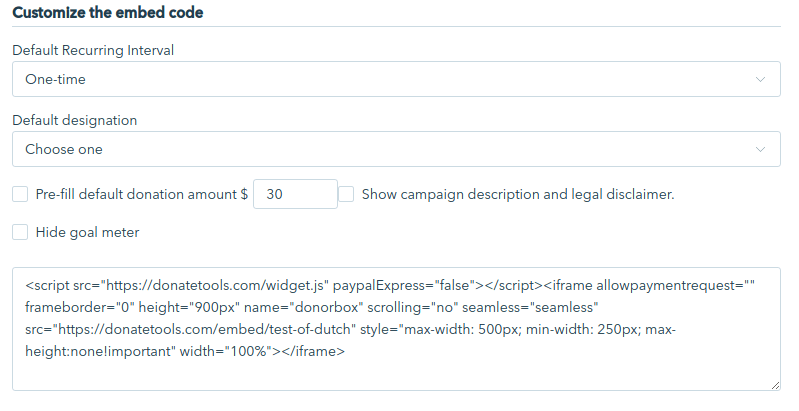
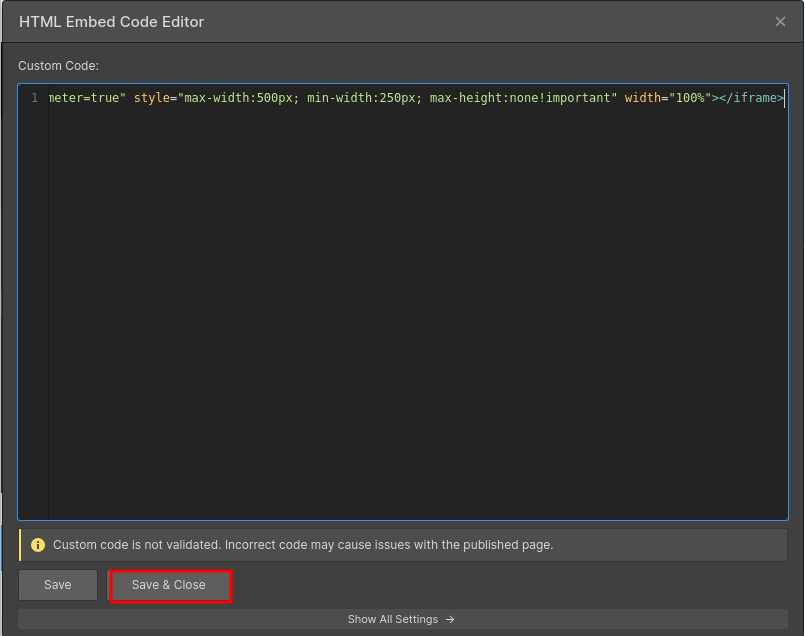
Click Save & Close and you’re done!
Pro tip: Have you found your donation form is dominating the page? Try adding a Container or Column element first. If you add an embed code on its own, the donation form can span the width of the page. Drop the Container element wherever you want your donation form to show up on the page. You can add an Embed form and drag it into the Container and Column element.
Step 5
Publish Your Webflow Website!
Note that you can view your donation form only when you publish your Webflow site. If you want to look at the preview, you can temporarily publish your website and unpublish it to make any needed changes.
How to add a goal meter on your Webflow webpage
You can add a goal meter on your website to display your fundraising progress! Here are the steps to add a goal meter.
Step 1
Add a goal to your campaign
On your Dashboard, go to campaigns.
Choose your campaign and click on “Edit”
Choose the amount tab.
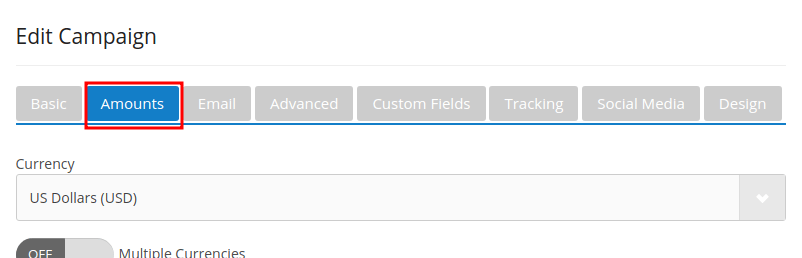
On “Campaign Goal” provide a goal amount. Then click on “Update & Preview”.

Step 2
Add an embed component
Click the plus button on Webflow. Click on Embed on the Components section
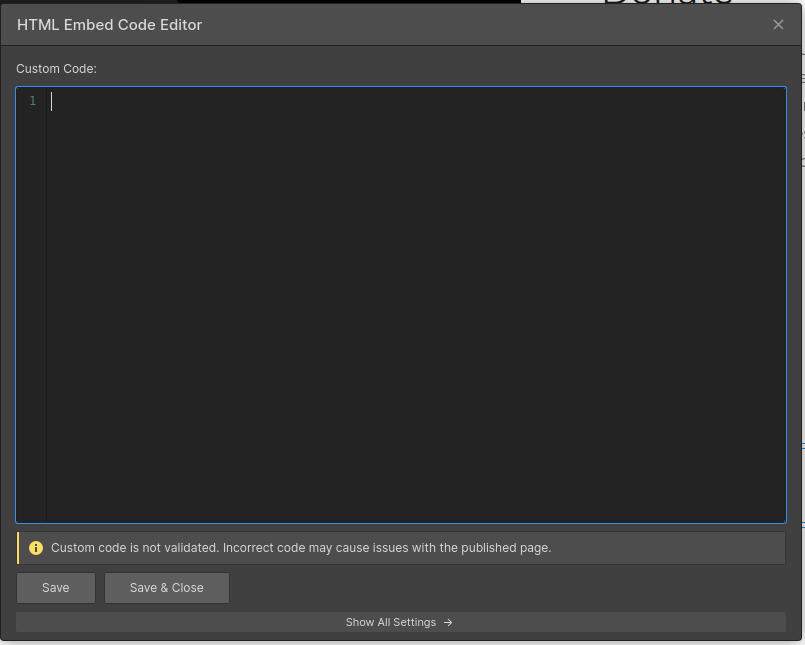
An HTML embed code editor will be opened. There, you can paste your donation button code.
Step 3
Copy the embedding code on Donorbox page
On your Dashboard, go to campaigns.
Choose a form of your preference and click on the angle braces button
Click on “Goal Meter”
Copy the embed code and paste it on your Webflow HTML embed code editor.
Click on “Save & Close”.
How to add Donor Wall to Your Webflow Webpage
Step 1
Enable “donor comment wall”
On your Dashboard, go to campaigns.
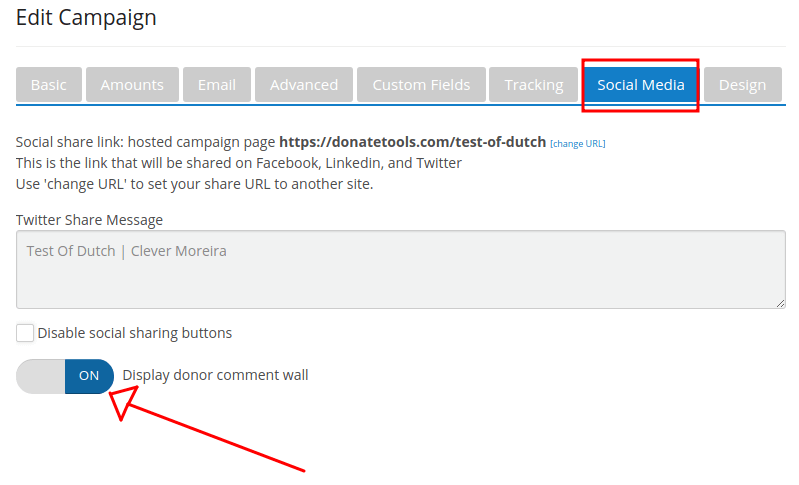
Choose your campaign and click on “Edit”
On the Social Media tab, enable “Display donor comment wall”.
Step 2
To add an embed component Click the plus button on Webflow.
Click on Embed on the Components section.
An HTML embed code editor will be opened. There, you can paste your donation button code.
Step 3
Copy the embedding code on the Donorbox page.
On your Dashboard, go to campaigns.
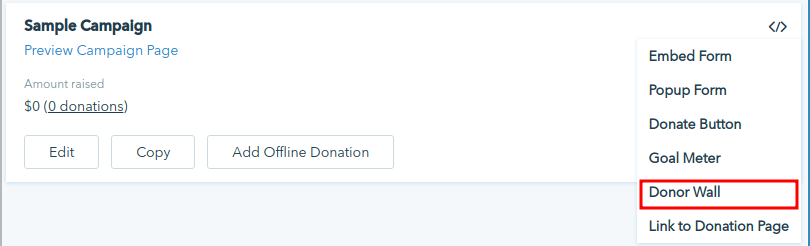
Choose a form of your preference and click on the angle braces button.
Click on “Donor Wall”
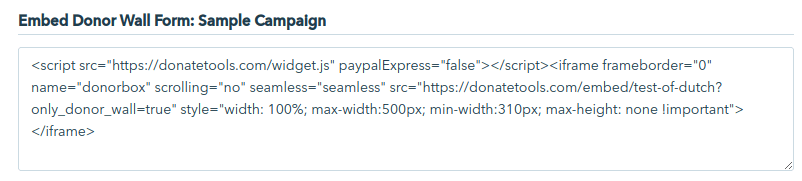
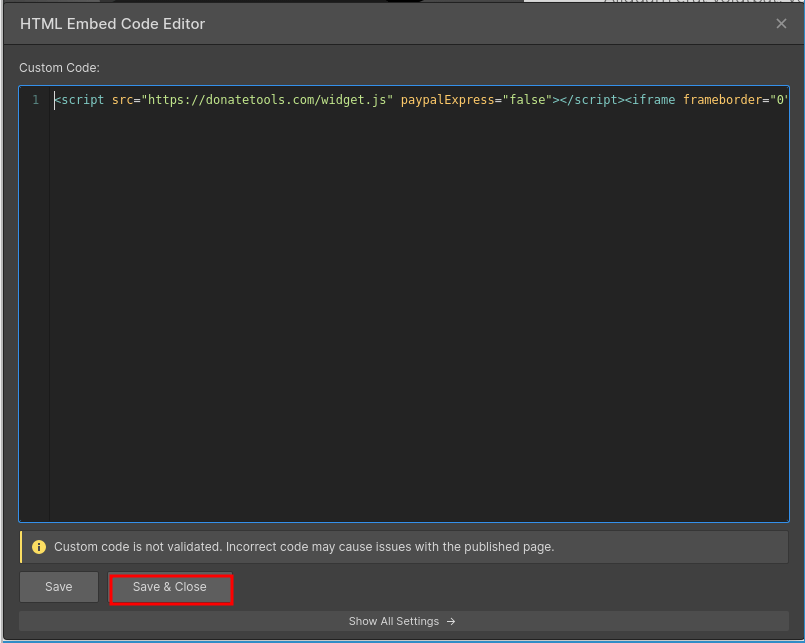
Copy the embed code and paste it on your Webflow HTML embed code editor.
Click on “Save & Close”.
Over to You
Not got any coding knowledge in your team? Webflow is an easy way to build an attractive nonprofit website.
Installing a donation page in Webflow is simple. In a few steps, you can embed a donation form.
For more tips on how to get the most from your Donorbox account, take a look at our nonprofit blog.
Related Articles: