Keeping your organization’s data in order is important for the success of your fundraising. Now, you can easily get your Donorbox data in Google Sheets to keep track of all your organizations donors and donations. With Google Sheets, you can create, edit, and collaborate with the members of your organization.
Steps To Connect Donorbox To Google Sheets
Step 1
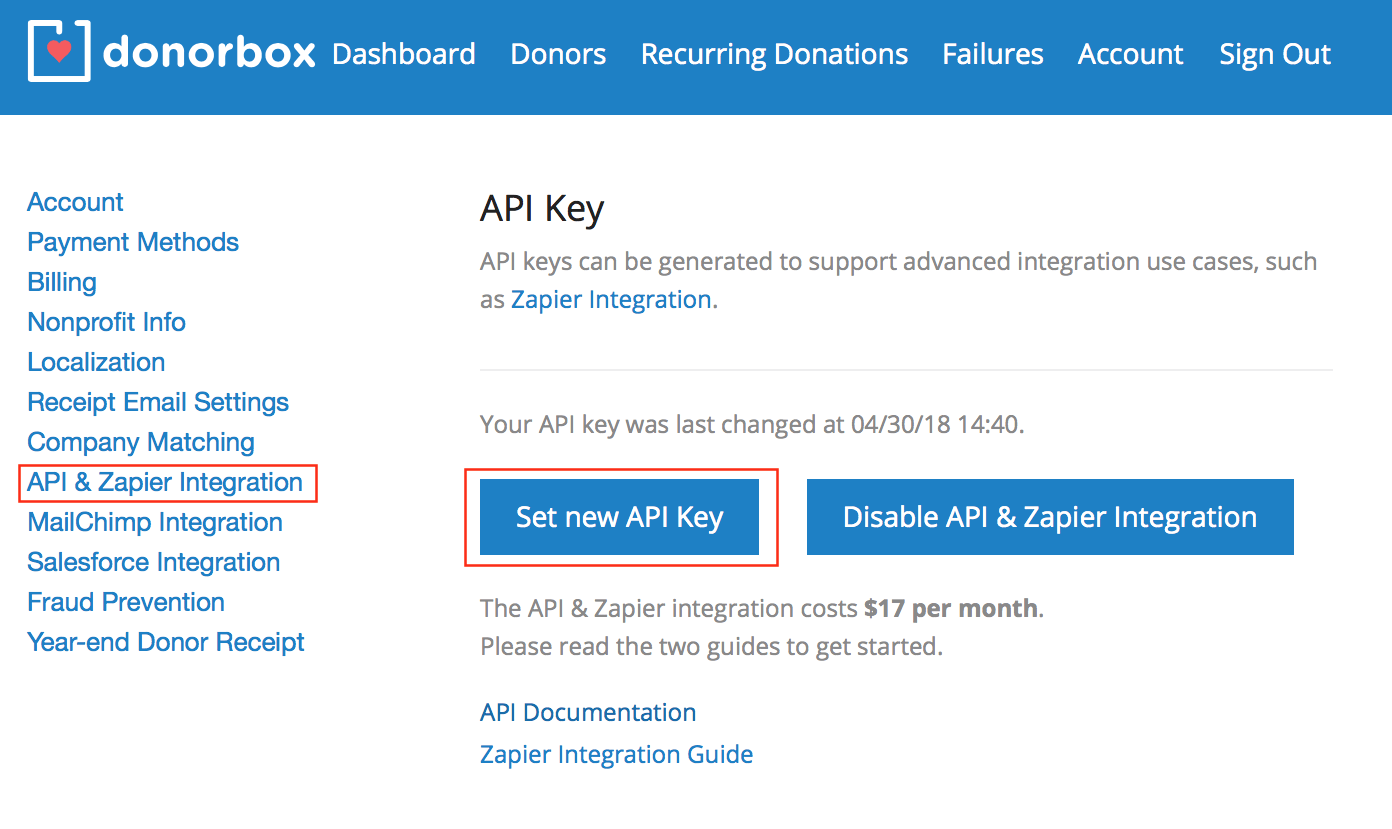
If you don’t already have a Donorbox account, sign up for a Donorbox organization account and log in. Go to your API & Zapier Integration page, under your Account Settings. There, you can create an API key that will connect Donorbox and Zapier.
Step 2
After you get your API key, log in to Zapier to start configuring the integration. This Zapier integration will trigger Donorbox events (such as whether you have received a new donor or donation) to your Google Sheets spreadsheets.
To link your Donorbox account to Google Sheets, make sure you are logged in and have created a new sheet for this purpose.
Step 3
In Zapier, click Make a Zap on the top navigation bar.
Step 4
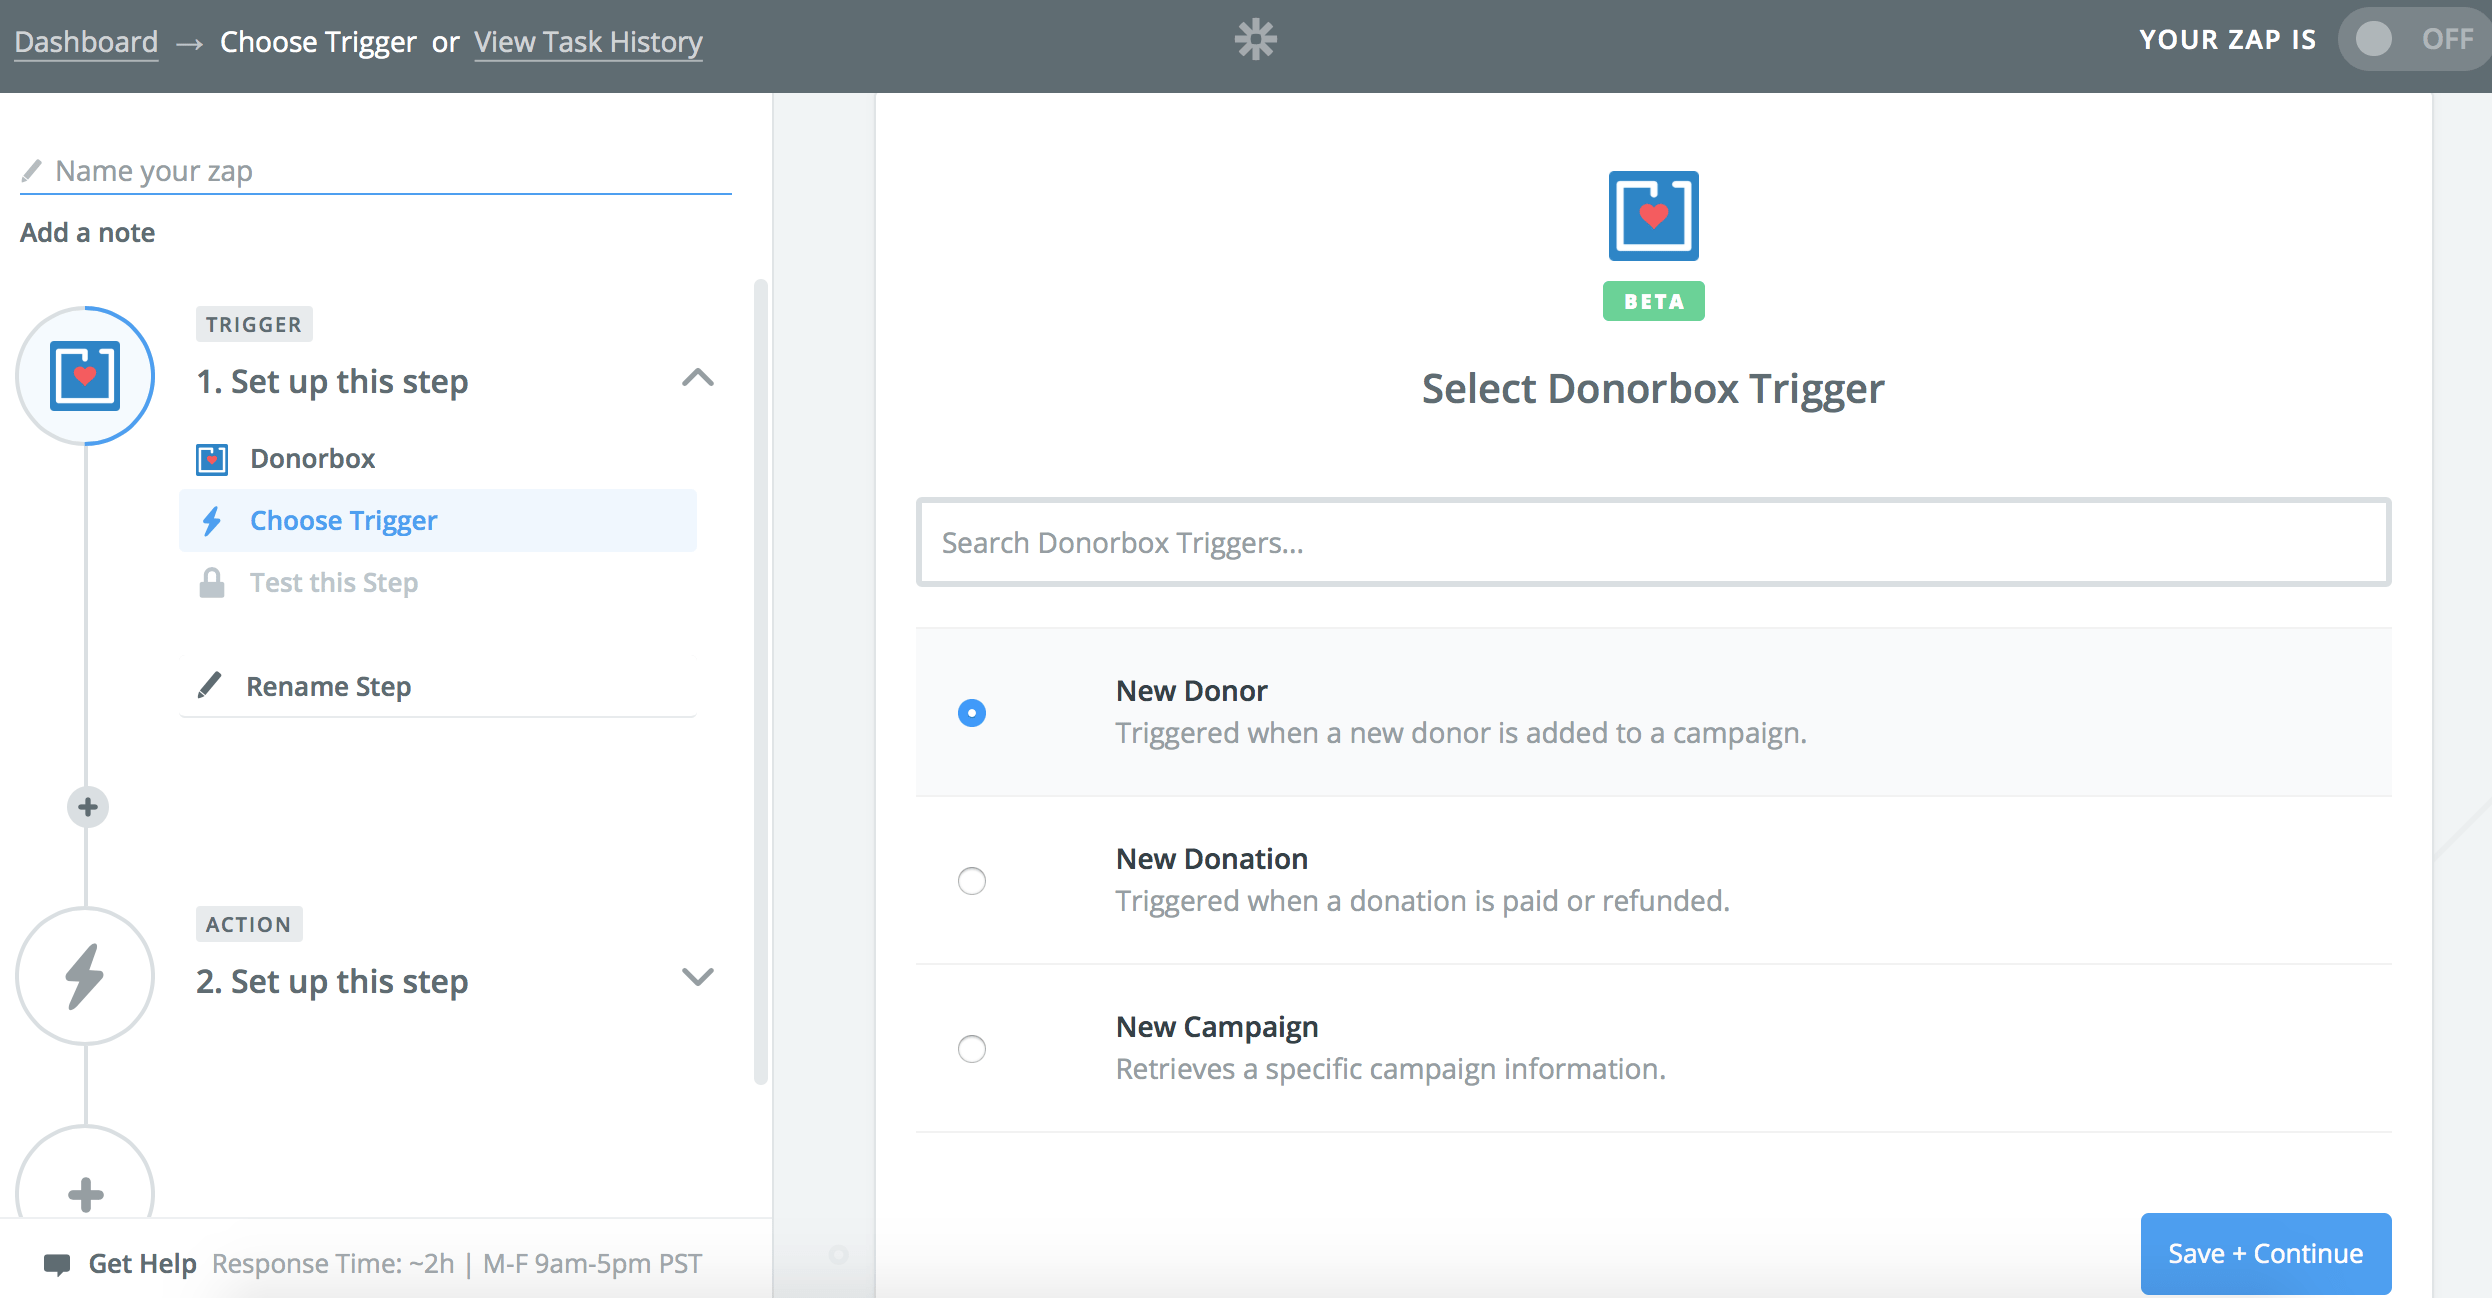
Choose Donorbox as your trigger app.
Step 5
Then, select a Donorbox trigger (new donor, new donation, or new campaign) and click continue.
Step 6
After you have selected the trigger, connect your Donorbox account to Zapier. In the popup authentication page, enter your username (your organization’s email) and your API key to allow Zapier to access your Donorbox account. Once you have successfully connected, you need to choose Google Sheets as your Action App.
Step 7
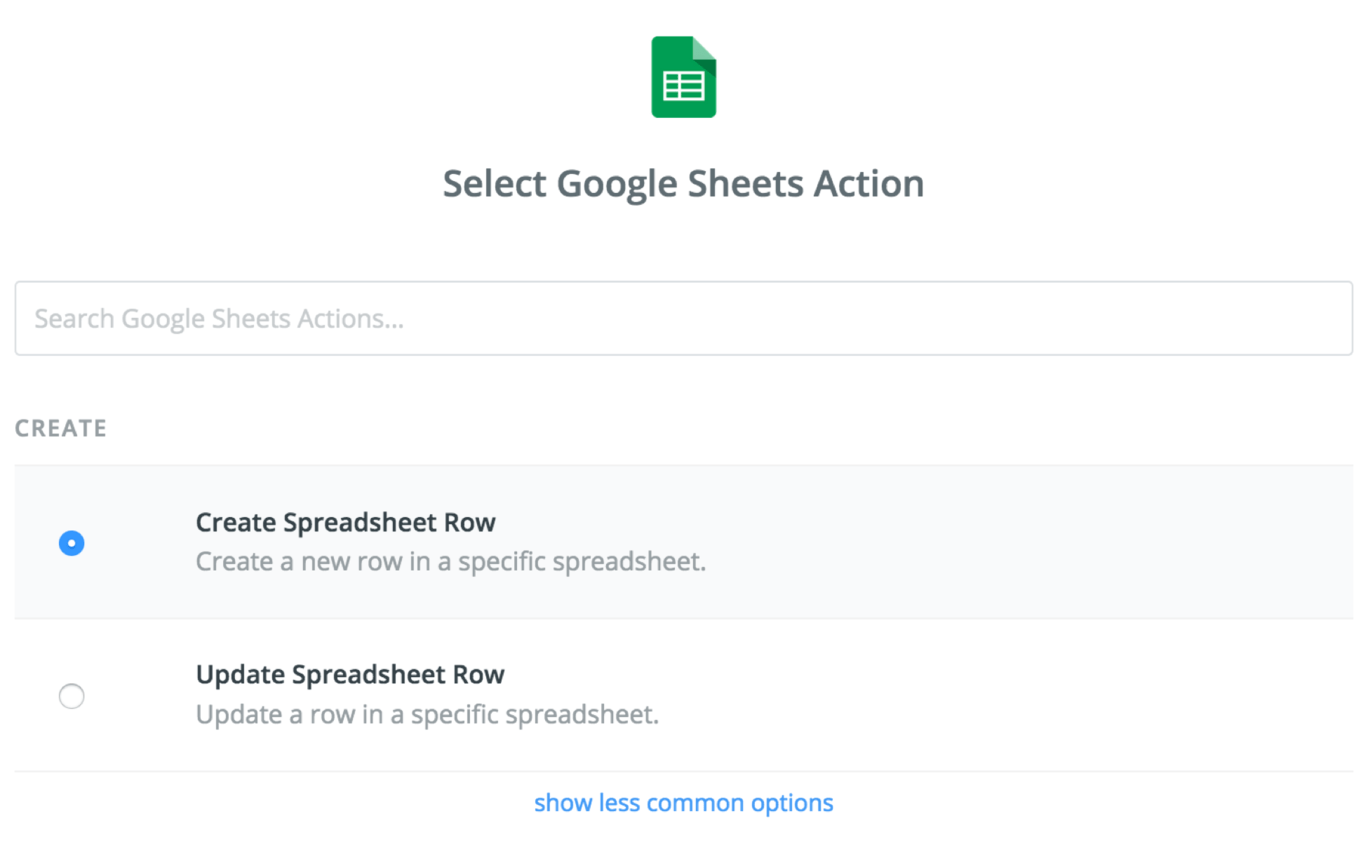
Once you have connected with Google Sheets, you can choose an action to send any new Donorbox information to your spreadsheet.
Step 8
After choosing your action, you will need to connect your Google account to Zapier. Then, you will be ready to start posting your information onto a spreadsheet.
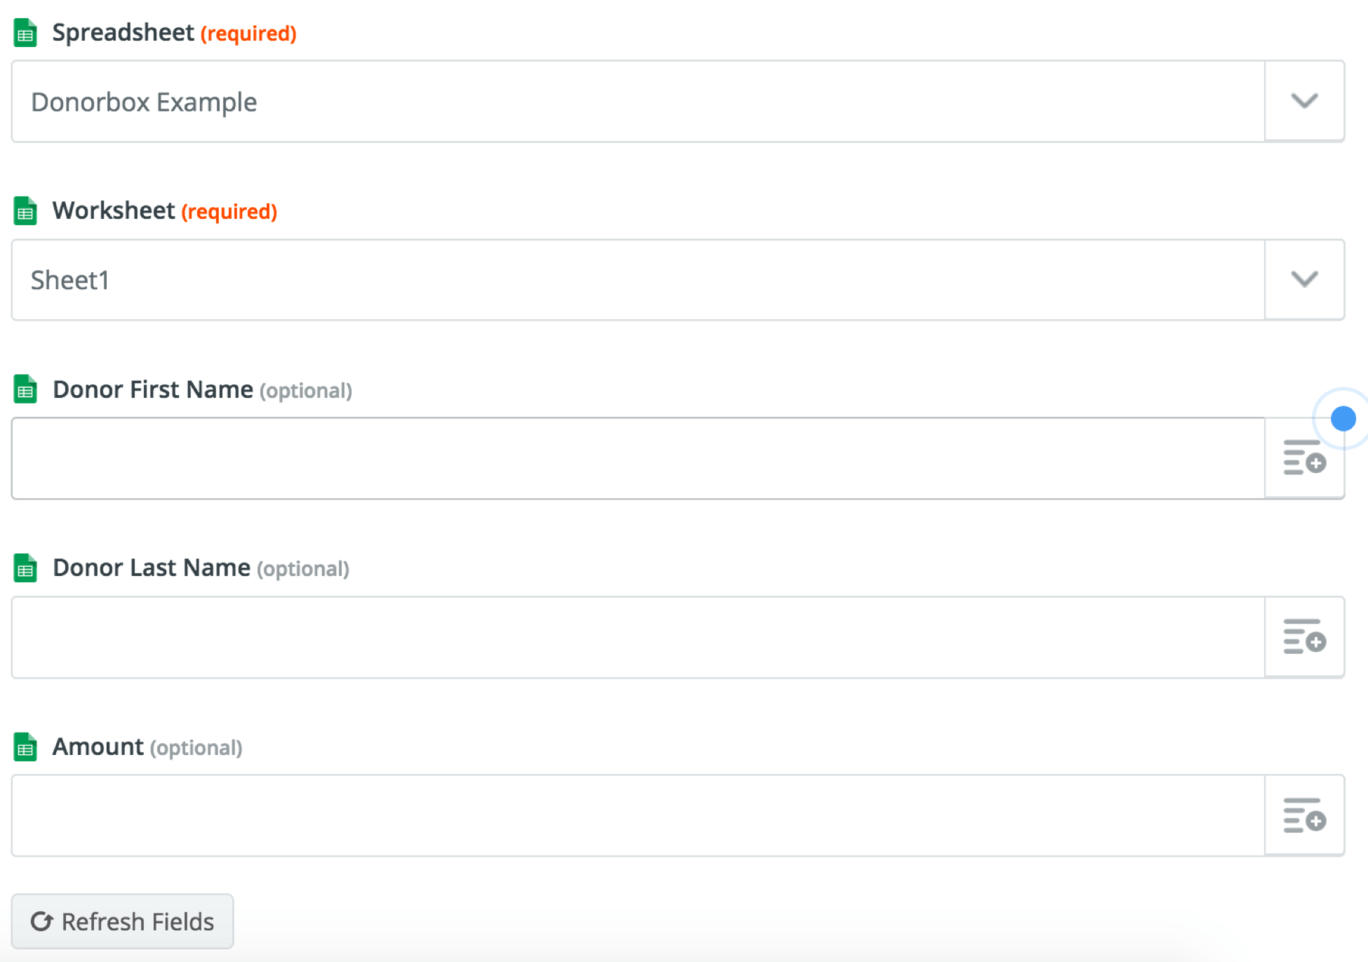
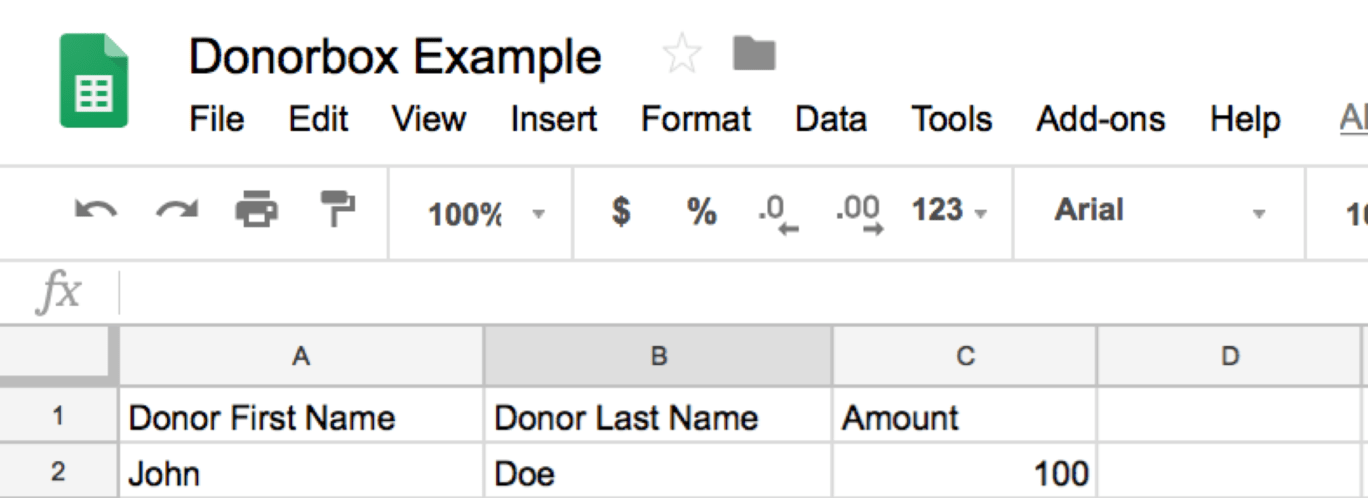
You will need to choose where to post your information. Remember that your spreadsheet will need to have headers to match the information. Zapier will automatically map the headers into containers where you will be able to send Donorbox Information.
Step 9
There’s a plus icon to the right of the text field that will allow you to add content using the data retrieved from Donorbox.
Step 10
Once you have finished mapping all the information that you need, click Continue to carry on, then click Finish. Once that’s done, name your Zap and then enable it to make it go live. Now, every time you get a new donation or donor, you will automatically see it on your Google Sheets.
This will be all that you need to make this integration works. Now your Donorbox data will be in order in your Google Sheets account.
Click on the templates below to get started right away.
Raj
Raviraj heads the sales and marketing team at Donorbox. His growth-hacking abilities have helped Donorbox boost fundraising efforts for thousands of nonprofit organizations.
