Donorbox + Salesforce: Harness the Power of Two Great Solutions for Your Nonprofit
Ready to harness two powerful solutions to streamline your fundraising? The Donorbox + Salesforce integration allows you to connect all donor and donation data collected on Donorbox to your Salesforce NPSP or Nonprofit Cloud account. Read on to learn how it works!
Ready to combine Donorbox’s powerful fundraising platform with the world’s number-one CRM? Donorbox’s native integration with Salesforce for Nonprofits includes both Nonprofit Success Pack, an add-on package, and Nonprofit Cloud, a standalone product.
In this article, we’ll show you exactly how to enable this integration so you get the most out of these two powerful tools.
What is Salesforce for Nonprofits?
As its name suggests, Salesforce for Nonprofits is built specifically to support nonprofit organizations. Salesforce offers both Nonprofit Success Pack, which is an add-on to their Cloud offering, and Nonprofit Cloud, a standalone cloud-based solution. Both provide powerful tools to easily analyze your donor data (names, addresses, relationships, donation frequency, and more) and build stronger relationships with your supporters.
To learn more about how nonprofits use Salesforce and the differences between Nonprofit Success Pack and Nonprofit Cloud, check out this blog.
Here are the step-by-step instructions to guide you through the simple integration process so that you can automatically sync all your Donorbox data with your Salesforce account.
Step 1: Sign Up for Salesforce for Nonprofits
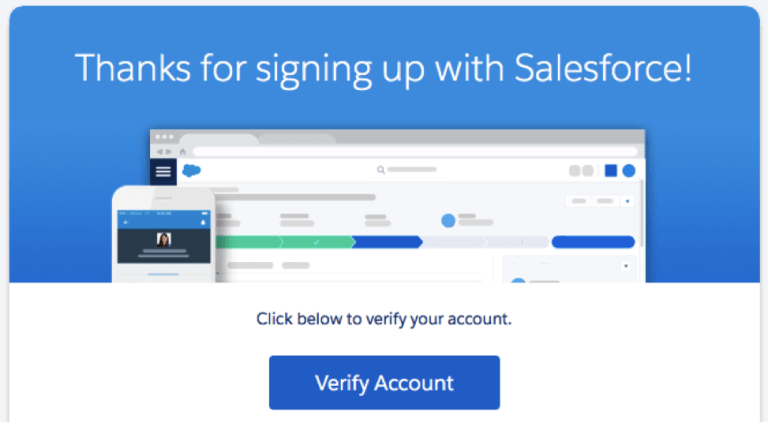
If your organization isn’t using Salesforce yet, it’s easy to sign up! Just follow these steps. If you’re already using Nonprofit Success Pack or Nonprofit Cloud, skip to the next step.
Choose whether your organization wishes to use NPSP or Nonprofit Cloud.
Sign up for a 30-day free trial. You can do that for NPSP here or for Nonprofit Cloud here.
Check your email for a confirmation email from . Confirm your account by setting a new password.
Salesforce created the Power of Us Program for nonprofit organizations and higher education institutions. They offer 10 free enterprise licenses, as well as discounts on additional Salesforce licenses, products, and/or services. Learn more about this program and sign up here.
Step 2: Connect Donorbox and Salesforce
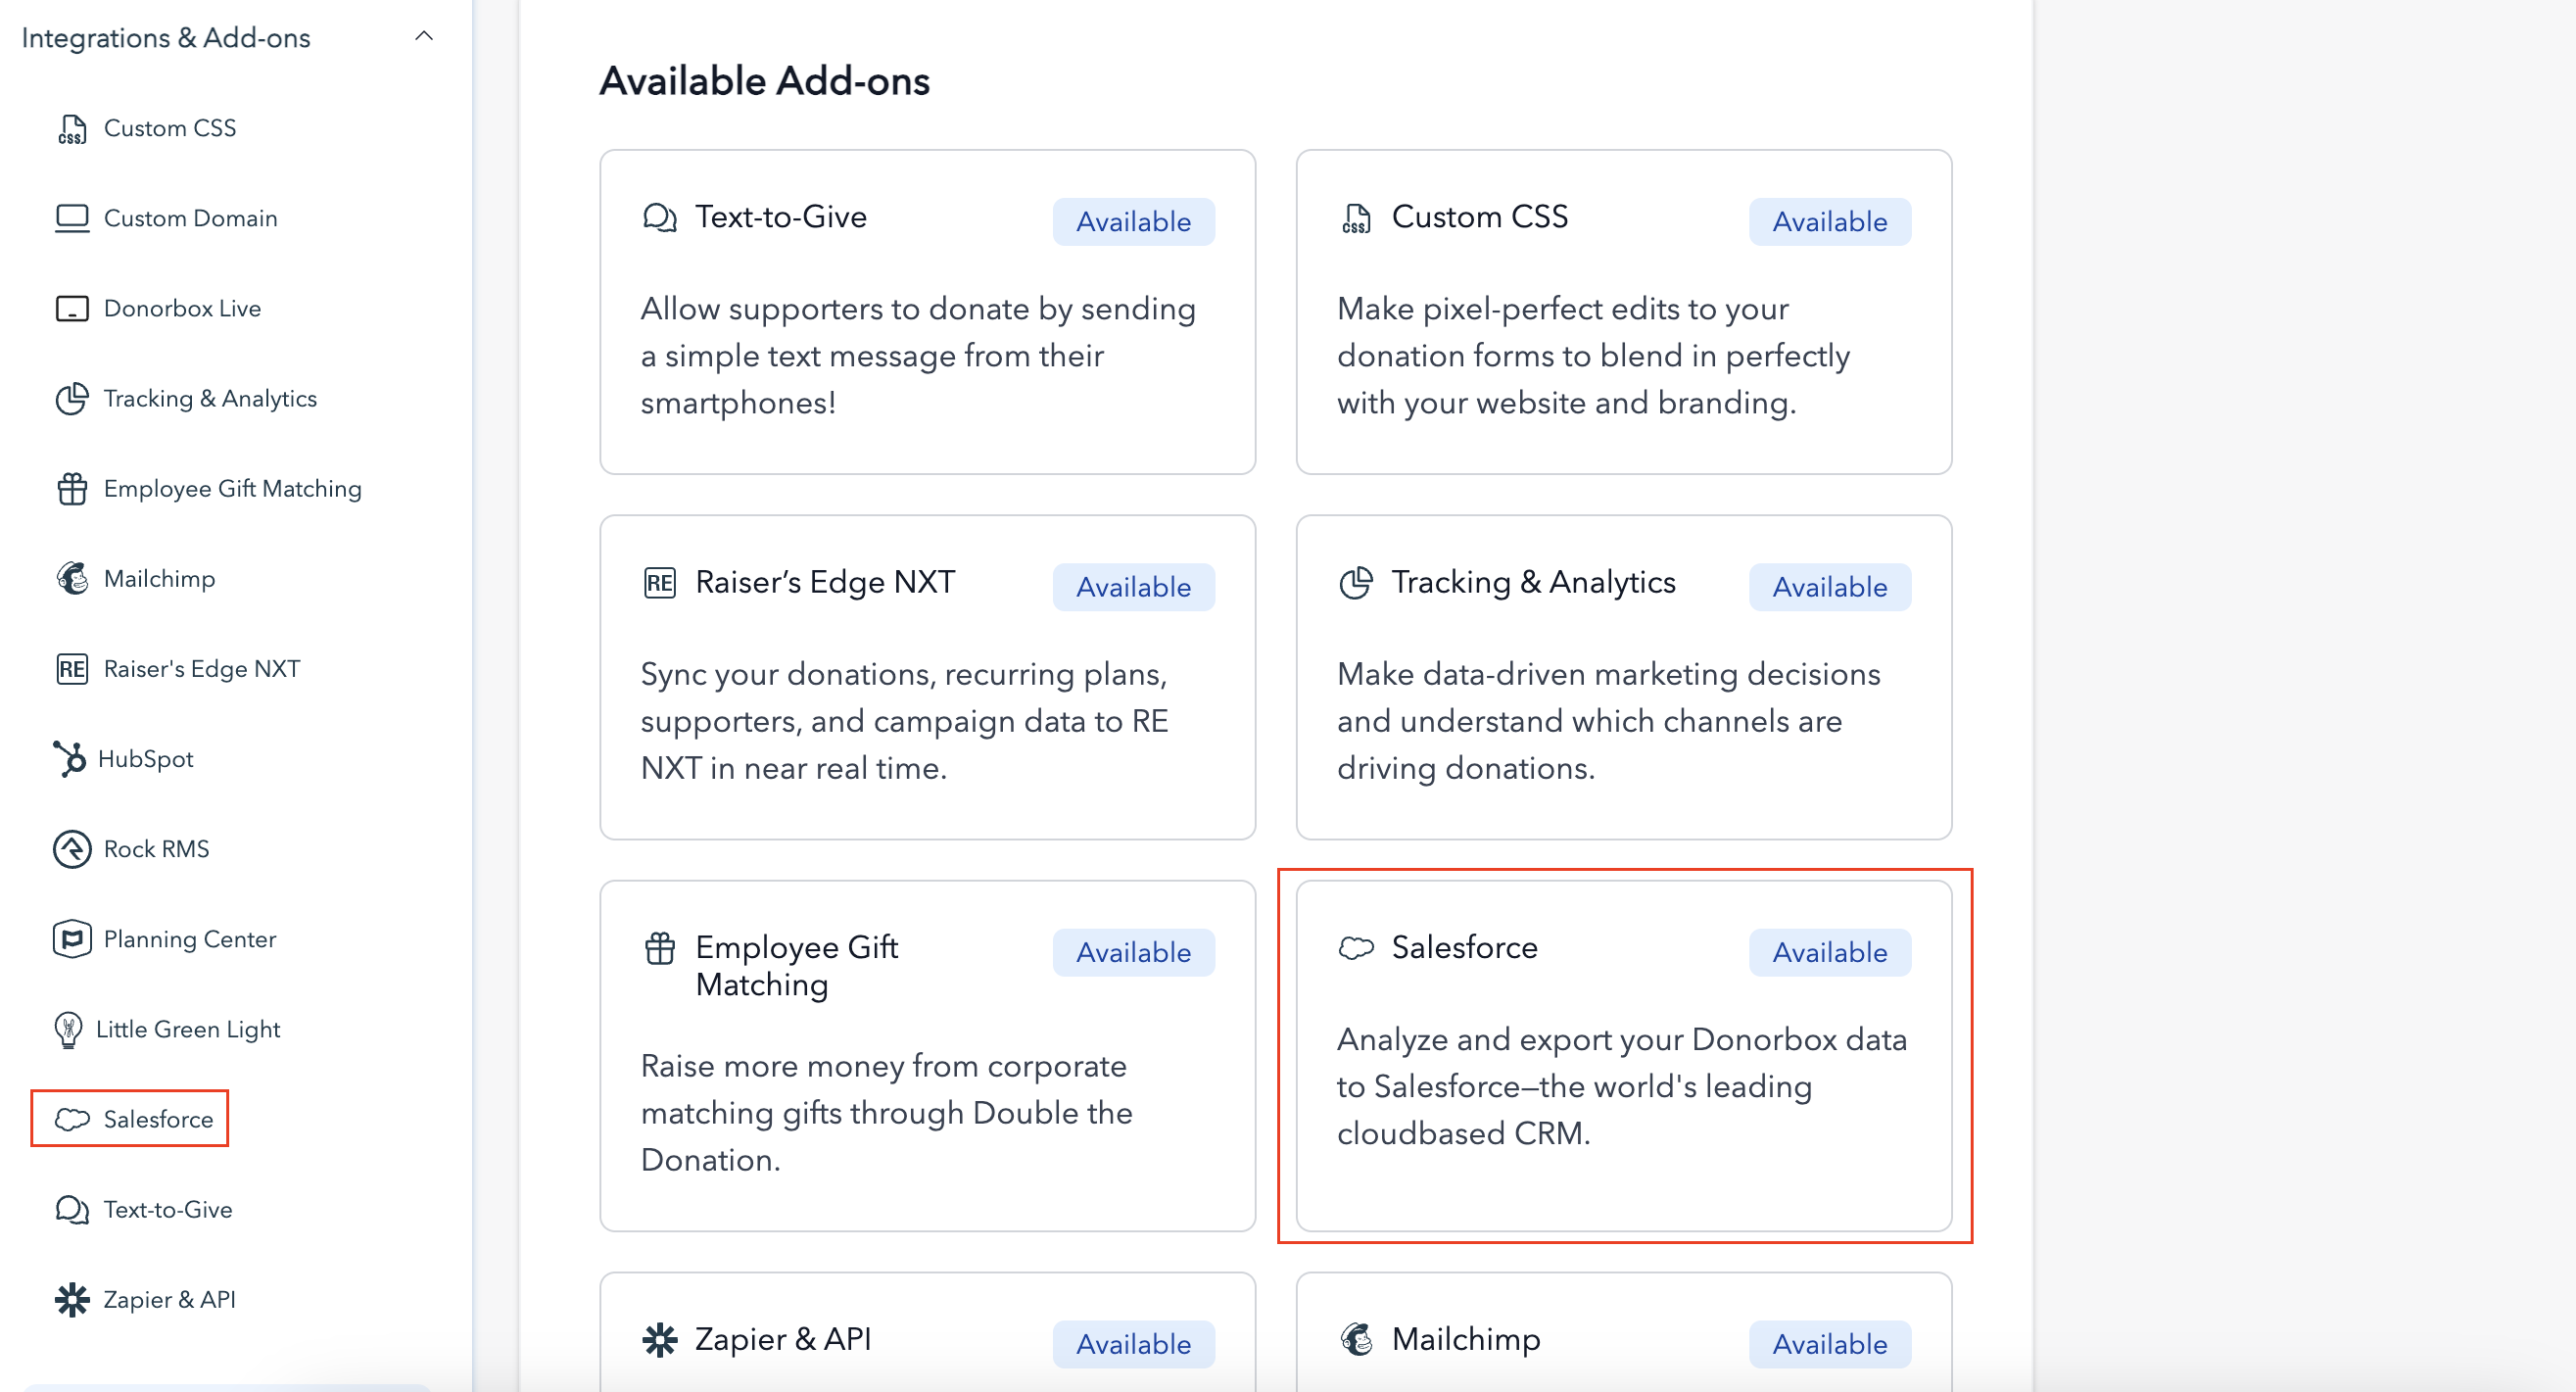
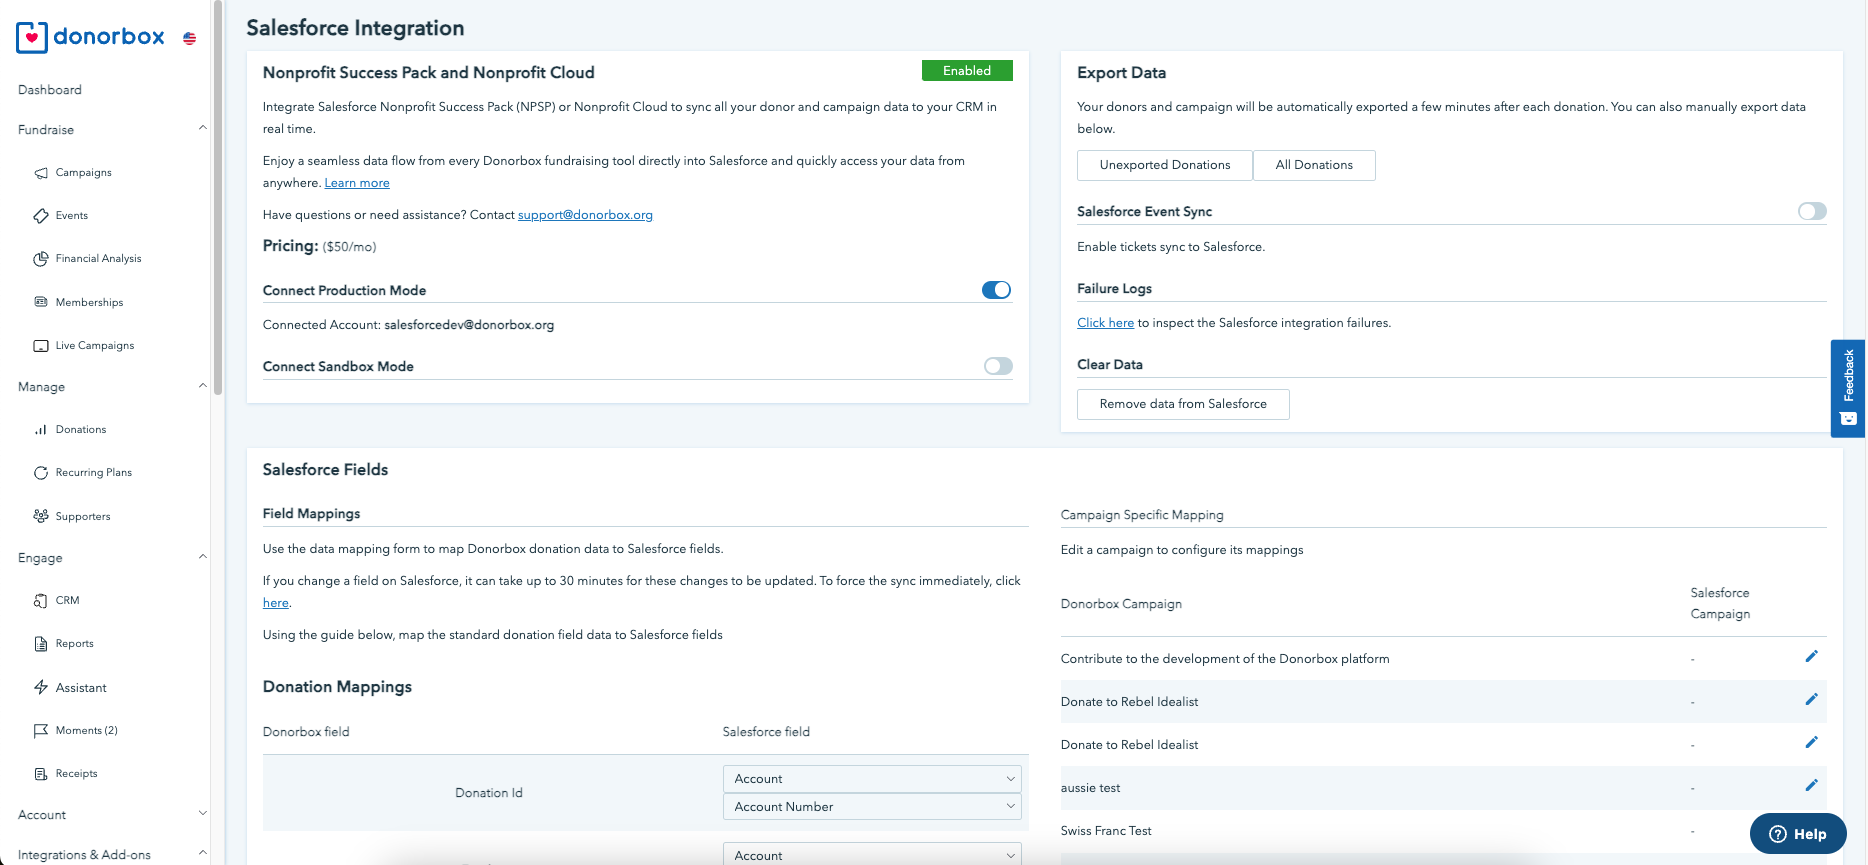
To begin the data integration, you first need to connect Donorbox with your Salesforce account. You can access this add-on from your Donorbox dashboard in the “Available Add-Ons” section, or in the menu on the left side of your screen under “Integrations and Add-ons.” Click on either to be taken to the Salesforce Integration page.
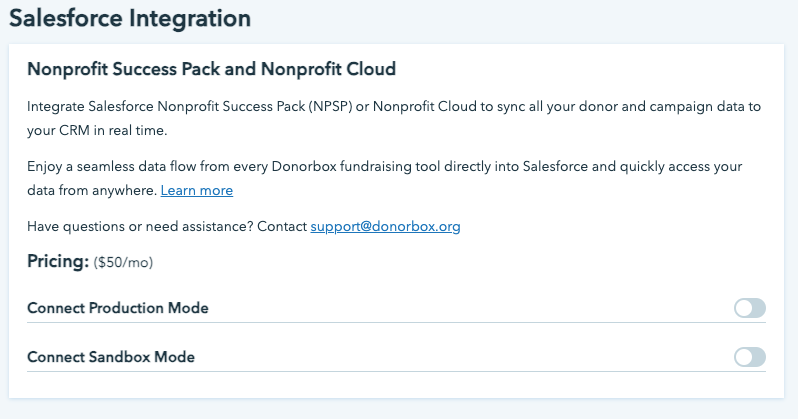
2. From the integration page, you’ll see toggle options for Production Mode and Sandbox Mode.
Production Mode is for connecting to your live Salesforce org with active users and data. Sandbox Mode allows you to connect to your Salesforce Sandbox org without disturbing your Production org.
Choose which mode you’d like to enable and click the toggle to activate it.
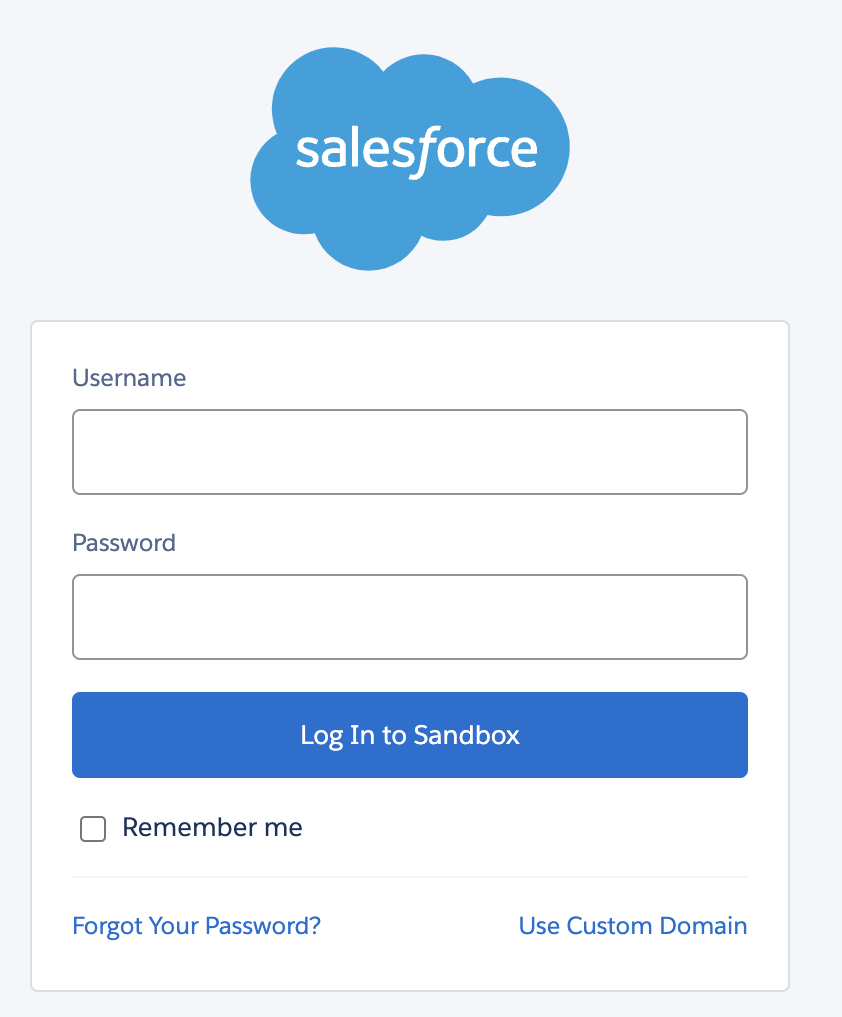
3. Once you click on one of the toggles, you’ll be prompted to sign in to your Salesforce account. Note: be sure to log in with a user account that has sufficient permissions, like an admin account.
You’ll be prompted to enter a verification code with multi-factor authentication. Once verified, you’ll be asked to allow access to Donorbox. Click “Allow.”
4. After a successful connection, you will be redirected to the Salesforce Integration page in your Donorbox Account. It should now look like this:
Step 3: Map Donorbox Data to Salesforce Objects
Once your integration is set up, you’re all set! Your data will automatically flow to your Salesforce account. However, there may be some additional field mapping you wish to do to customize your integration further. Read on to learn how.
Standard Fields
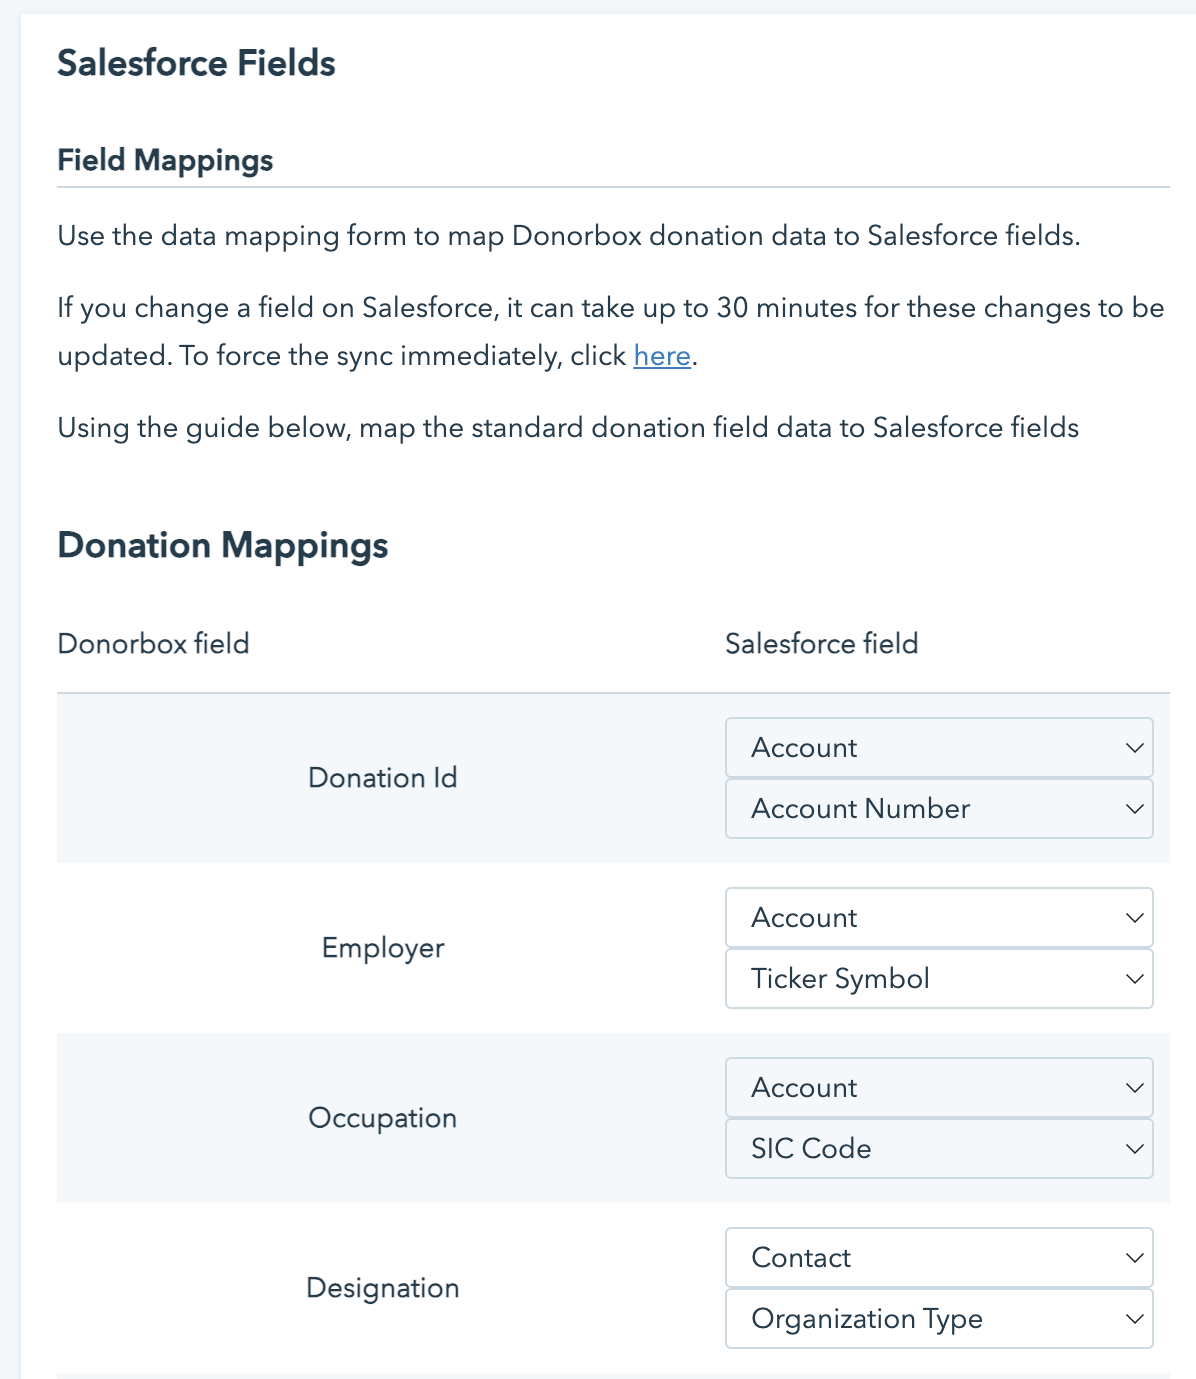
For any standard fields on your Donorbox form (i.e. anything other than additional questions you add), you may customize how they map to objects in your Salesforce org.
You’ll see a list of all Donorbox data fields, along with dropdowns for the corresponding Salesforce fields available to you. Connect each Donorbox field to your preferred Salesforce field.
Note: Check out our detailed Data Mapping guide for more information on field mapping between Donorbox and Salesforce.
Custom Fields
If you ask your donors additional questions on your Donorbox donation form, you may want to record their answers in Salesforce. You can do this with Custom Fields.
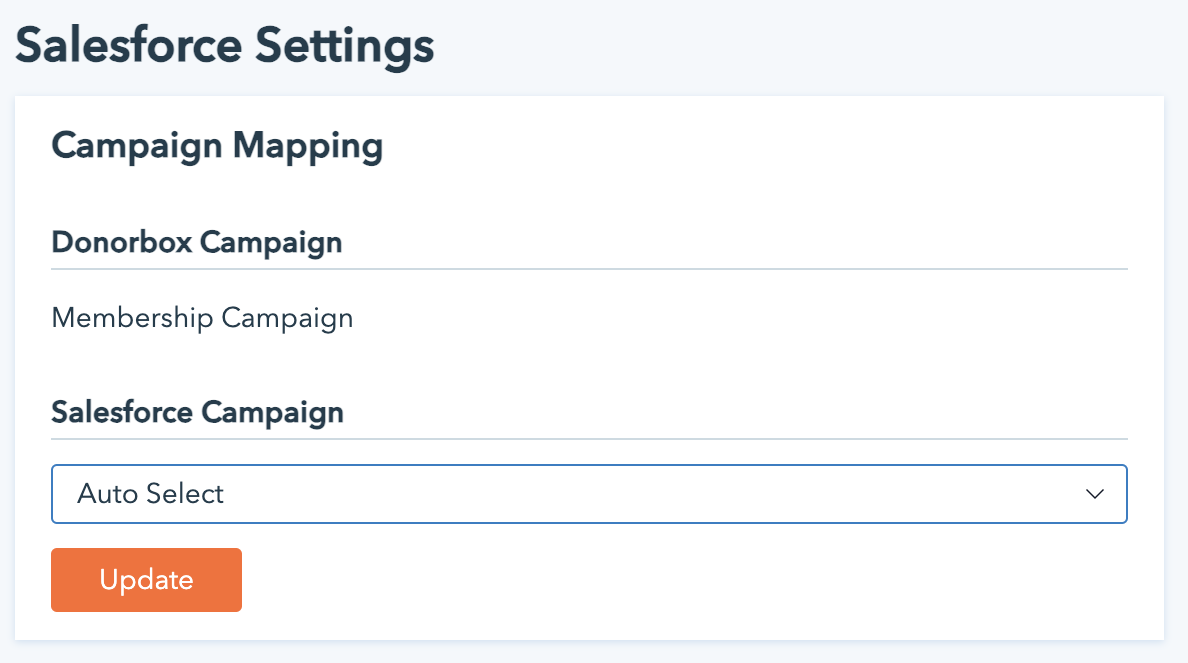
Next to the data mapping section, you’ll see the “Campaign Specific Mappings” section. Here, you can map a Donorbox campaign to a Salesforce campaign. First, click the edit icon next to the Donorbox campaign name.
3. You’ll then be taken to a settings page where you can select the Salesforce campaign that corresponds to your selected Donorbox campaign.
Just like the standard field mapping above, you can map the values of additional questions to standard or custom fields in your Salesforce objects. Note: this option will only appear if you have added additional questions to your donation form.
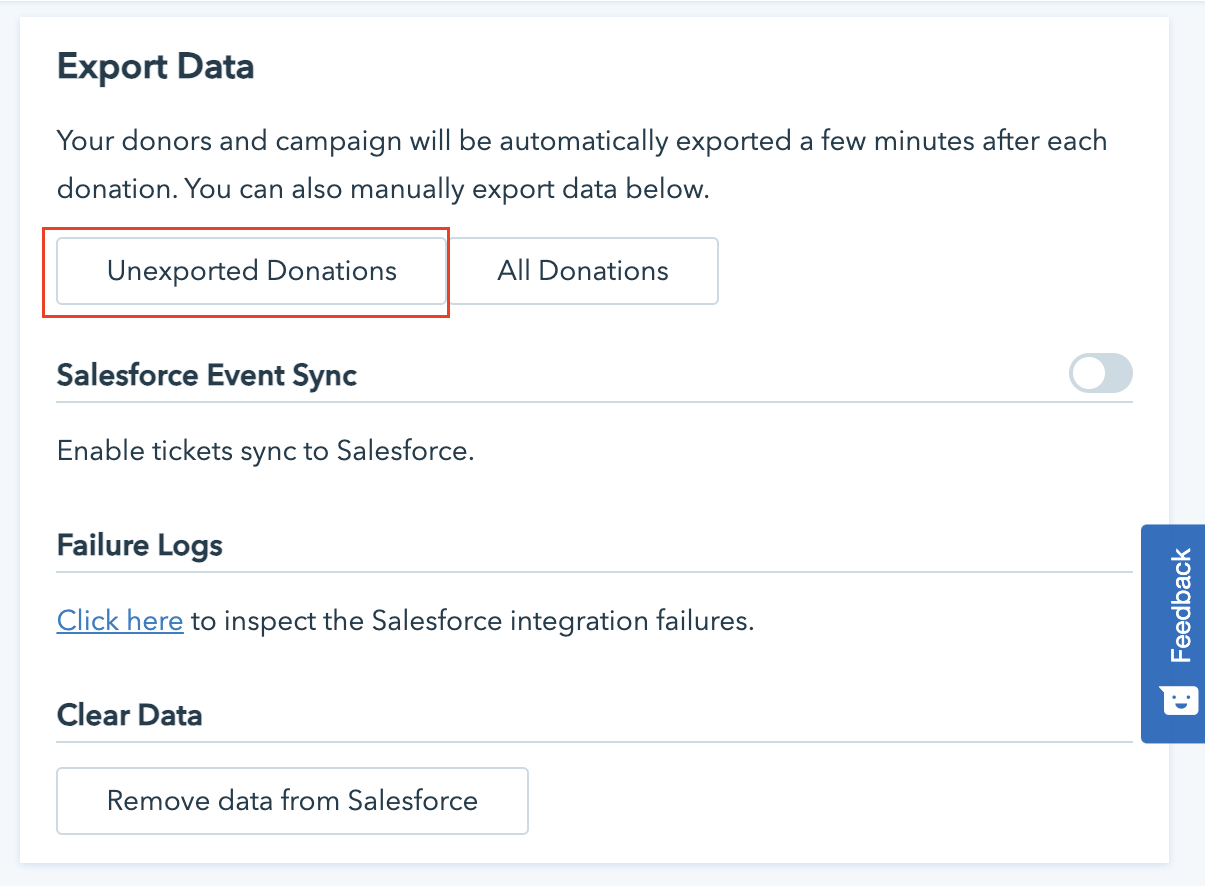
Step 4: Syncing Donorbox With Salesforce
Export Donorbox Data
Now that you have all your fields mapped, you are ready to export your donors, campaigns, and donations data to your Salesforce org.
Simply go to your Salesforce Integration page and click on the “Unexported Donations” button in the Export Data section. Note that moving forward, all donor and campaign data will be automatically exported shortly after each donation.
Here, you can enable any events you create with Donorbox Events to sync with Salesforce as well. You can also view your Failure Log to check for any mapping or exportation failures.
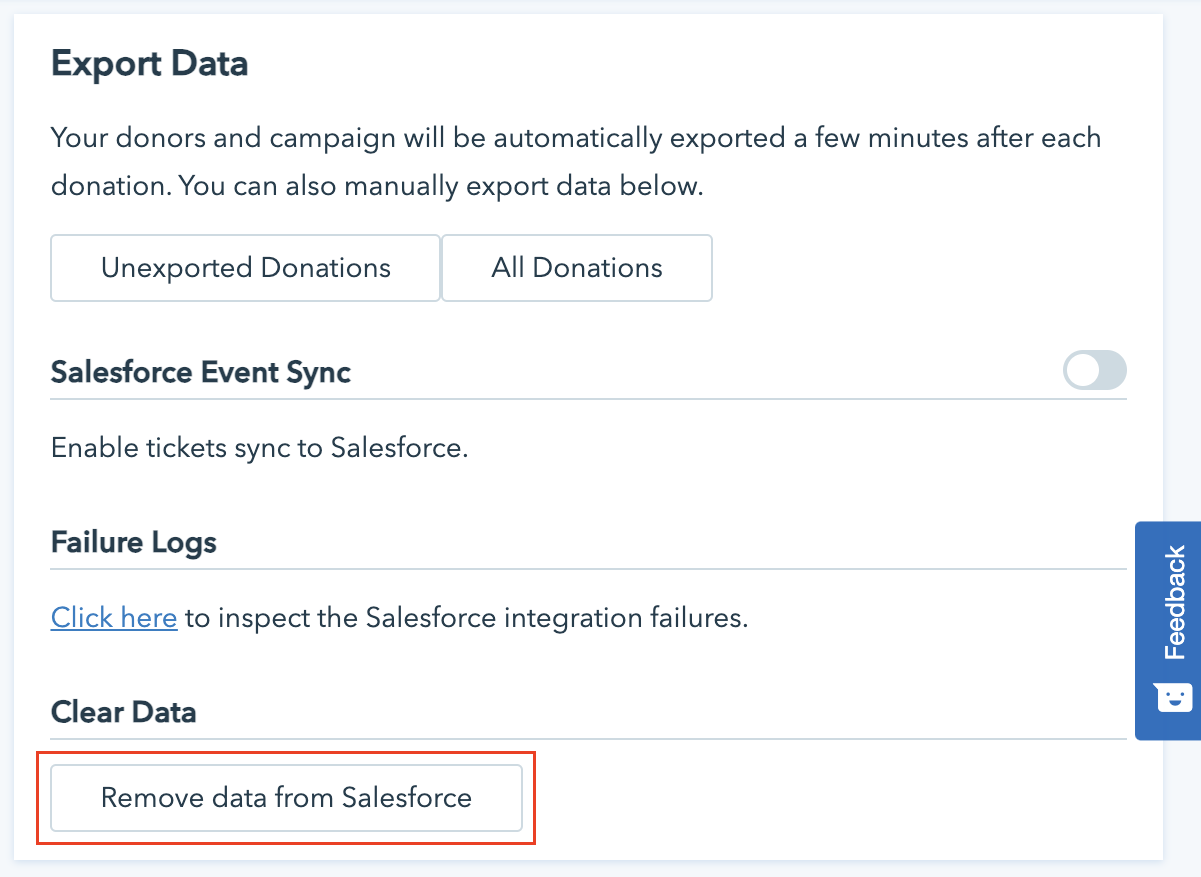
Re-Export Donations
We all need a re-do sometimes. The “All Donations” button in the Export Data section deletes the existing donations from your Salesforce org and exports them again from your Donorbox account.
It’s important to note that this functionality does not remove and re-create the Accounts (Households) and Contacts from your Salesforce org.
Remove Data
The “Remove data from Salesforce” button removes all the donations (Opportunity records in Salesforce) that have been made by Donorbox.
Note: It does not remove the Accounts and Contacts that were created with the donations. This is because these Accounts and Contacts may now be linked to other records in Salesforce too. You can always delete them from within Salesforce if you don’t need them.
Donations in Salesforce
When a donation is made to your Donorbox campaign, it is automatically exported to your Salesforce org. It gets mapped to an Opportunity record in your Salesforce org.
With the donation, the corresponding Contact, Account, and Campaign are also created in Salesforce.
The Campaign name is the same as your Donorbox campaign name.
The primary contact name is an amalgamation of the donor’s first name and last name, as given on your donation form.
The Account (Household) name follows the Salesforce NPSP naming convention that you have selected in your NPSP household naming format if you are using the NPSP package. If you are using the Nonprofit Cloud then the integration will create a Person account.
Conclusion
Donorbox’s comprehensive fundraising features help you collect more donations and sell more tickets to support your important mission. Pairing the power of Donorbox with Salesforce’s world-class CRM solution will help you take those donors and build stronger, lasting relationships.
We hope this guide has given you everything you need to easily connect Donorbox to Salesforce. If you have any questions, you can reach us at .
For more in-depth guides about our features, check out the rest of our Nonprofit Blog.
FAQs
1. How does Donorbox manage existing Salesforce Contacts and Accounts?
If you have existing Contacts and Accounts in Salesforce,there is no need to worry about data duplication. Donorbox checks existing Contact emails for de-duplication.
If a donation with the same first name, last name, and email comes in, we add the Opportunity to the existing Household or Person Account and Contact.
If the email is the same, but the first name or last name differs, we create a new Contact under the same Account. The incoming donation is assigned to that newly created Contact.
Our integration takes a similar approach for donors who make recurring or multiple donations. For example: if a matching Account and Contact are found based on the first name, last name, and email in Salesforce, the incoming donation is tied to them in Salesforce.
2. How does Donorbox handle Salesforce Campaigns?
Whenever the first donation comes in for a campaign in Donorbox, our integration searches for the corresponding campaign in Salesforce. If a campaign with that exact name is found in Salesforce then we link the donations to that otherwise we create a new campaign in Salesforce.
Once a campaign has been created/identified in Salesforce, all the subsequent donations are added to it as they are made. The “Type” picklist field in the campaign record in Salesforce is set to “Donorbox.”
This is the default behavior but we also allow mapping of Donorbox campaigns to any of the campaigns that are currently present in your Salesforce org. You can define this mapping by going to the Salesforce Integration page where you can assign a particular Salesforce campaign to a Donorbox campaign of your choice. Note: The Salesforce campaign dropdown is pre-populated with all the campaigns from your Salesforce org once you have connected your Salesforce account to Donorbox.
3. How does Donorbox manage recurring donations in Salesforce NPSP?
With recurring donations, we provide the option to use the Standard NPSP Recurring Donations object model as well as the simple opportunities object for syncing recurring donations. Please reach out to our support if you would like to enable the sync with the Salesforce NPSP Recurring Donations object. This feature has to be enabled by Donorbox support on demand otherwise by default recurring donations are synced as simple opportunities in Salesforce.
When a recurring donation is set up in Donorbox and the NPSP Recurring Donations usage is not enabled, we create a simple Opportunity record in Salesforce just like we do for one-time donations. If the Recurring Donations usage is enabled for your integration then a new recurring donation record is created in Salesforce against every new incoming recurring plan in Donorbox. You can find more details about how to sync with recurring donations in Salesforce works here.
4. How is Salesforce updated when a donation is updated on Donorbox?
When a Donorbox donation is updated, the changes are also replicated in your Salesforce org. The process is fairly straightforward unless the donor email is changed.
All the fields are updated in the Salesforce org based on the field mapping done for that Donorbox campaign. If the email is updated, we try to find the updated contact on Donorbox and in Salesforce using the updated email. If the contact is found based on the updated email, it is linked to this donation on Salesforce. Otherwise, a new Contact and Account are created for the updated donation.