
As a nonprofit, we know that you’ve got a million important things on your mind. Keeping your QuickBooks account updated with your donation data should not be one of them. That’s why we’ve got a way to automatically update your QuickBooks Online account every time you receive a new donation. You won’t have to lift a finger!
Using our Zapier integration, you can set up a Zap to integrate Donorbox and QuickBooks. Every donation you receive will trigger a Zap that updates your QuickBooks account with the Donorbox data.
We can even take things up a notch by creating a multi-step Zap. As the name suggests, a multi-step Zap will perform multiple actions on a single trigger. This is useful if you want to move the full donation amount AND its processing fee data to QuickBooks. The end result will show the donation as income, and the processing fee as a deduction. It gives a more accurate view of exactly how much your nonprofit ends up with.
In this blog post, we’re going to show you how to set up a multi-step Zap like this. This is the basic data flow of how this Zap will work.

There are a few preliminary things you will need before we start creating our multi-step Zap.
- You need a Donorbox account with donation data already recorded. This could be real or test donation data. It will be used for the sample that Zapier will need later on. Ensure that Zapier integration is already enabled in your Donorbox account. You will be given an API key, which will be used later on within Zapier.
- The login details for your QuickBooks Online account.
- You need a Zapier account. You’ll need to be on a paid plan to access Quickbook Online, which is considered a premium app.
Once you have these 3 things in place, we can get started.
Step 1 – Set up your first Zap
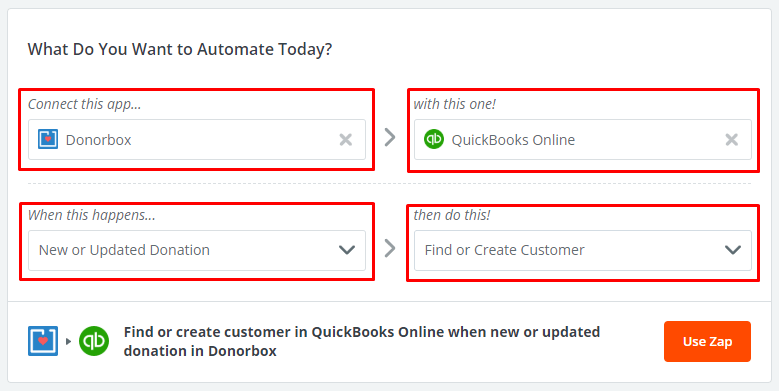
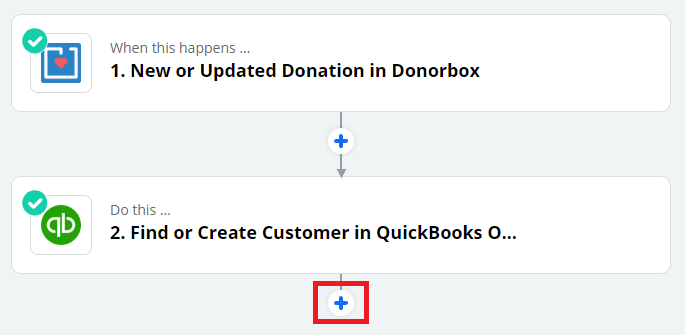
The first step is to set up the initial trigger and action. The trigger is “New or Updated Donation” in Donorbox. The action is “Find or Create Customer” in Quickbook Online. Here’s what this looks like:
Step 2 – Add your Donorbox Account Details
Fill in all the required fields for your trigger. This will include:
- Your Donorbox account email address, as the username
- Your Donorbox API key, which you recorded earlier when enabling your Zapier integration in Donorbox
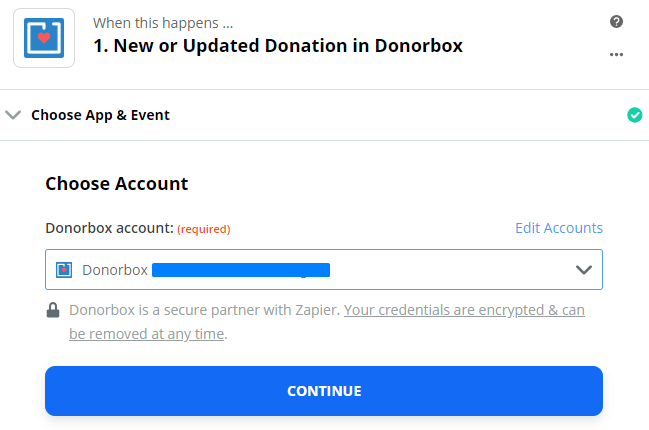
Click Continue when you’re done.
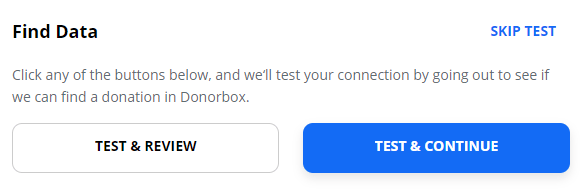
Then you will be asked to test the connection. This will help you ensure that the connection is set up correctly.
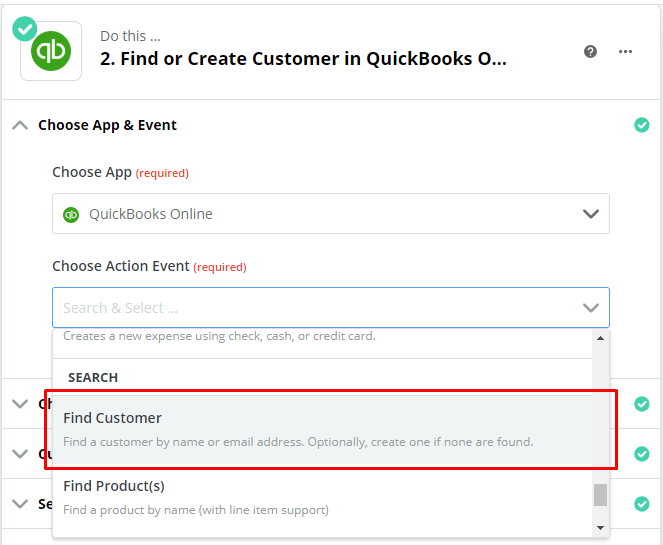
Step 3 – Add your QuickBooks Online Account Details
Fill in all the required fields for the QuickBooks action. This will include:
- Your QuickBooks login details.
- The action event, which is “Find Customer”.
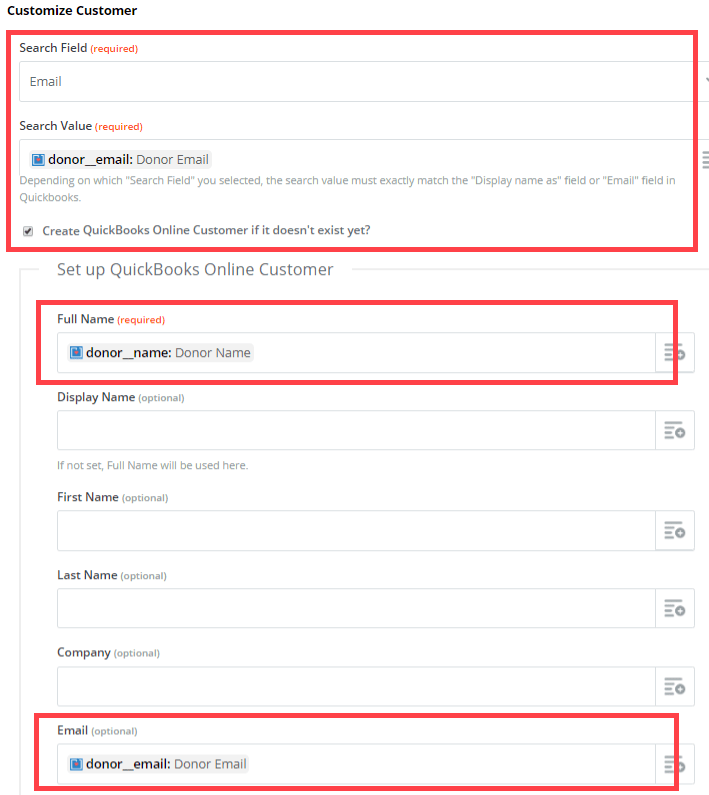
Step 4 – Customize the settings for the Customer search
Next, you need to customize the way Zapier will locate your donor in QuickBooks (a.k.a the “Customer”). Here, most crucial field settings are the following:
Search Field
Select “Email” for this setting. This refers to which field will be searched in QuickBooks.
Search Value
Select “Donor Email” for this setting. It tells Zapier to search for this email address within QuickBooks.
“Create QuickBooks Online Customer if it doesn’t exist yet?”
This setting must be enabled. It means that if the customer’s email address is not found, a new customer will be created.
Full Name
Select “Donor Name” for this field. This tells Zapier that if a new QuickBooks customer record needs to be created, the full name should be the one that Donorbox has on file.
Email
Select “Donor Email” for this field. Just like the previous setting, this tells Zapier to use the email address that Donorbox has on file if a new customer record needs to be created.
Once you’re done, test the connection to ensure it works correctly. Now, let’s move onto the next part of the multi-step Zap.
Step 5: Create Sales Receipt in QuickBooks
We are going to create a step that will create a new sales entry within QuickBooks for your new donation. In the case of an updated donation, the existing entry will be edited. The idea of this step is to add all donations as sales entries within QuickBooks. It will reflect as a source of income in your records. Here’s how to set this up:
At this point, your existing Zap should look something like the image below. Click the + sign, as shown. It will add another step to your Zap.
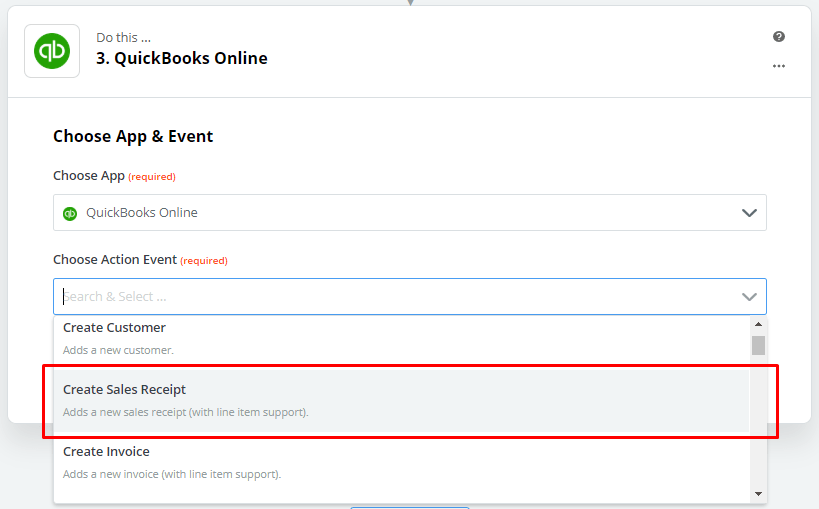
Choose QuickBooks Online as an app. Your QuickBooks account will already be connected from the previous step, so you won’t need to log in again. Simply choose that account to connect to.
Select your action event as “Create Sales Receipt”, as shown below.
Customize this step of the Zap by mapping the relevant fields. The most crucial fields to map are the following:
Find Customer by Name/ Email
Select “Donor Email” from the 1st step in the Zap for this setting. This refers to the donor’s email address which will be used to locate the customer in QuickBooks.
Line Amount
Select “Amount” from the 1st step in the Zap for this setting. This will populate the sales entry with the full donation amount (ie. the full amount that was donated).
Transaction Date
Select “Donation Date” from the 1st step in the Zap for this setting. This will populate the sales entry with the date of the donation.
Sales Receipt Number
Select “ID” from the 1st step in the Zap for this setting. This will use the Donorbox receipt number of the donation as the sales receipt number here.
Deposit To account
Select an account within QuickBooks that will receive these donations. For this tutorial, we’ll use the Undeposited Funds account.
You can add other fields, like “Campaign Name” for the Line Description setting. This will show which campaign the donor donated. It’s useful info, but not critical.
The sample record will be sent to your QuickBooks account. You can view it in your QuickBooks dashboard, under Sales Receipts.
Step 6: Create Expense in QuickBooks Online
Next, we are going to create an expense entry for the processing fee that’s charged for every donation. Similar to how the full donation will appear as income, the deducted processing fee will appear as an expense. The result will be the final total that your organization will receive (ie. full donation amount – Stripe/PayPal processing fee).
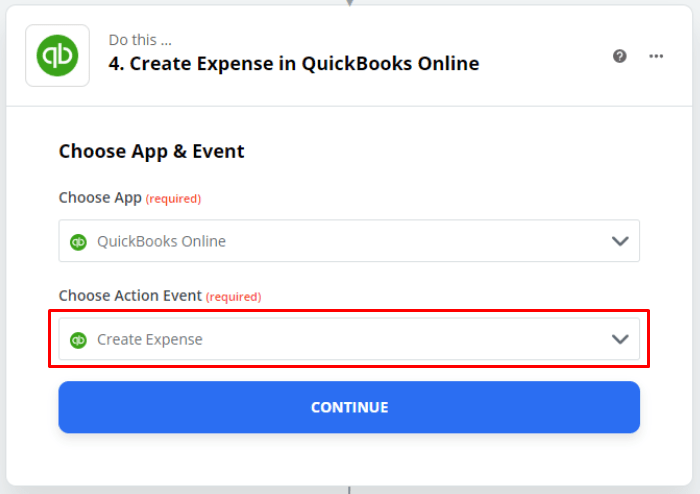
As in Step 5, click the + sign to create the last step in your Zap. Again, select QuickBooks Online as the app. You won’t need to connect your QuickBooks account again. Select your action event as “Create Expense”, as shown.
Customize this final step of the Zap by mapping the following crucial fields:
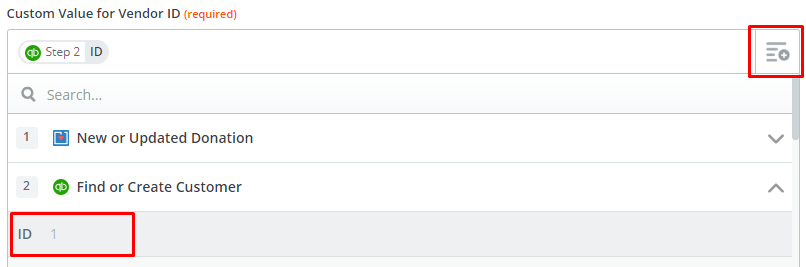
Payee Type
Select “Vendor” for this setting. This will open another setting for the Vendor ID. Select “Use a Custom Value”. A setting called Custom Value for Vendor ID will appear. Set this to the ID from Step 2, as shown below.
Payment Type
It’s important to select a value for this setting, but it’s not too critical which value you choose. For this tutorial, we chose Credit Card.
Bank/Credit Account
Select the same Quickbook account that you chose in Step 5. For this tutorial, we chose the Undeposited Funds account. The important thing here is that both the sales entry and expense should reflect in the same account.
Payment Date
Select the donation date from the 1st step in the Zap for this field. While not a critical setting, it will help with reconciliation later.
Reference Number
For this setting, select the Doc Number from the 3rd step in the Zap. This will ensure that both sales entry and the expense will have the same reference number. Again, this will help with reconciliation later.
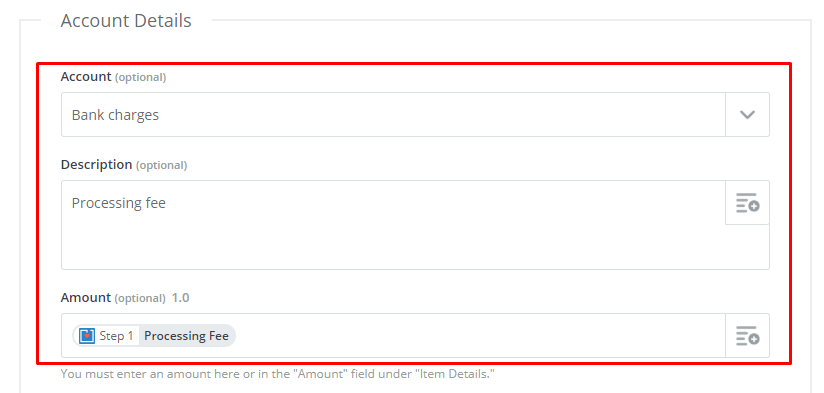
The next 3 settings are under the Account Details section, as shown in the screenshot that follows.
Account
For this setting, set the value to Bank Charges.
Description
Add a description here to indicate this is an expense for processing fees. The phrase “Processing Fees” will work just fine.
Amount
For this setting, select the Processing Fee from the 1st step in the Zap.
And we are finally done! It may have taken some work but this Zap will save you invaluable time as soon as you turn it on.
The Results
In your QuickBooks Online account, locate the account that received these sales entries and expenses. In our case, we used the account Undeposited Funds.
Check the account history. You should see the full donation amount and the corresponding processing fee deduction. It will look similar to the screenshot below.
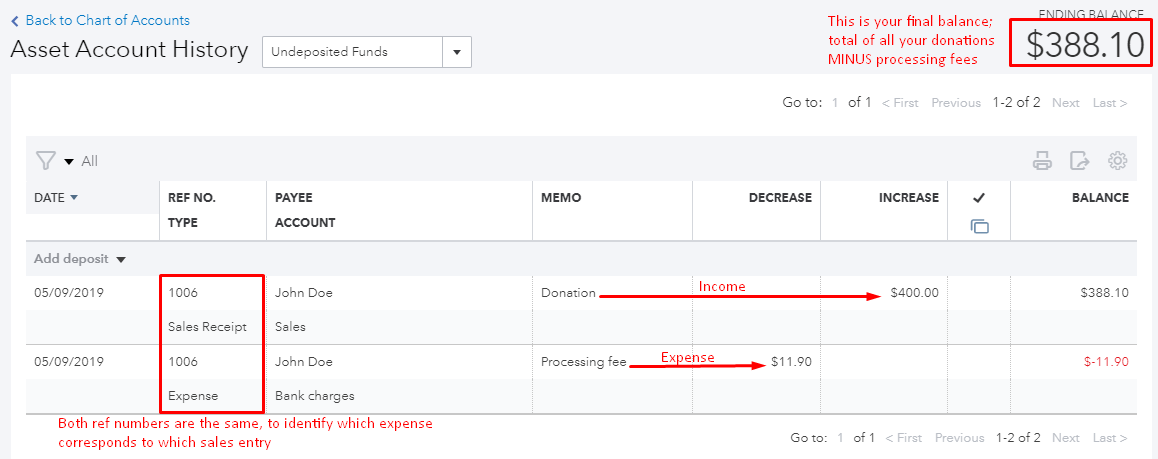
This Zap will save you loads of time and energy. As long as it remains on, your QuickBooks account will be updated automatically every time you receive a donation. You won’t need to do a thing!
If you need our help at any time, you can reach out to our Support team. We’re always ready to help. Happy fundraising!